1. So, here we see the dashboard
2. Click “Manage Admin Access”

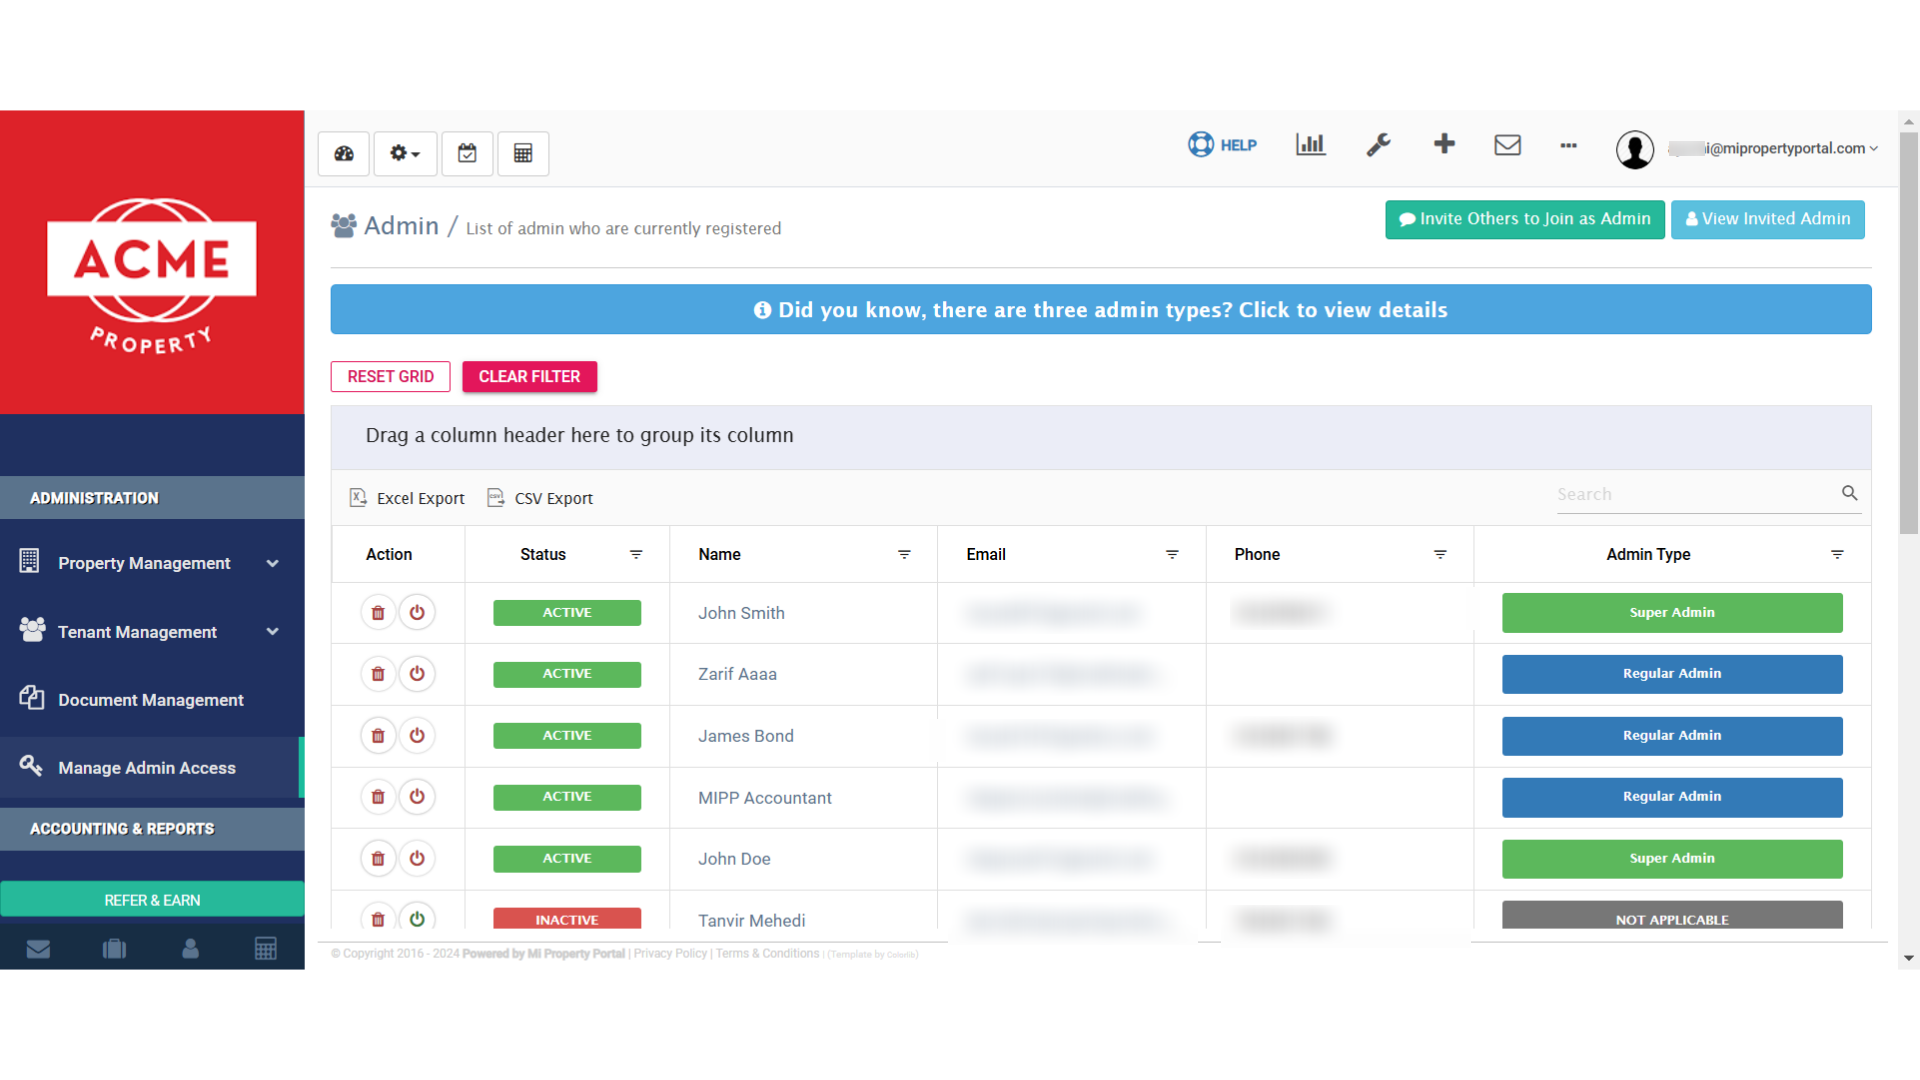
3. Click “Admin / List of admin who are currently registered”
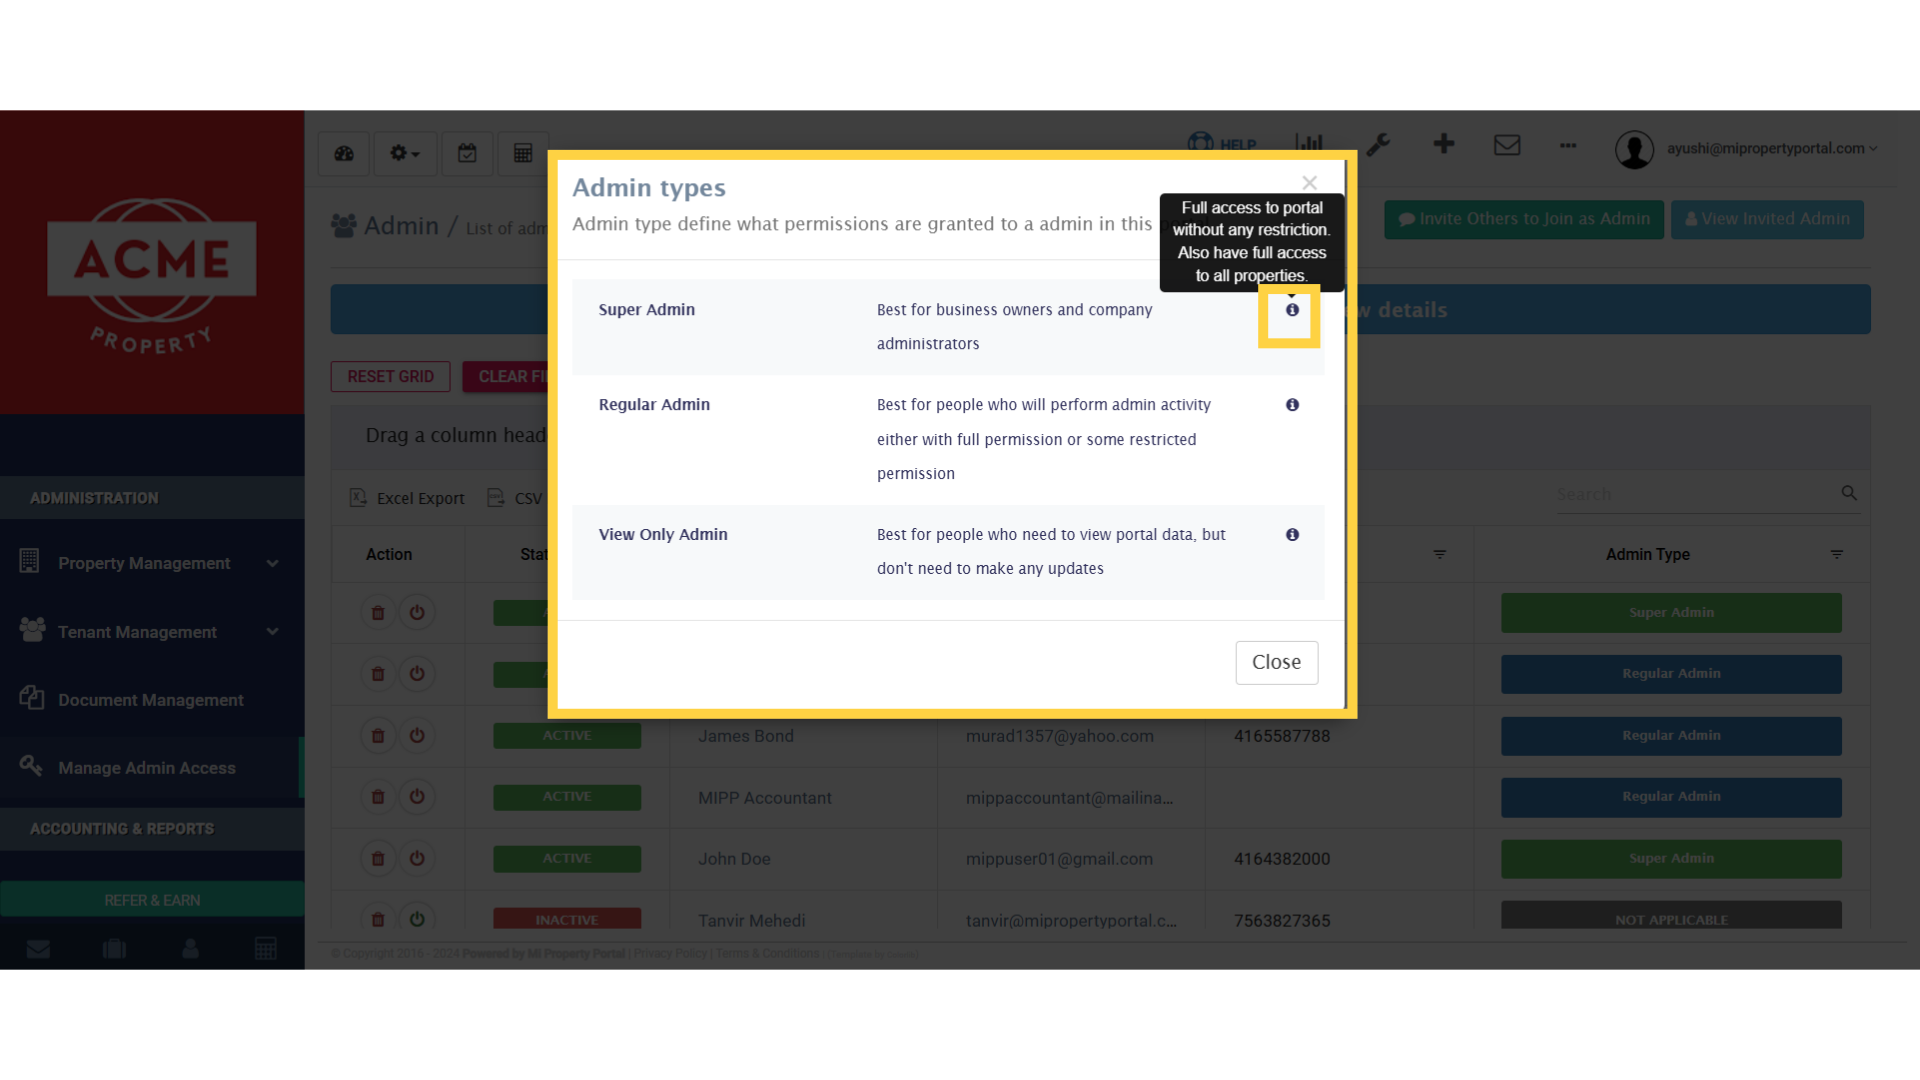
4. Click “Did you know, there are three admin types? Click to view details”
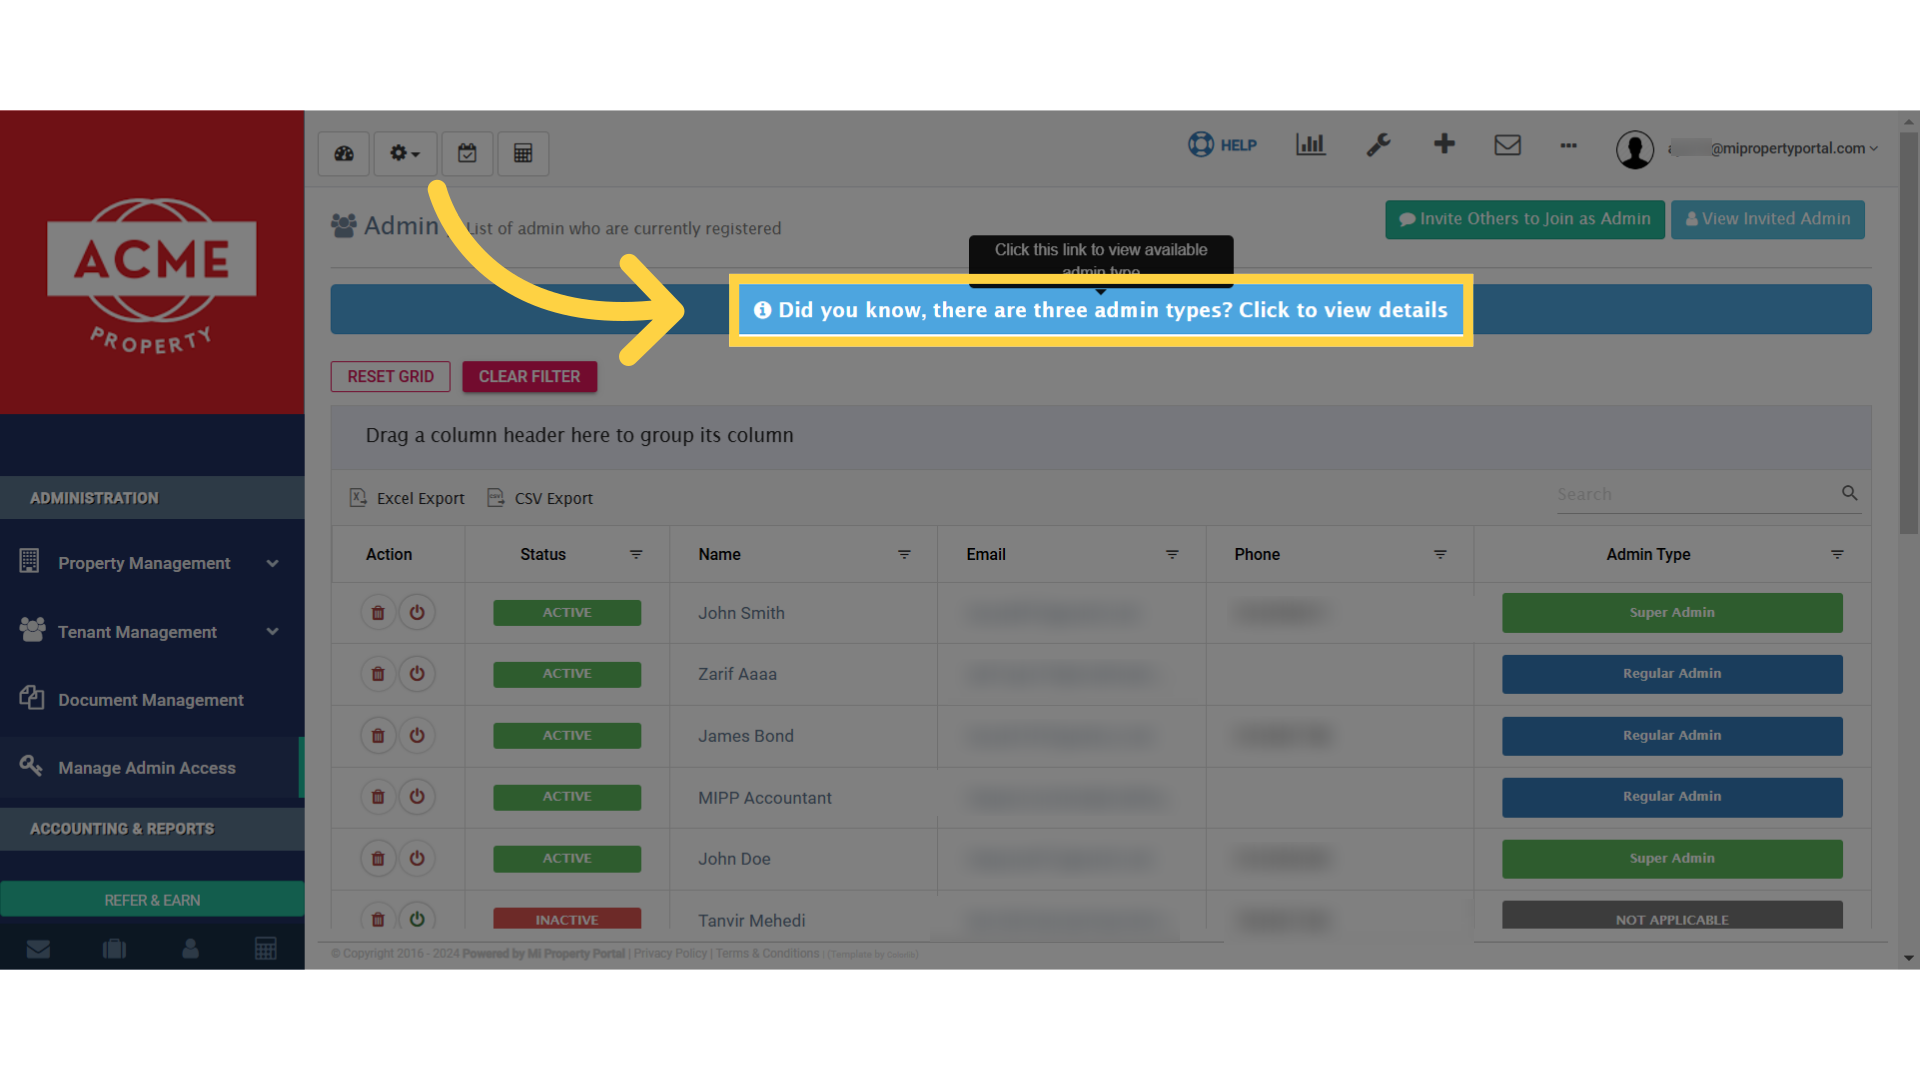
5. Here you can learn about the three types of admins in our portal, along with their descriptions
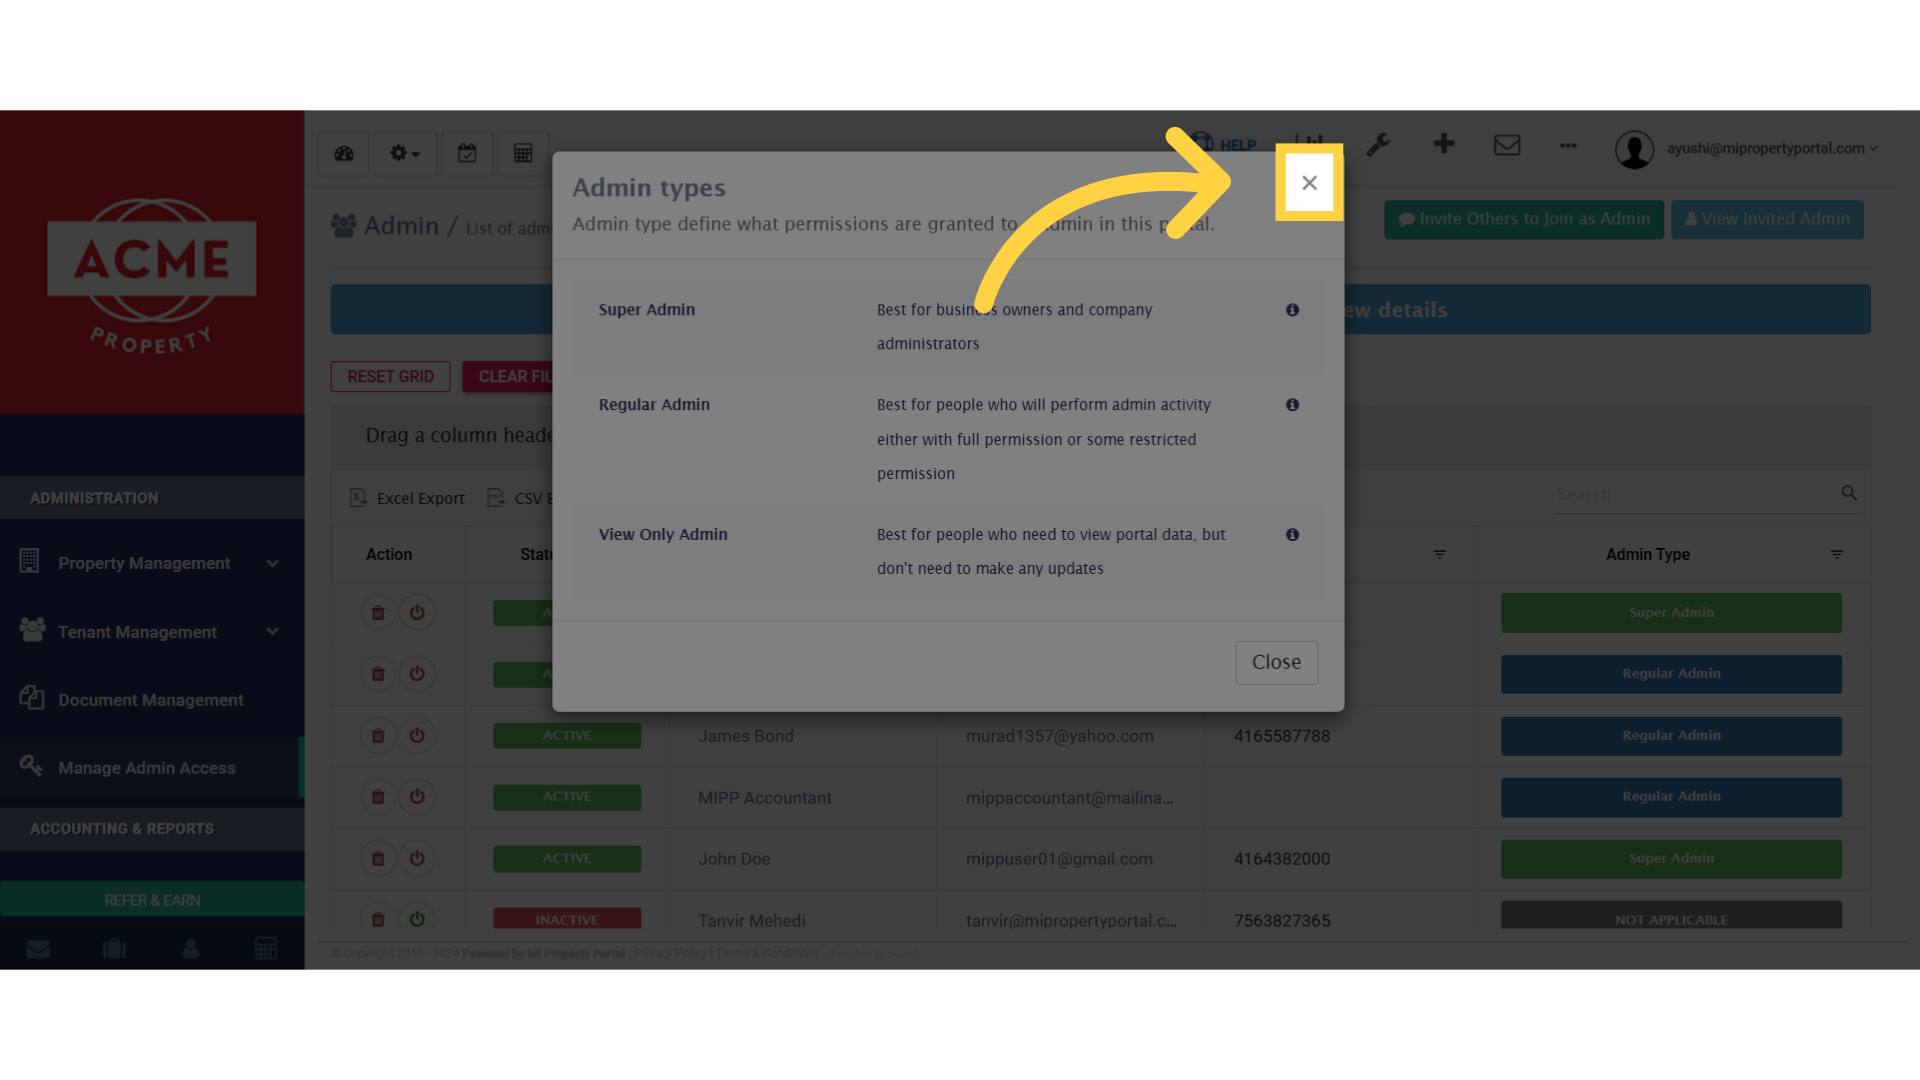
6. Now, close the current information box
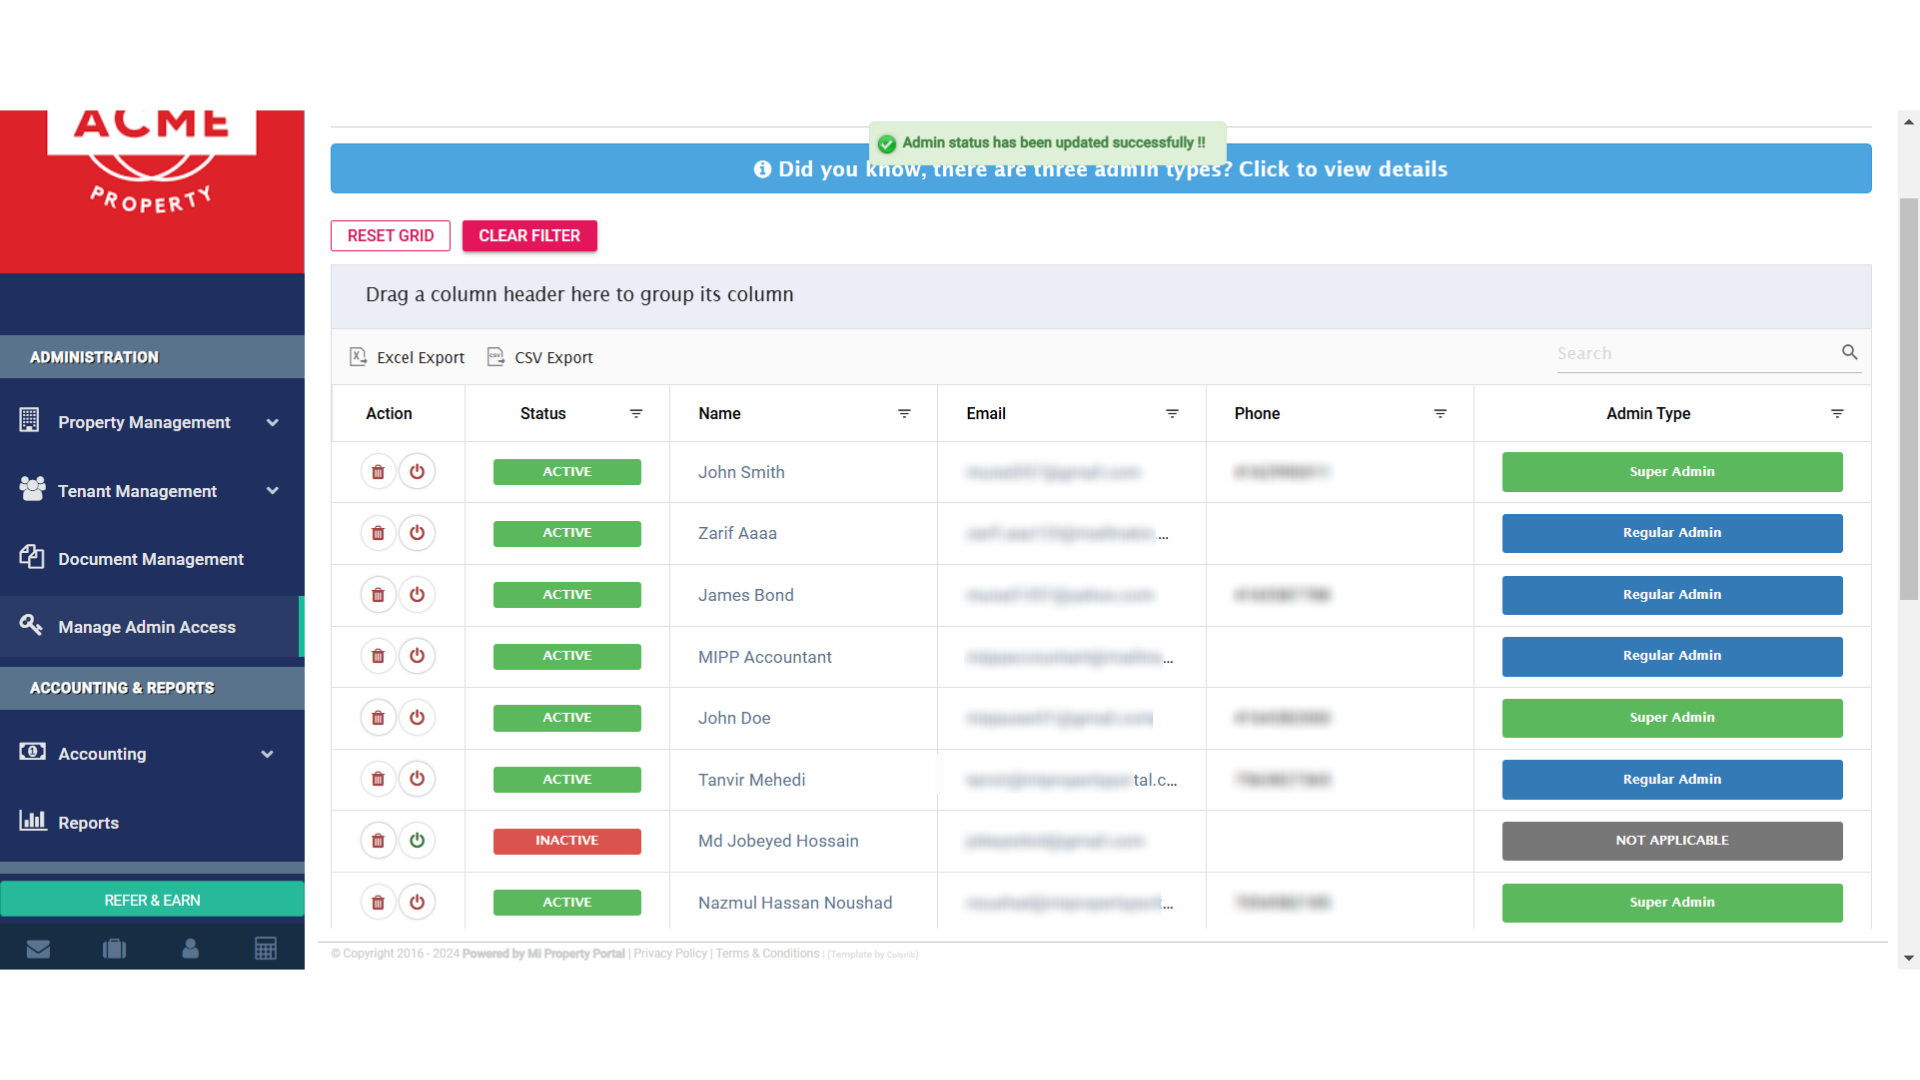
7. Once the admins have joined the portal, you’ll see them listed here
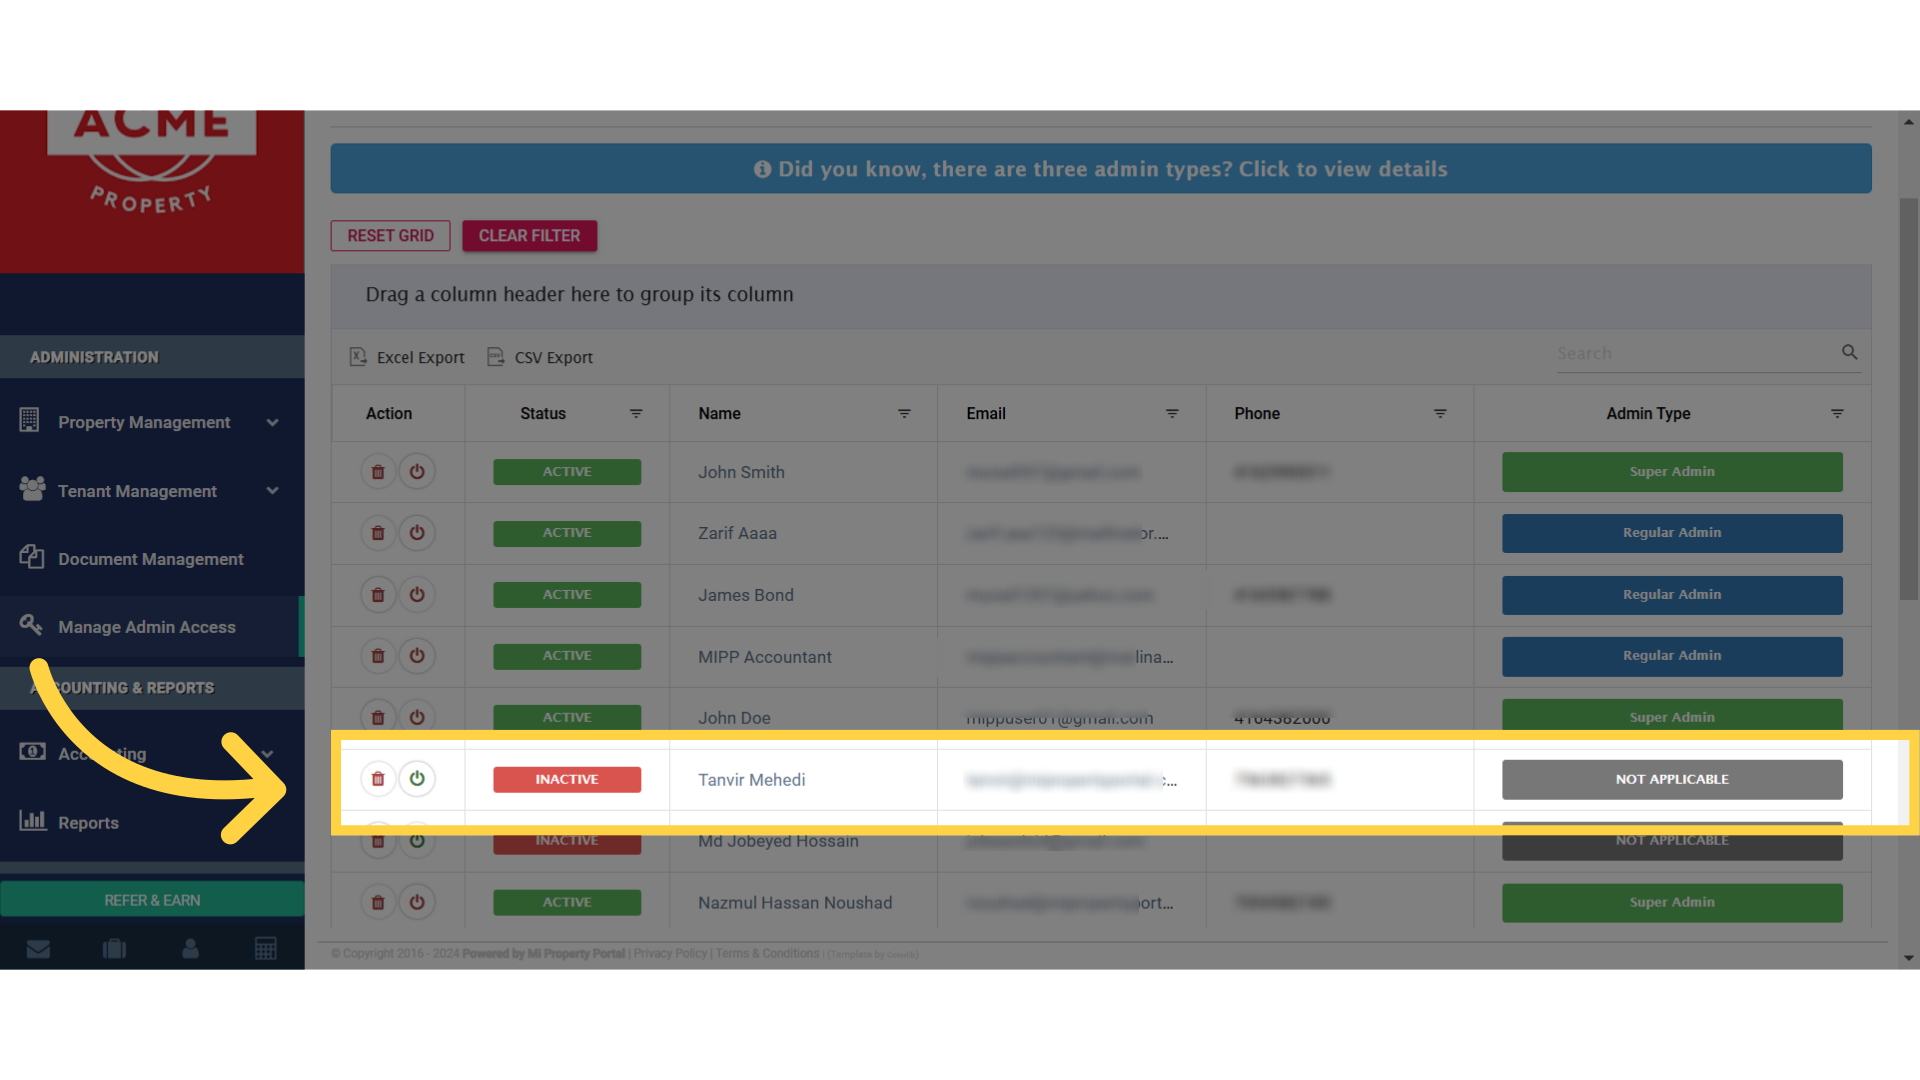
8. Simply click the “Power” icon in the Action column, on the same row as the admin, to activate or deactivate them
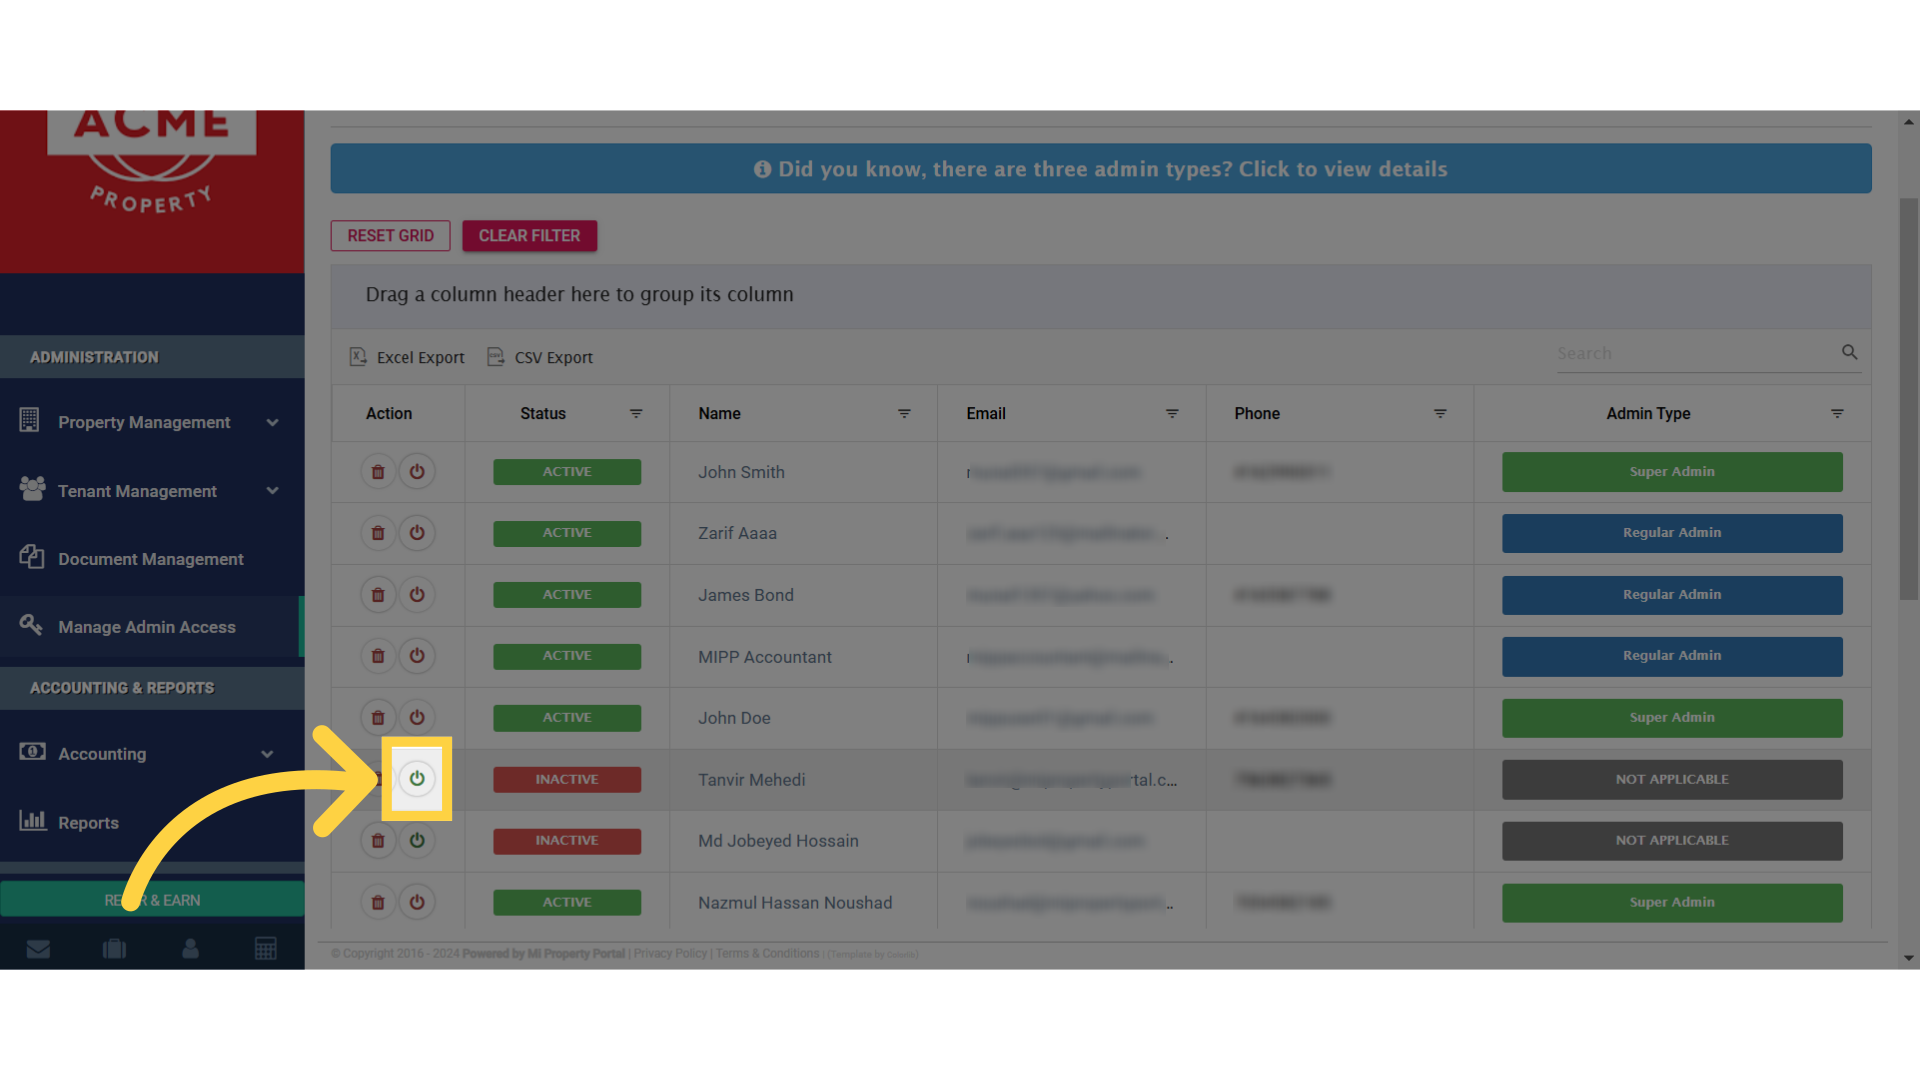
9. You’ll see a pop-up message asking, if you’re sure you want to activate the admin
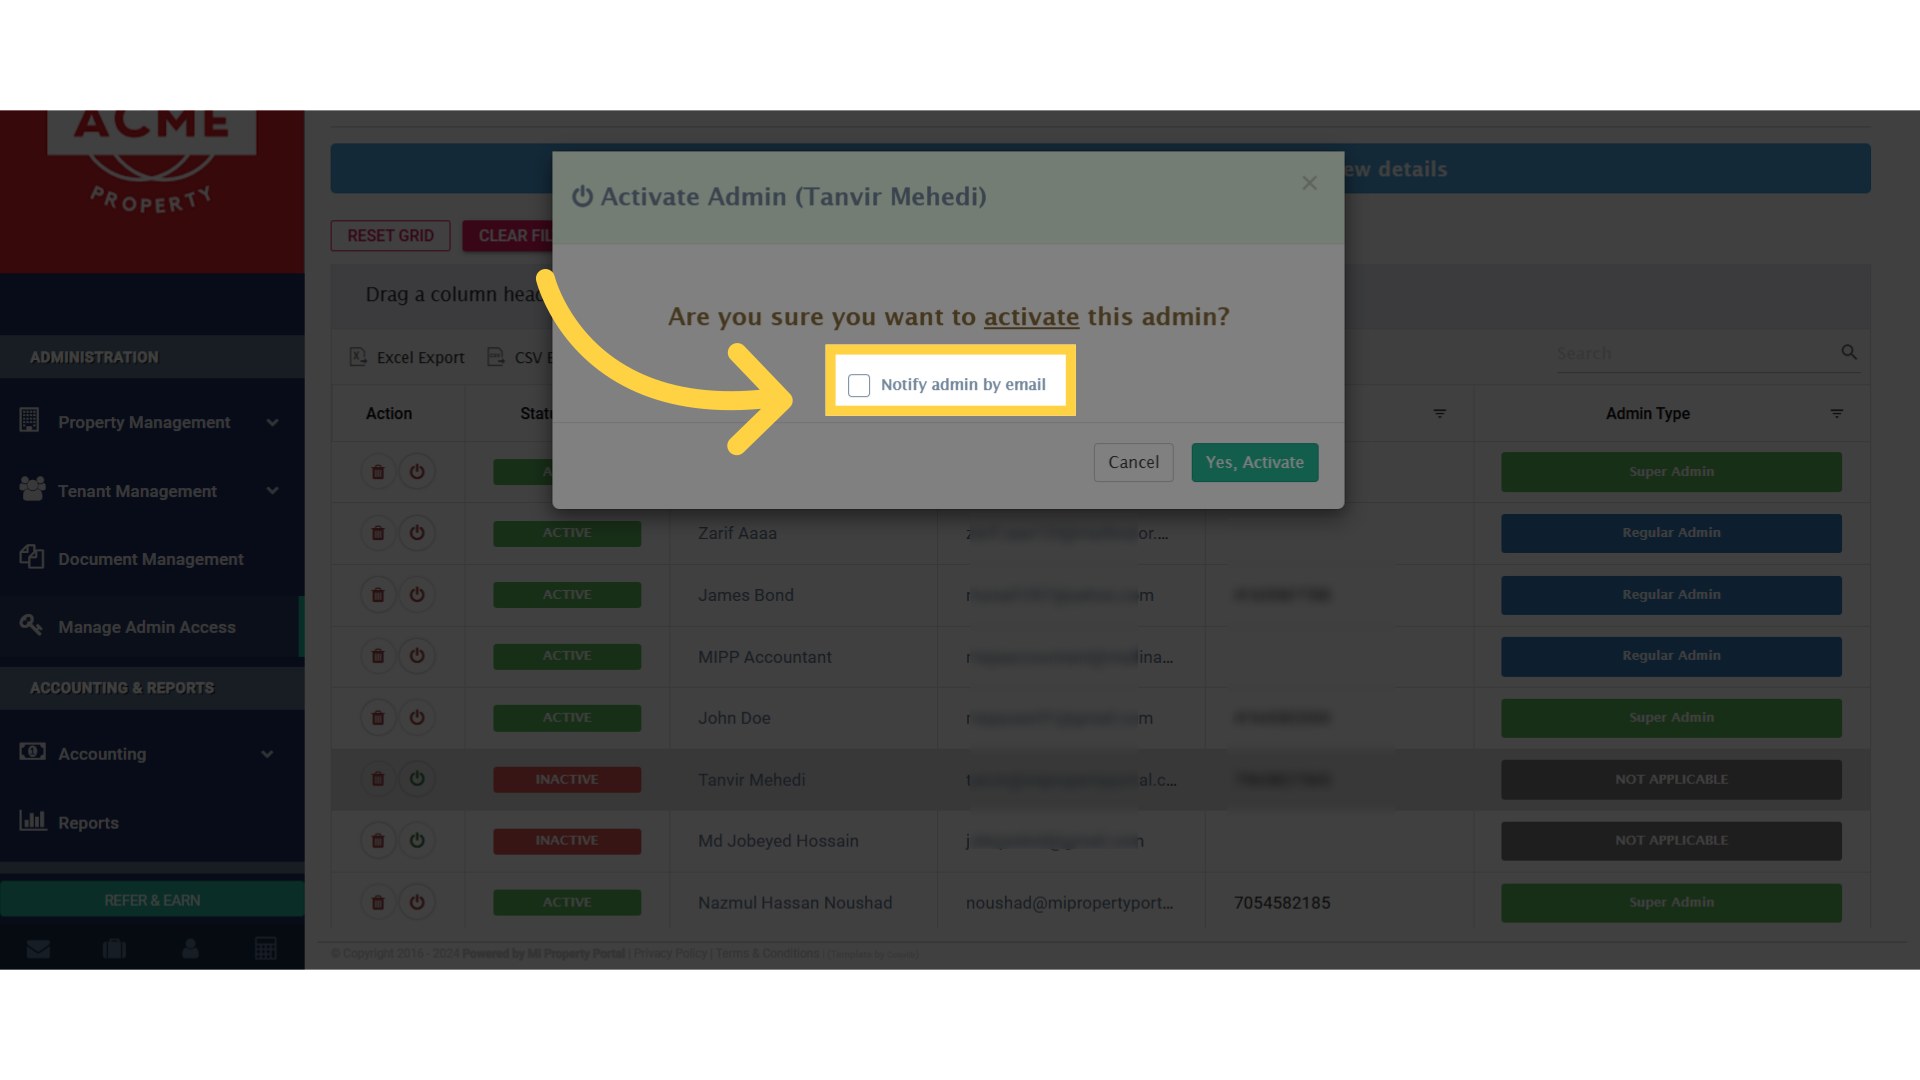
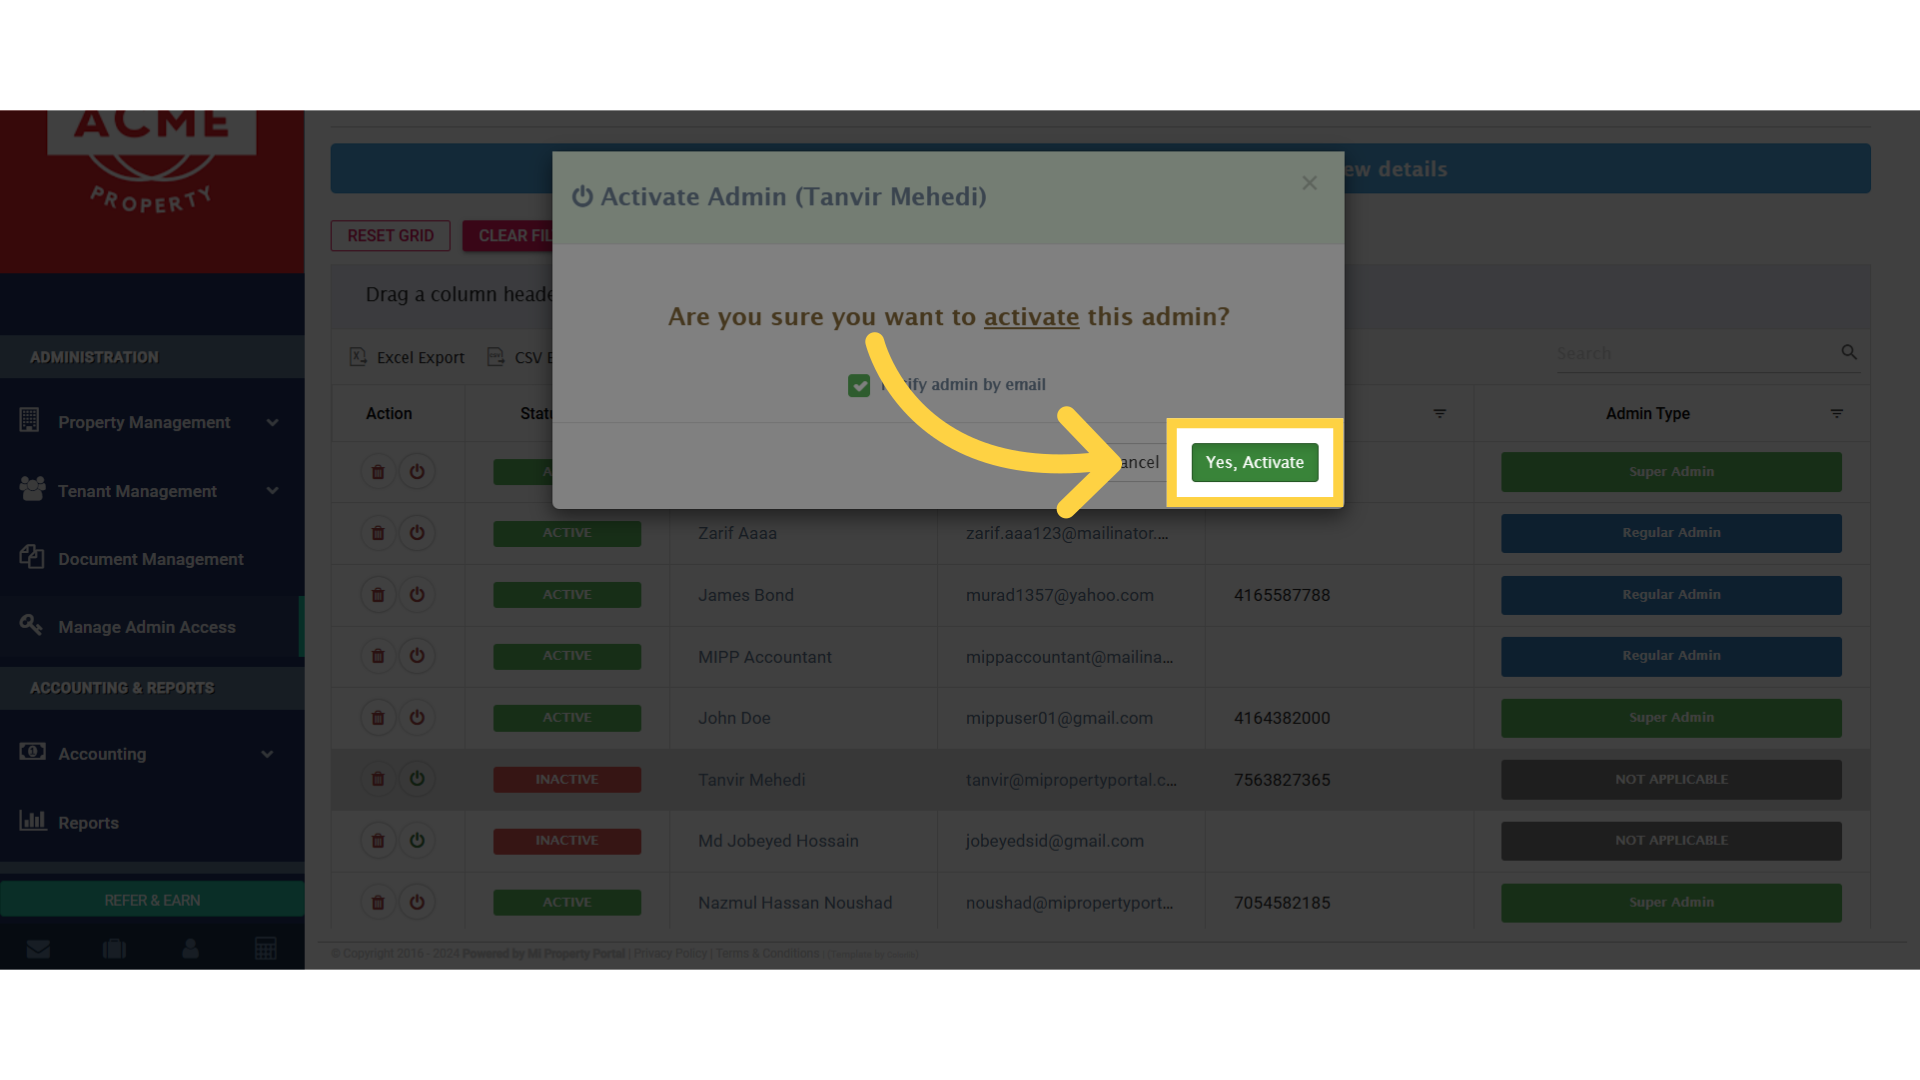
10. Click “Yes, Activate”
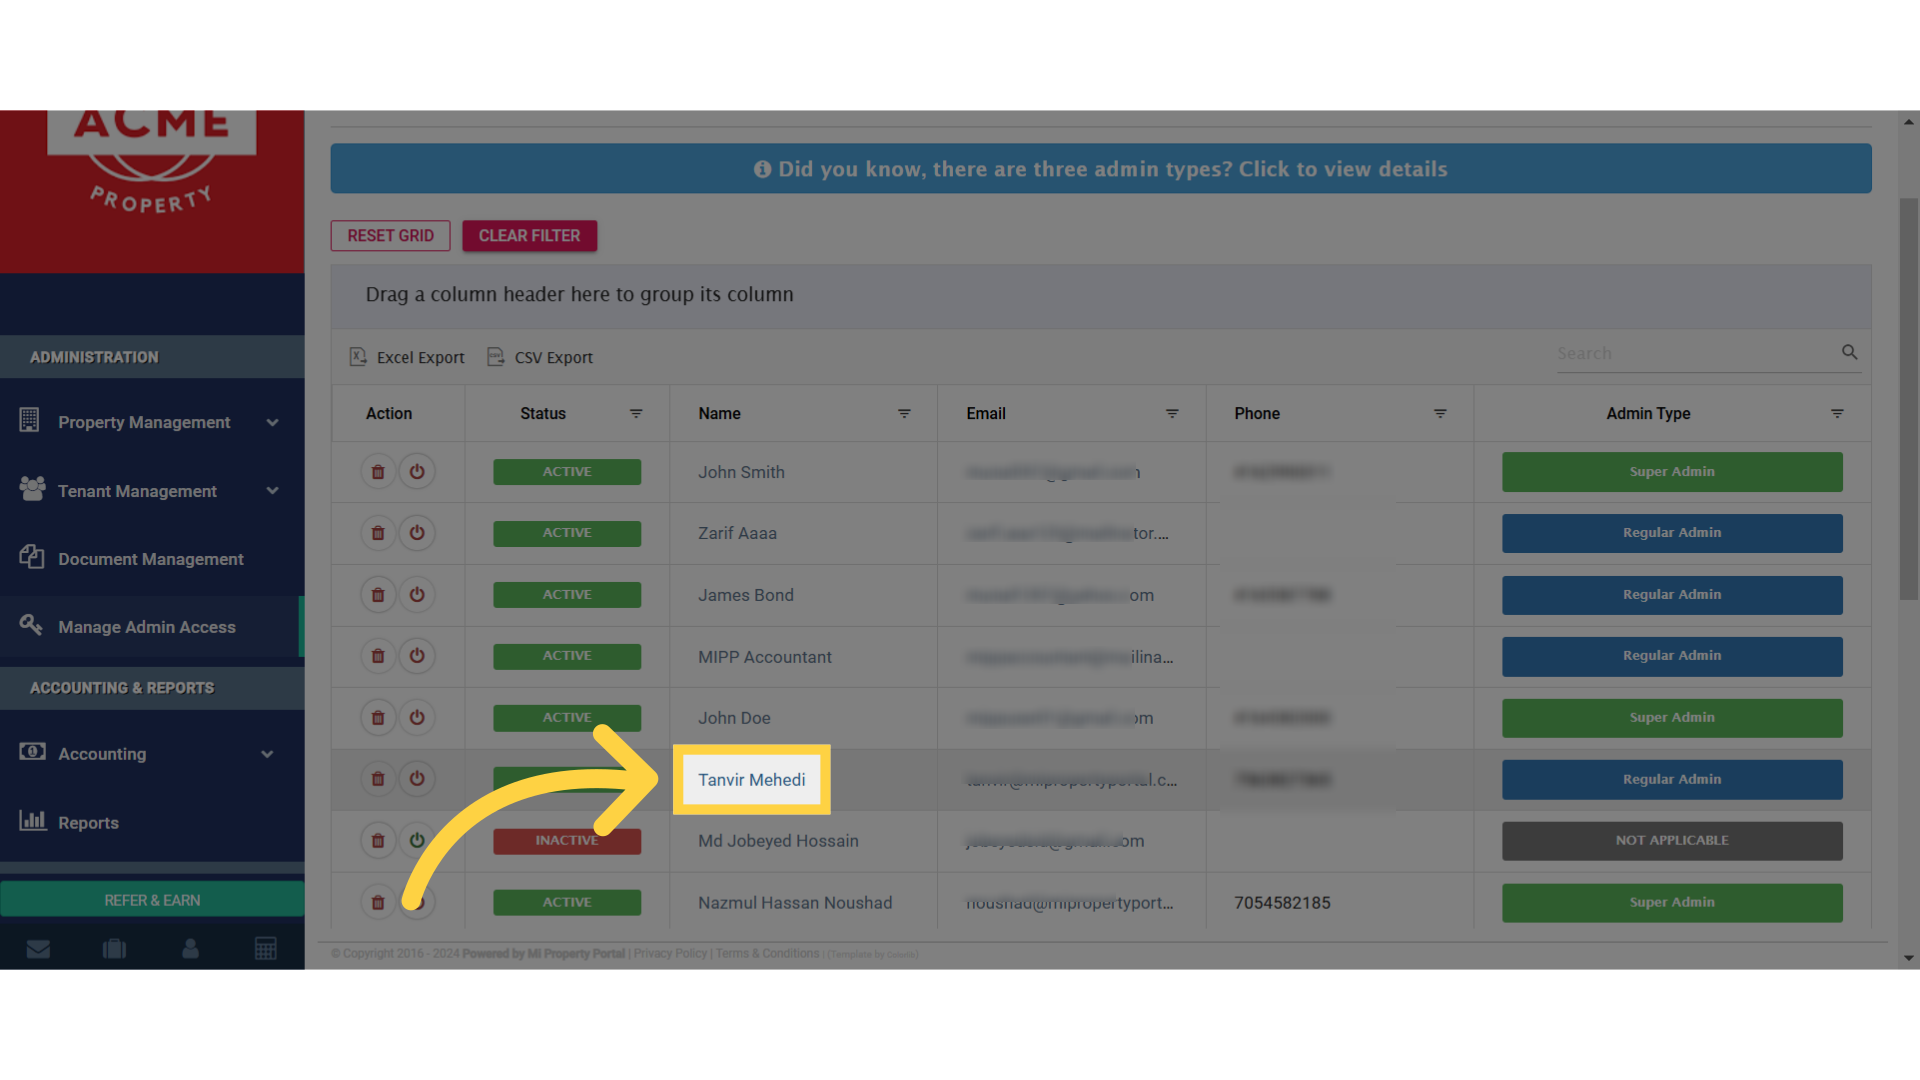
11. Wait, here’s a quick tip—on the right side, you see this little search box? Simply type in the admin’s name
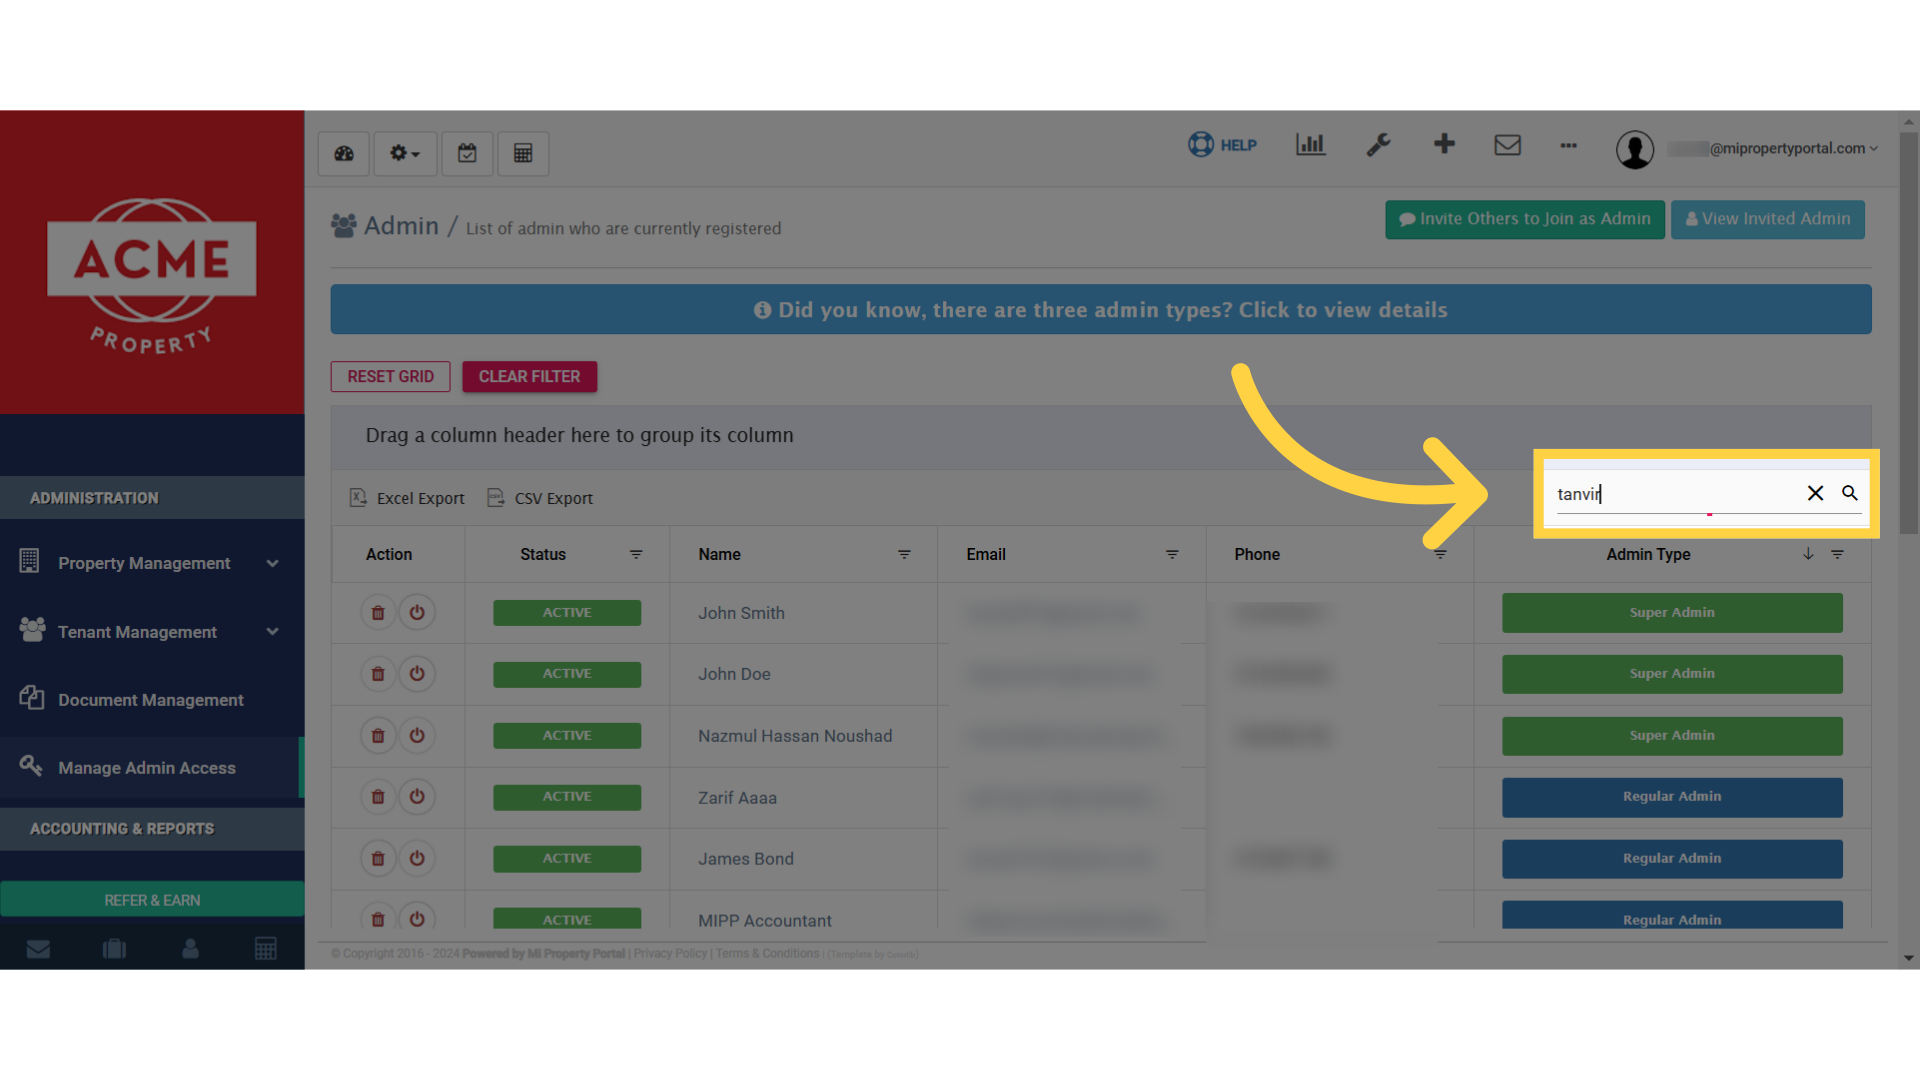
12. See? It’s now showing you the admin you were looking for. Also, notice that their status is marked as “Active.”

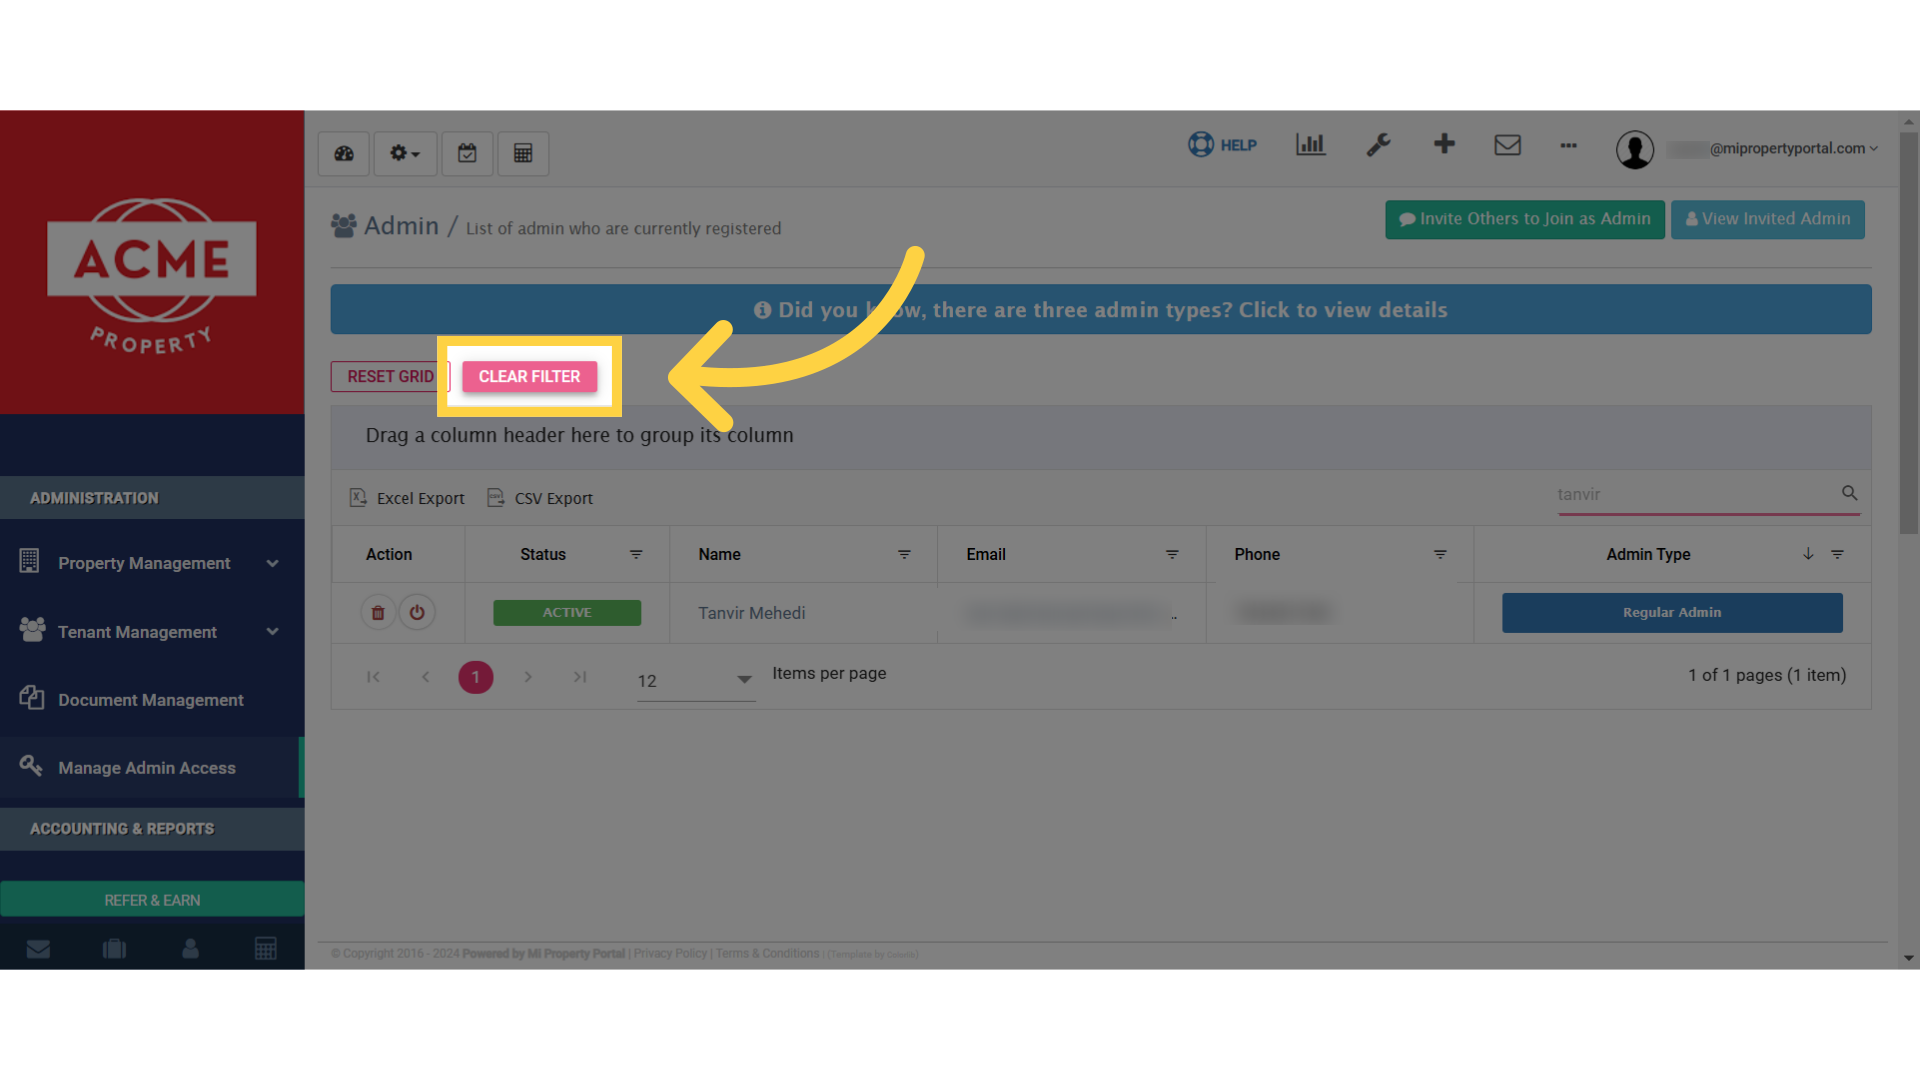
13. Click on the “Clear Filter” button, at the top left. Since you searched for a specific admin, it’s currently showing only that admin
14. Now that you’re back on the Admin List View page, let’s learn how to set an admin role
15. Click on the name of the admin, for whom you want to set the role. This will take you to their profile page
16. “View Only Admin” is set by default
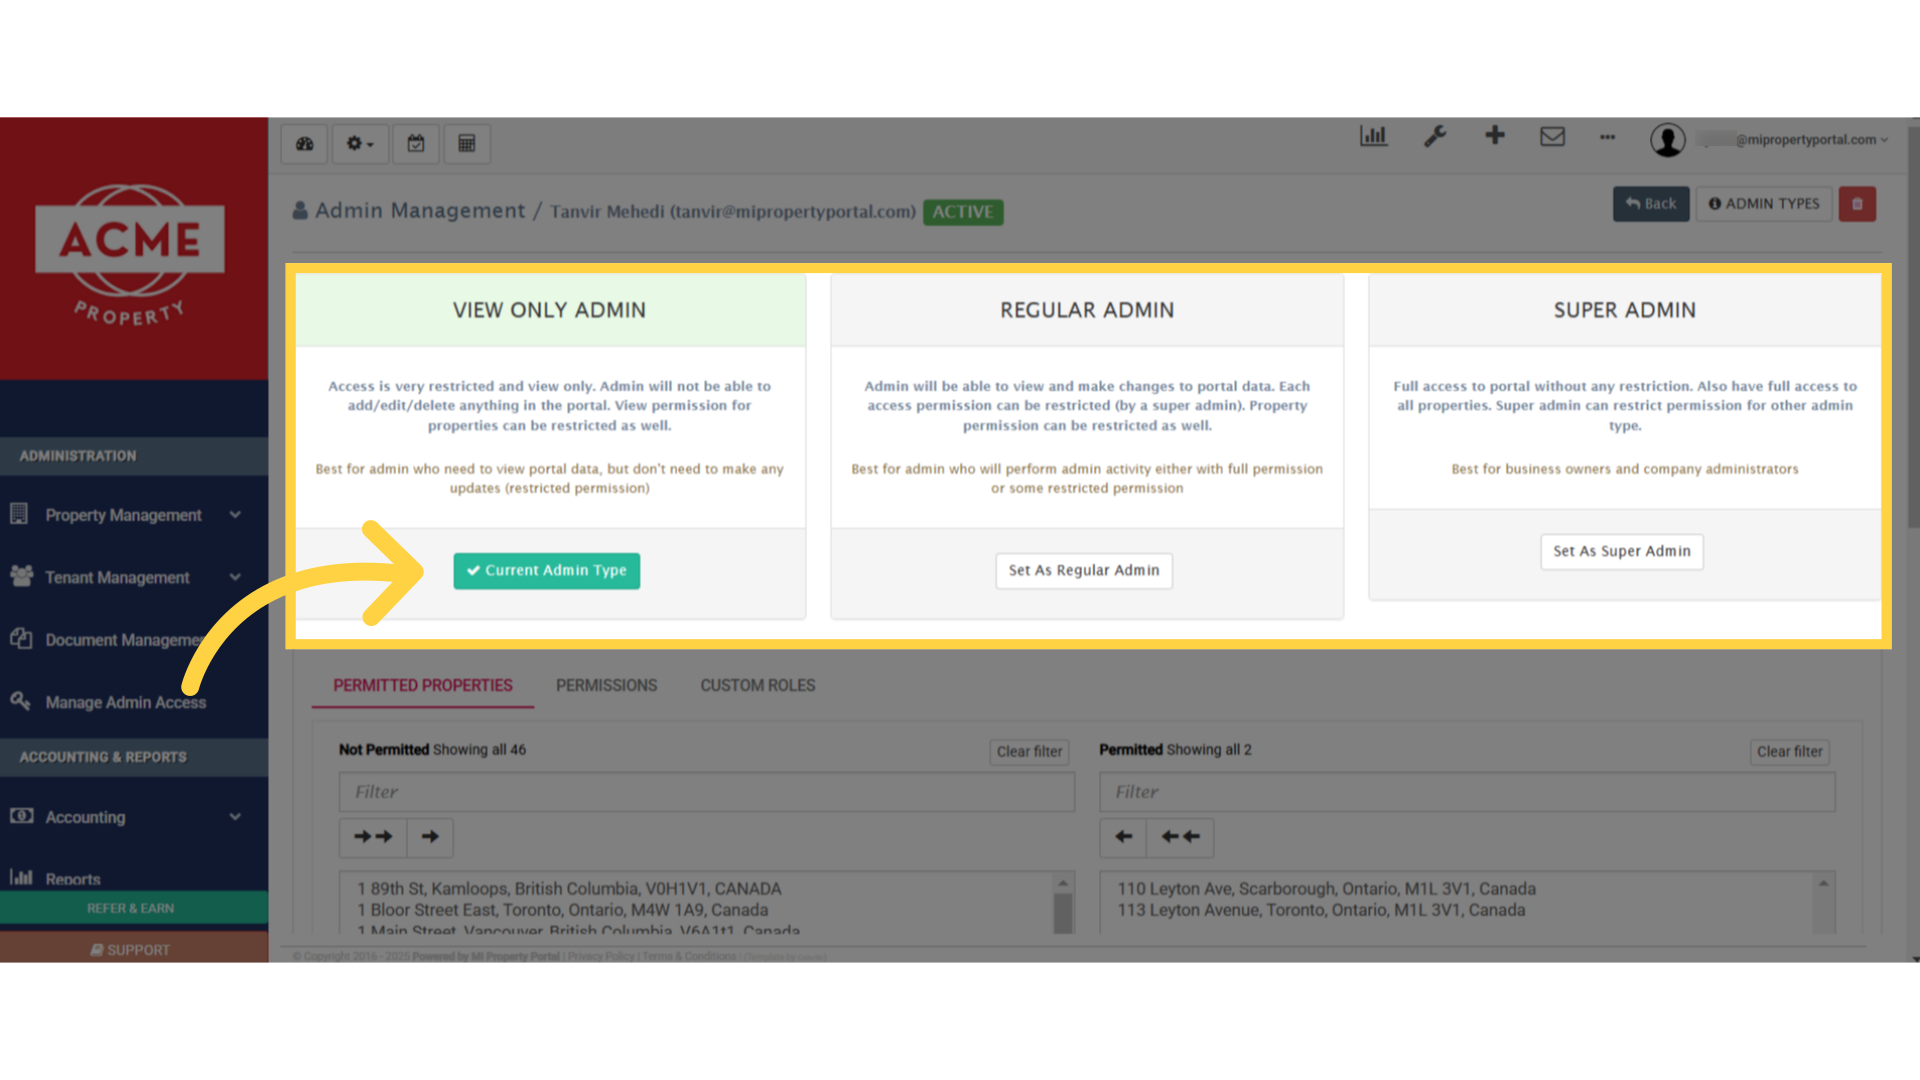
17. Click “Set As Regular Admin”
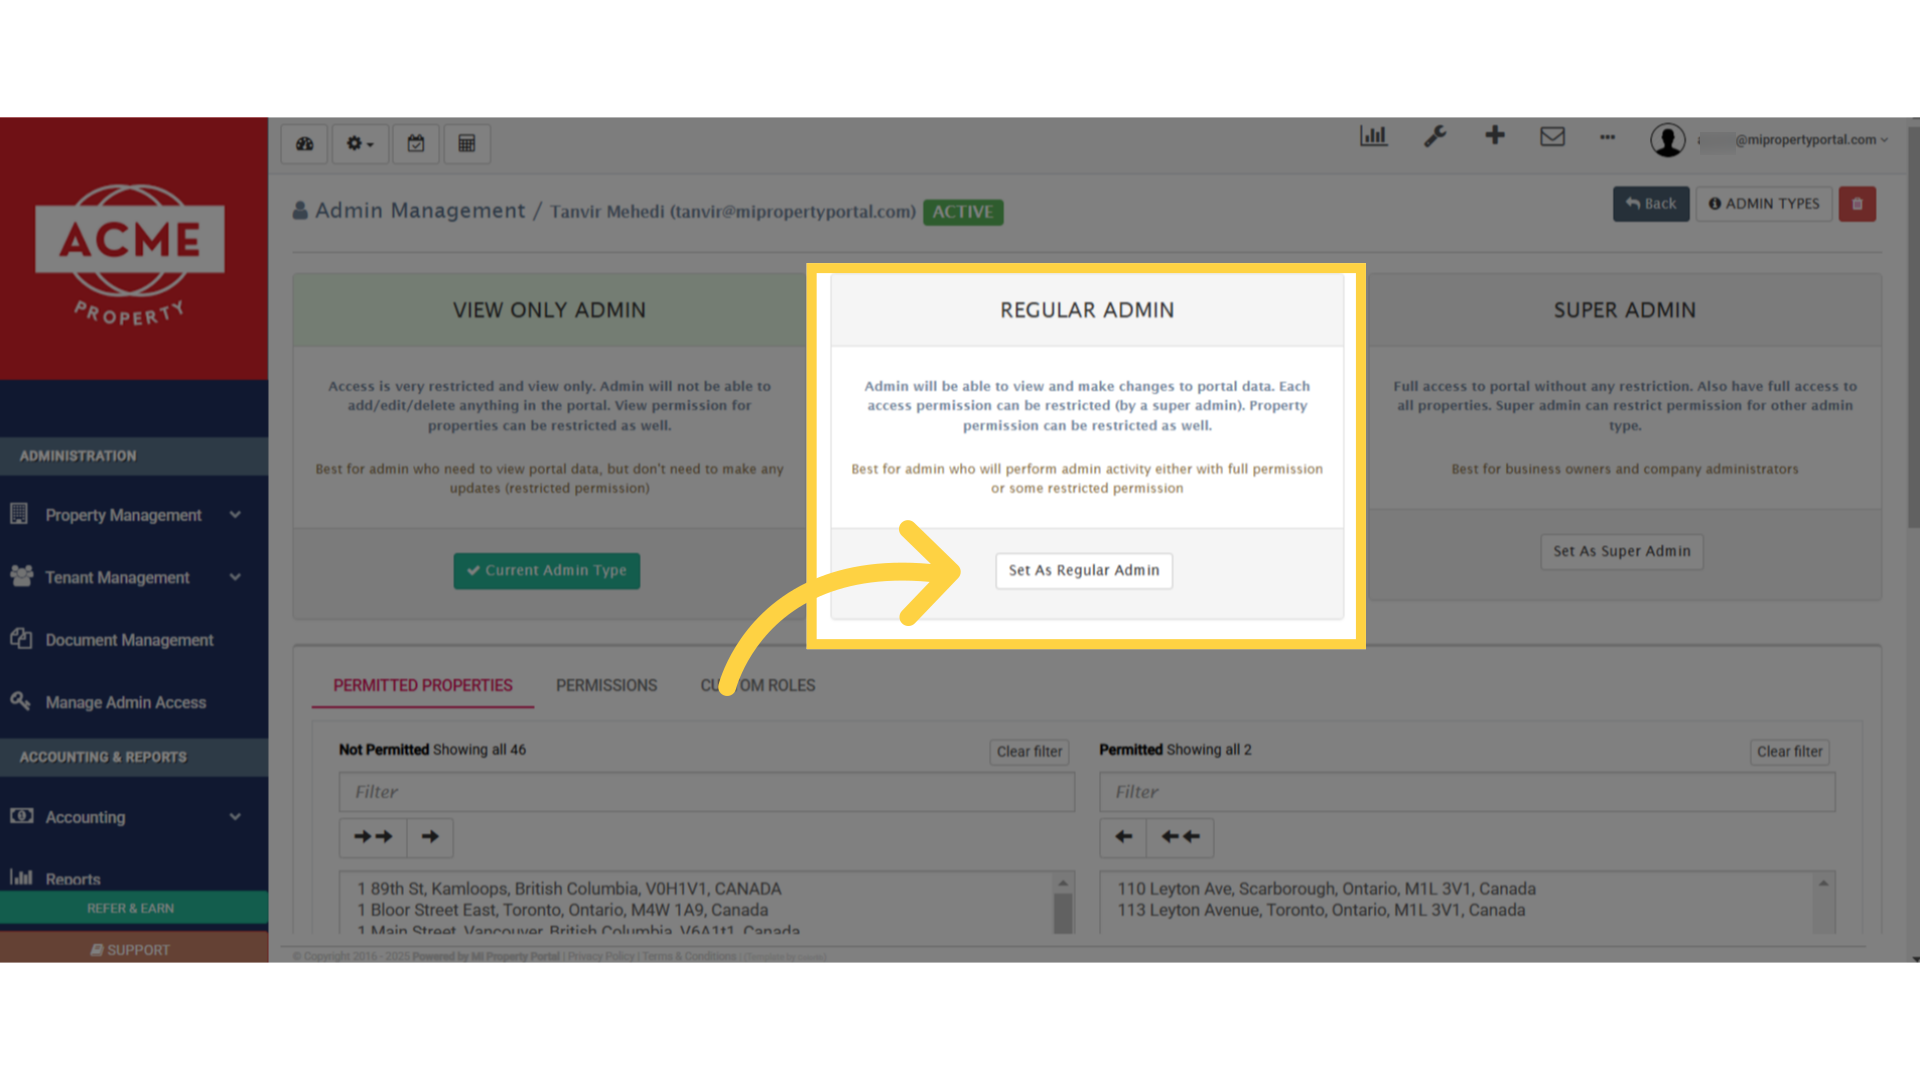
18. Click on the scroll bar on the right side and scroll down to the highlighted section
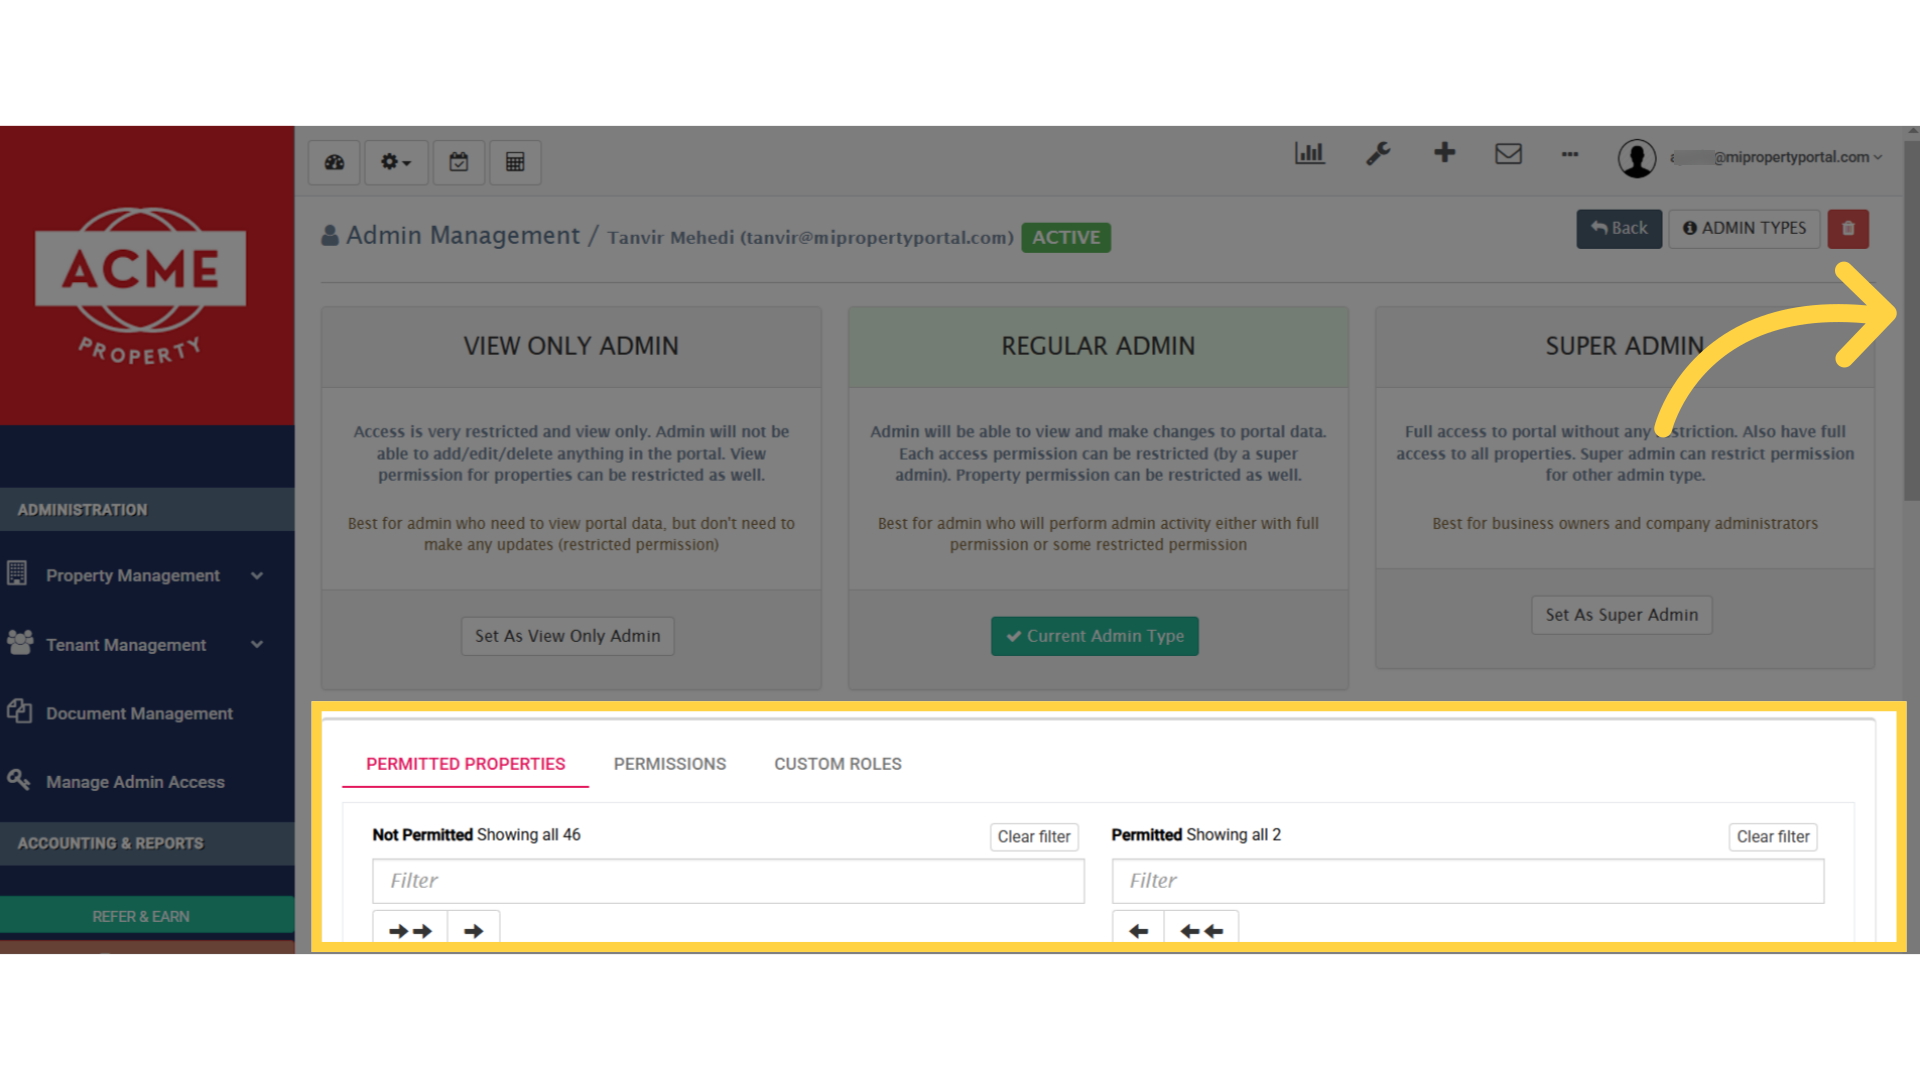
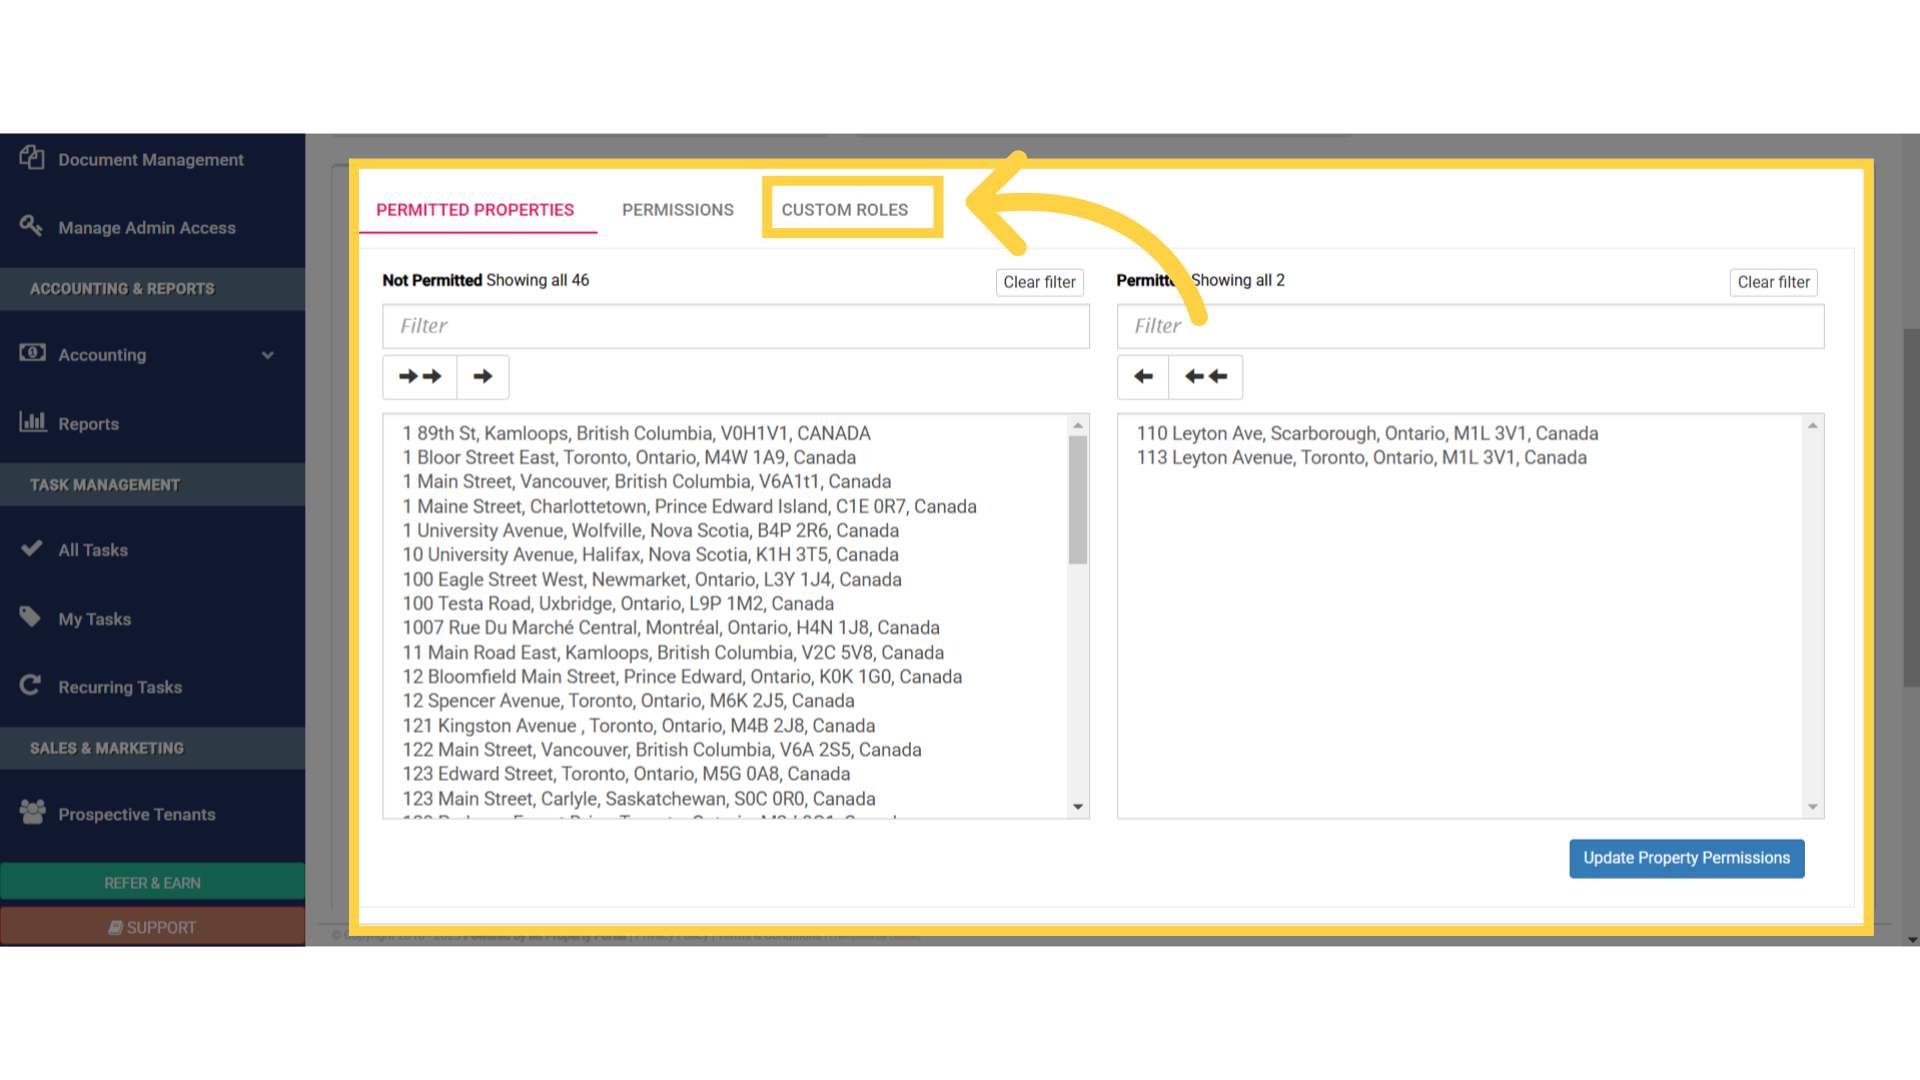
19. Here, you’ll see three different tabs: Permitted Properties, Permissions and Custom Roles.
Permitted Properties Tab, is where you assign the properties, the admin will manage
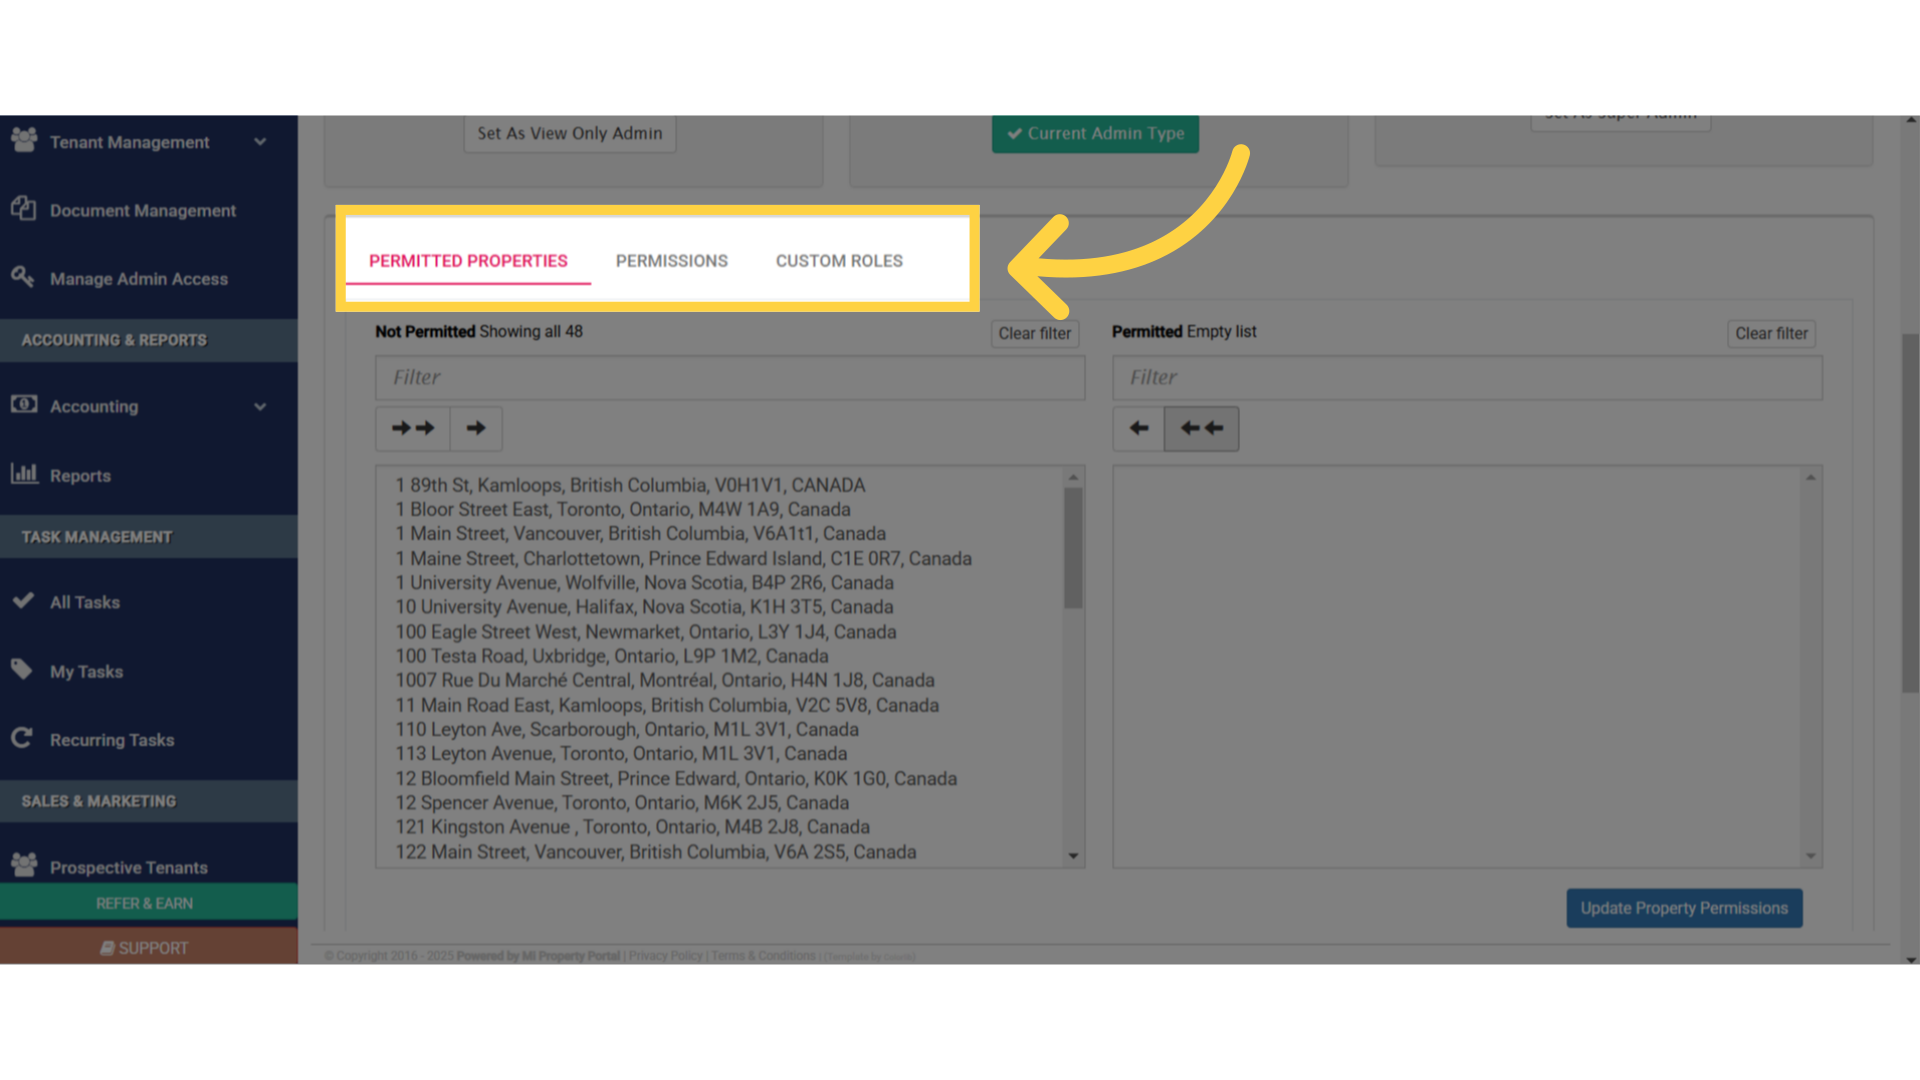
20. You’ll notice filter boxes on both sides, under Permitted and Not Permitted. You can type an address, into these boxes to quickly locate a specific property
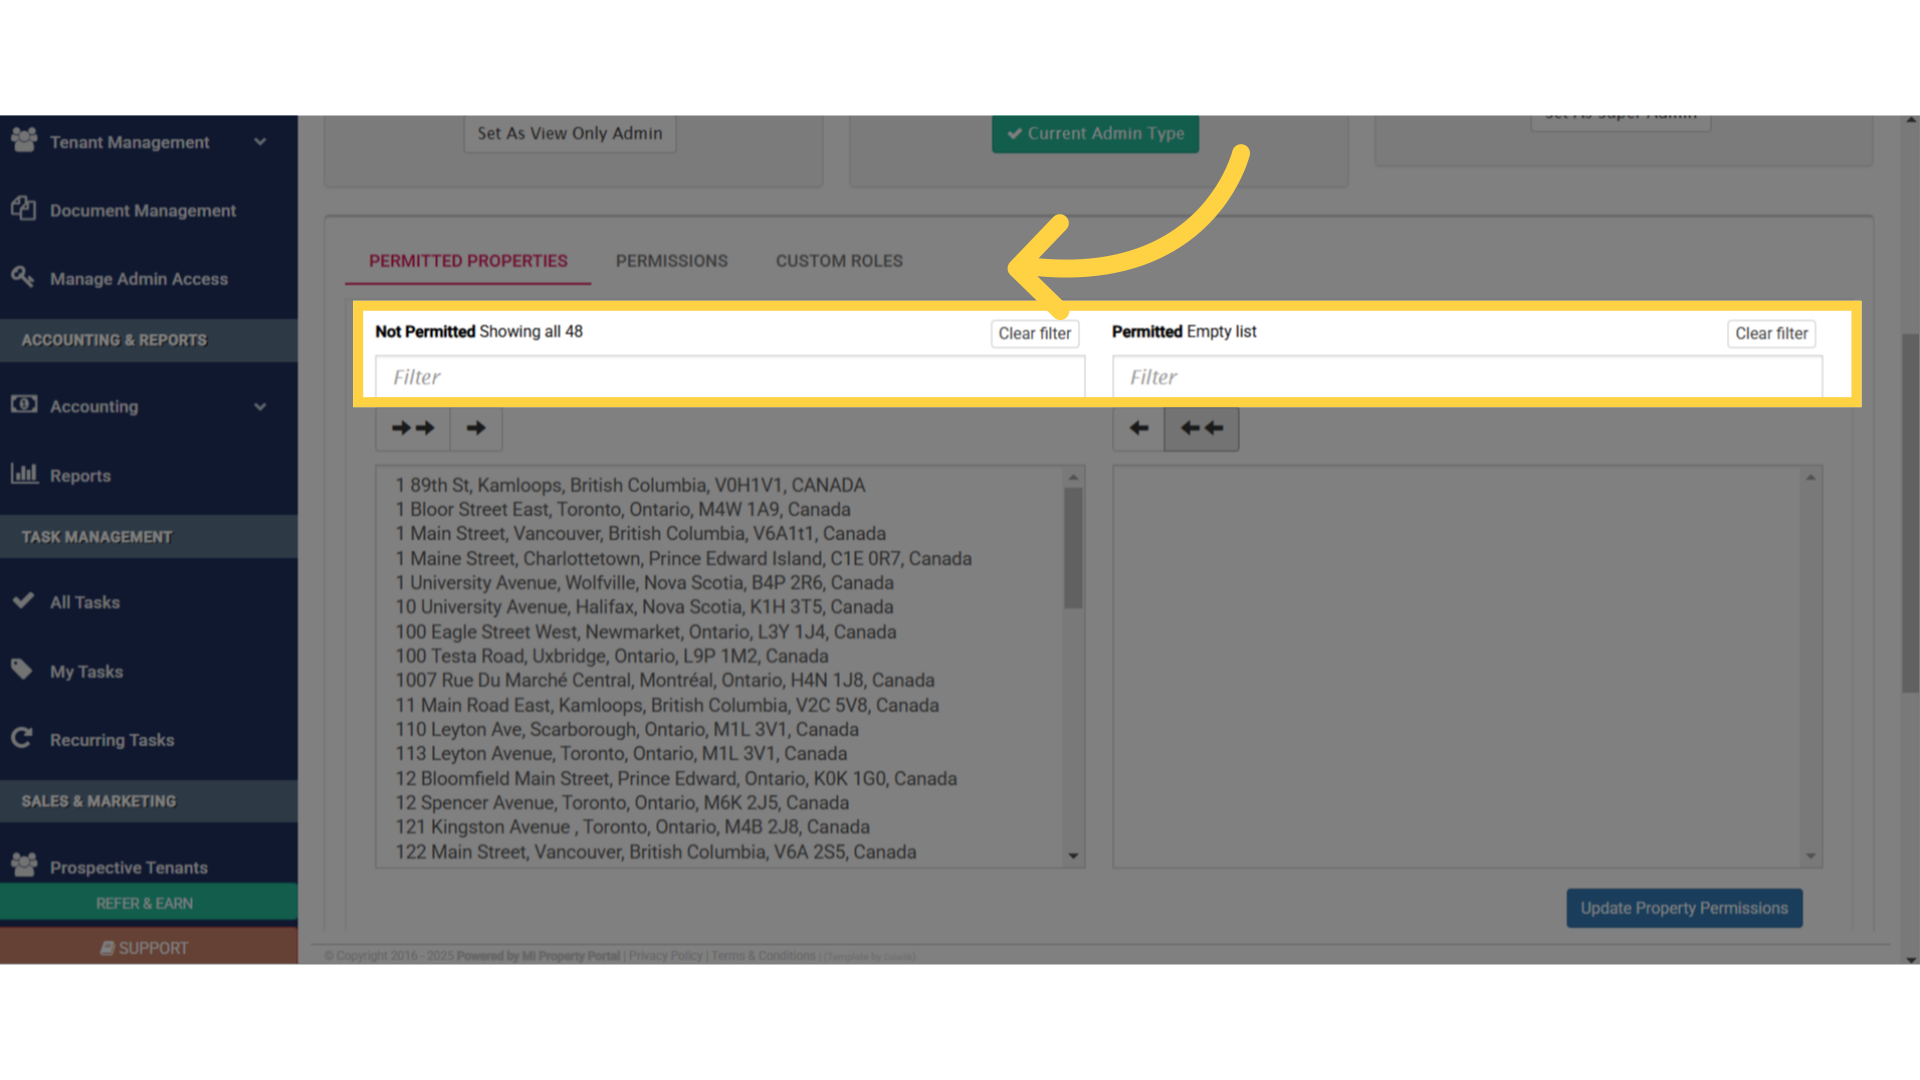
21. For example, by typing 11 in the search box, you’ll see all the addresses that include 11, or 110, 113 in the search results

22. Now, I’ll select the properties located in Ontario to assign them to the admin
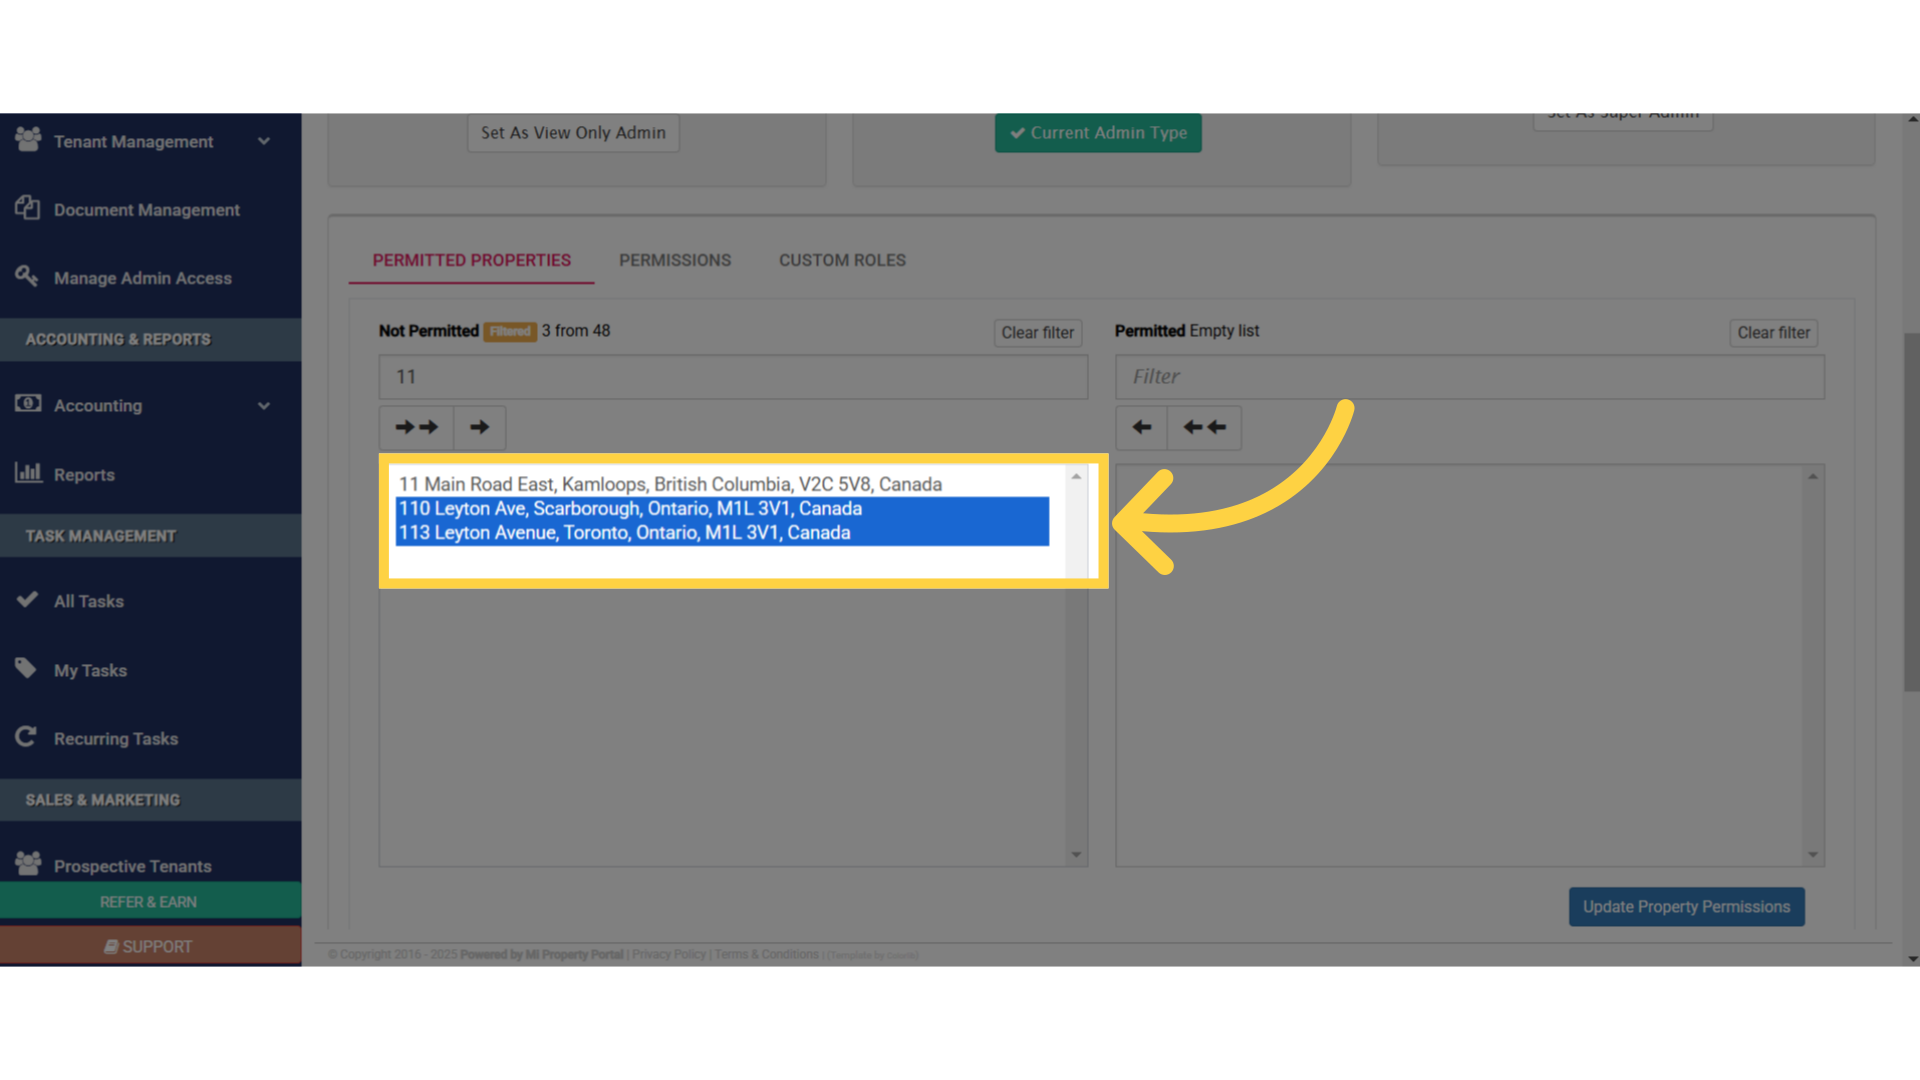
23. Now, simply click on the single arrow icon, to move the selected addresses from the Not Permitted section, to the Permitted section
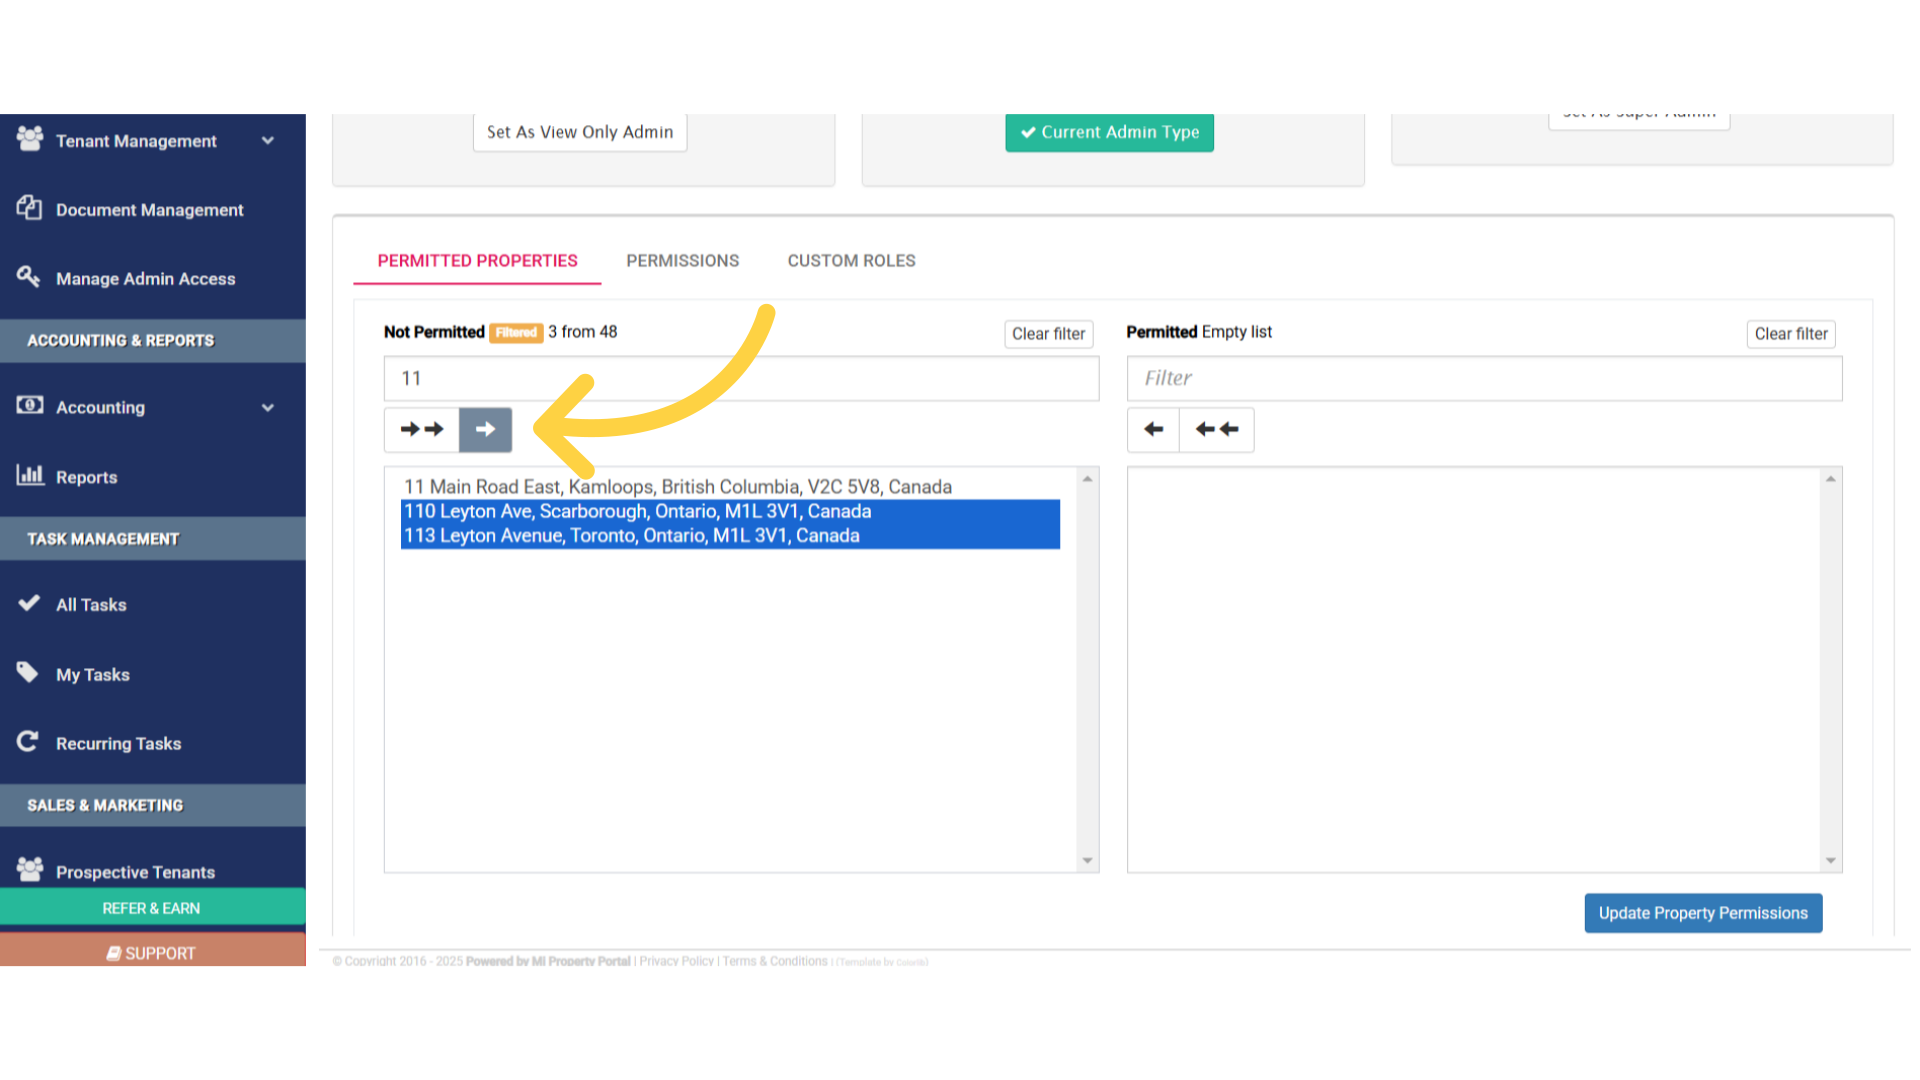
24. Look. The addresses have been moved to the Permitted side. Now, click on the Update Property Permissions button at the bottom to save the settings
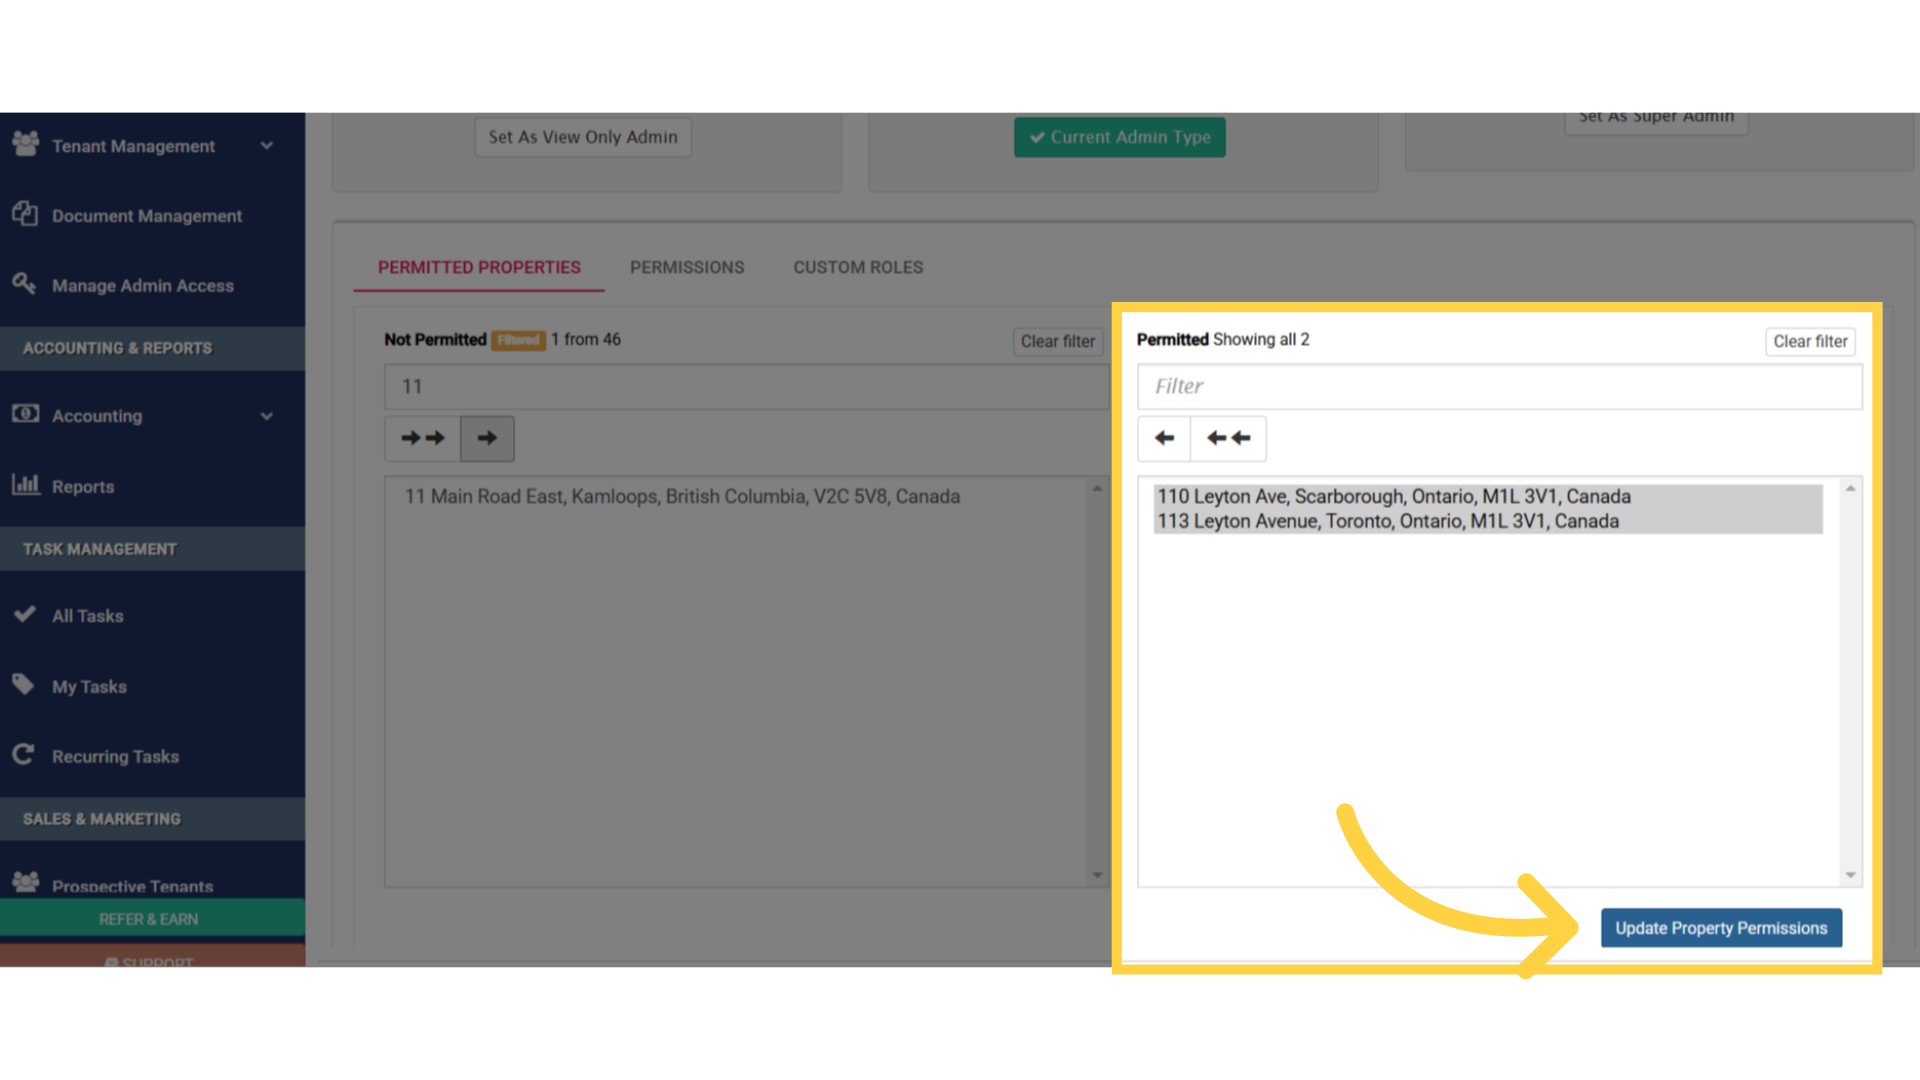
25. Once we update the settings, we’ll return to this view. Here, we can see the list of properties

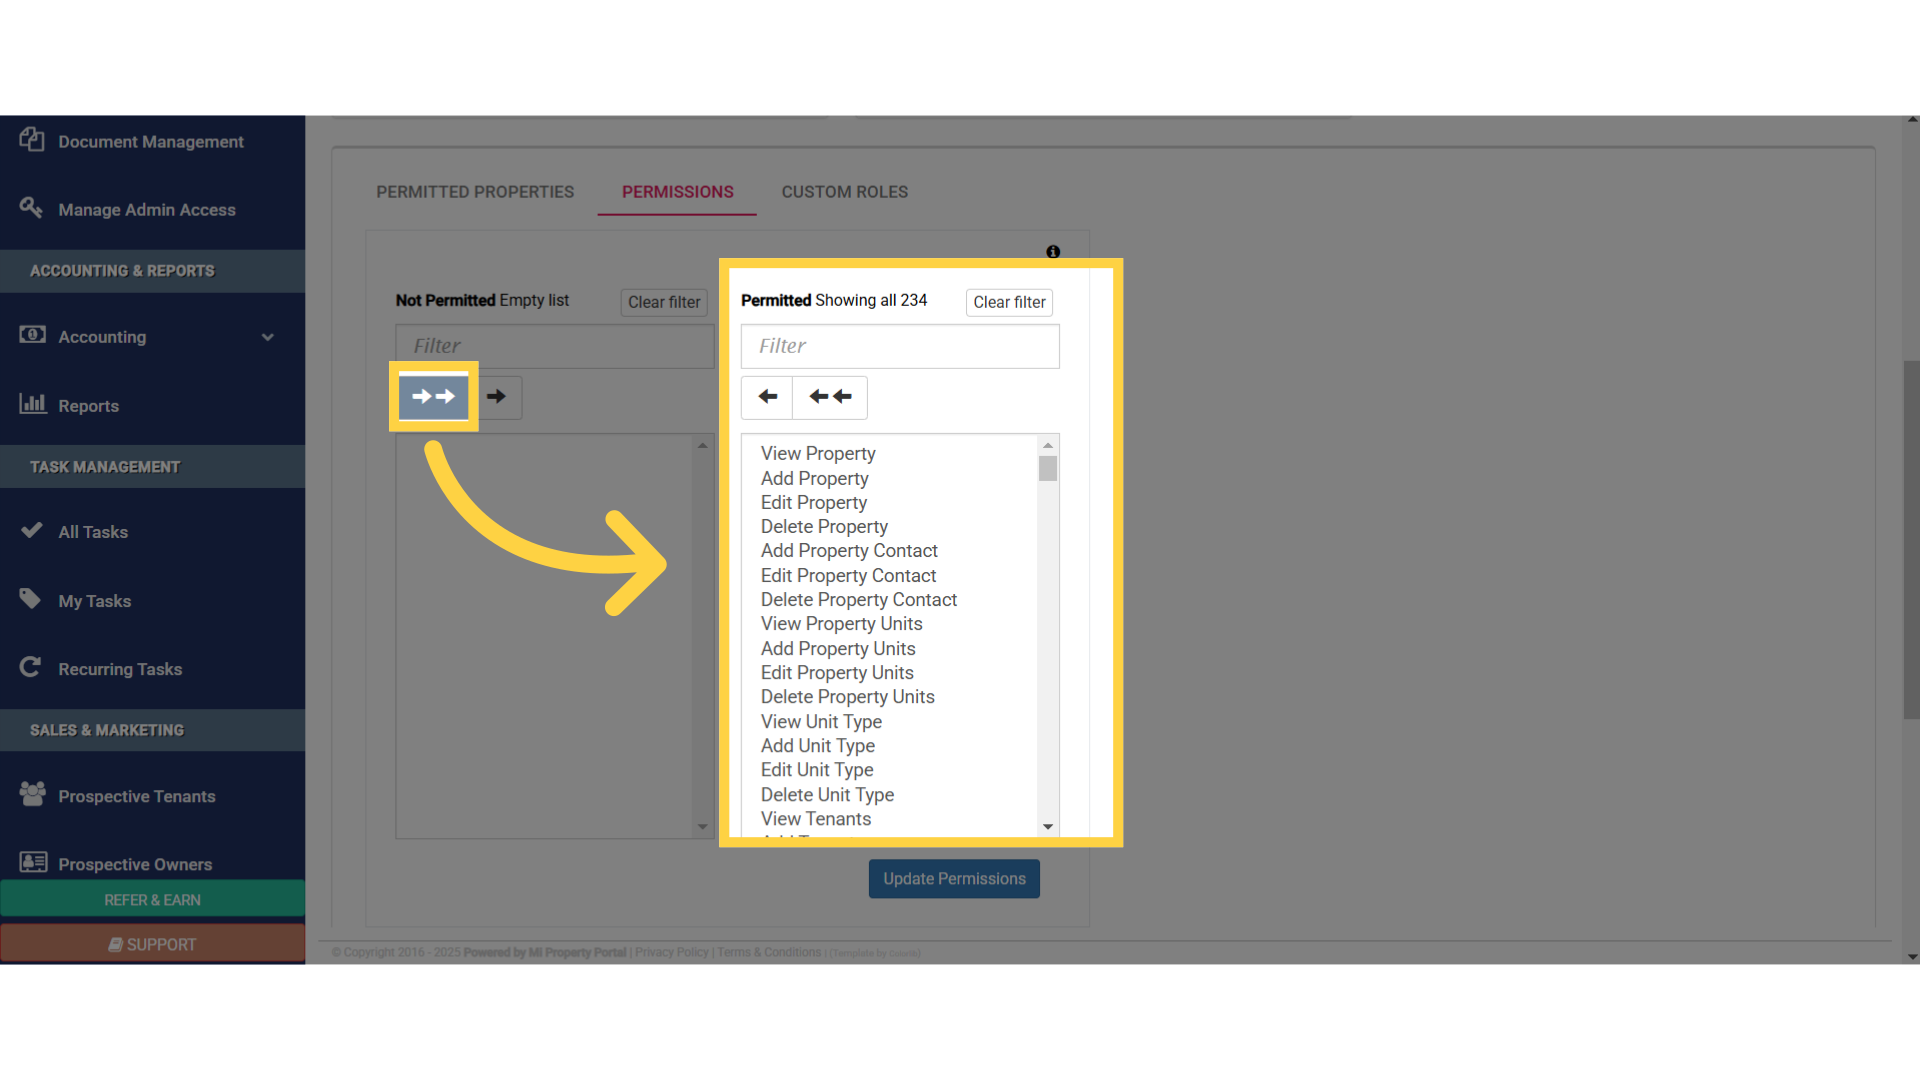
26. Now, we’ve switched to the Permissions tab, where we’ll set up the actions, the admin will be allowed to perform

27. One important thing to note is, when you set an admin as a Regular Admin, a default set of actions is already assigned to them
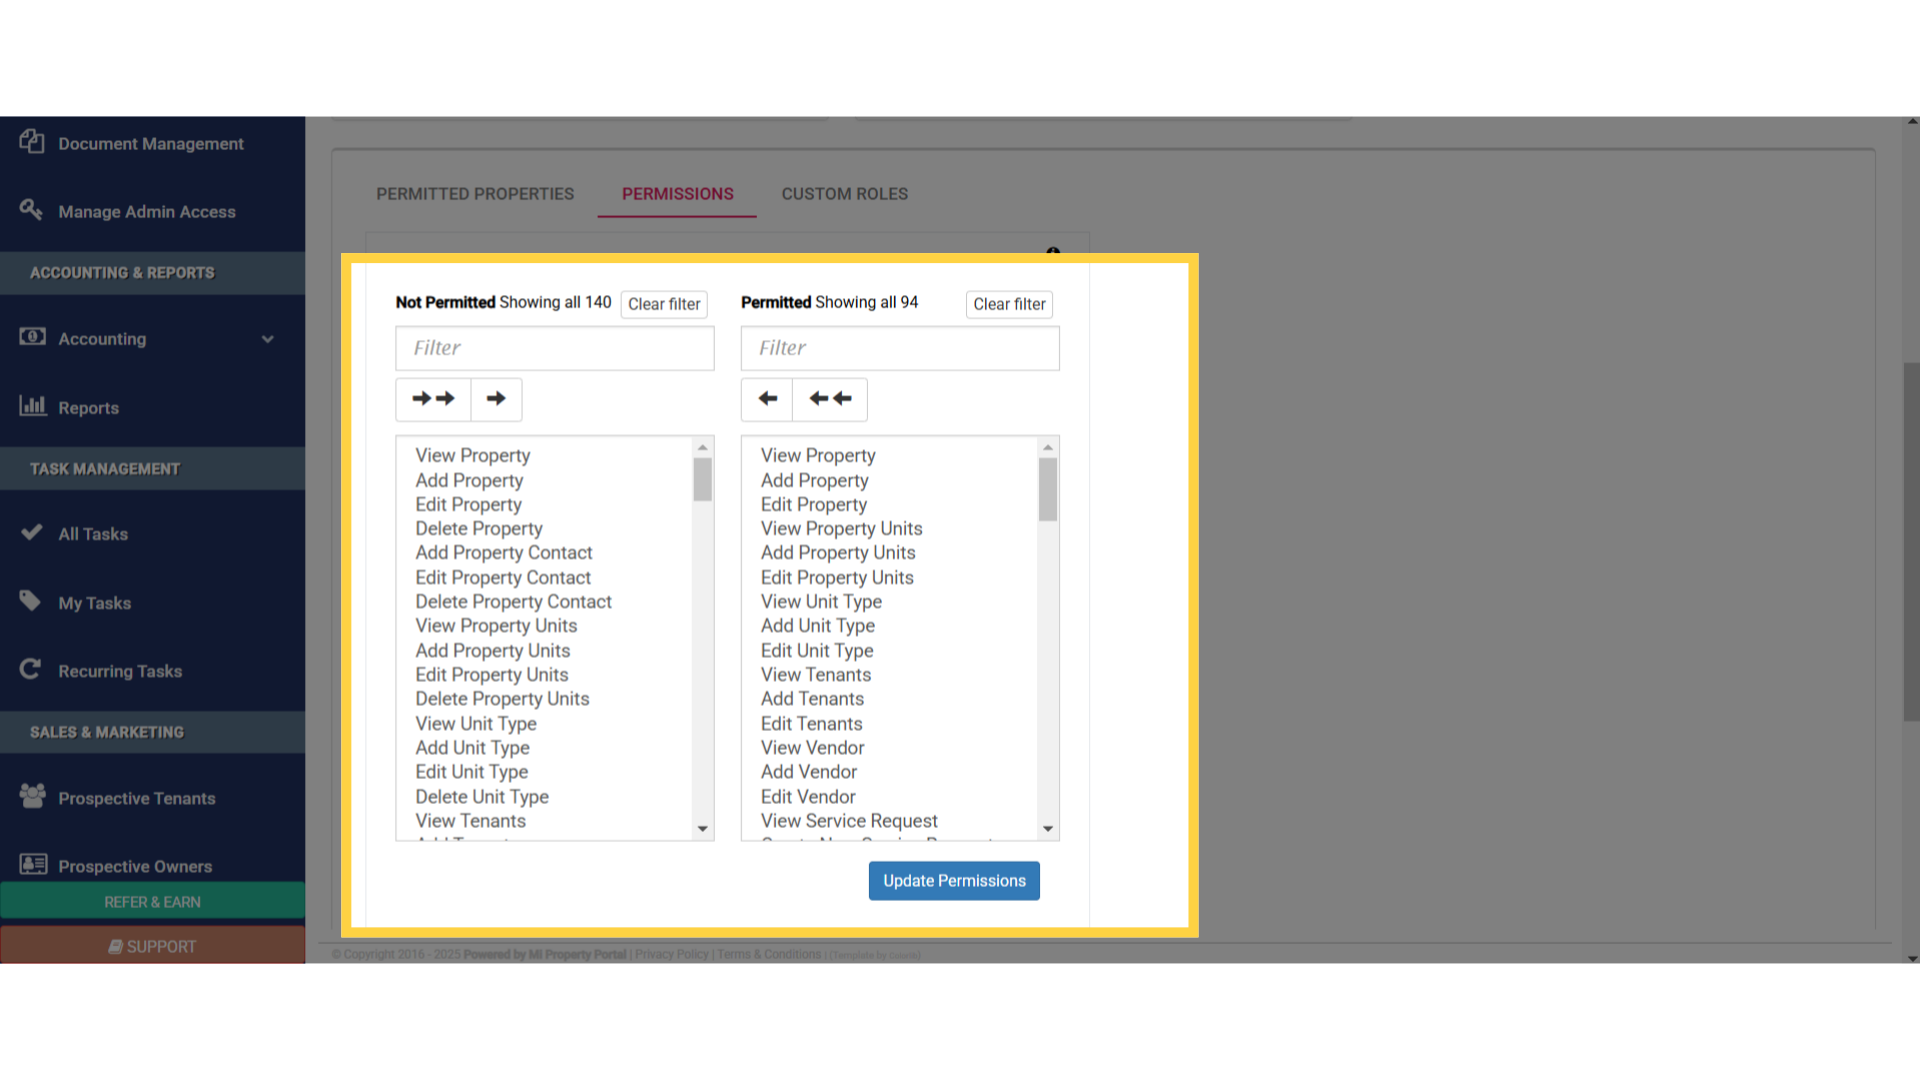
28. You’ll notice filter boxes on both sides under, Permitted and Not Permitted
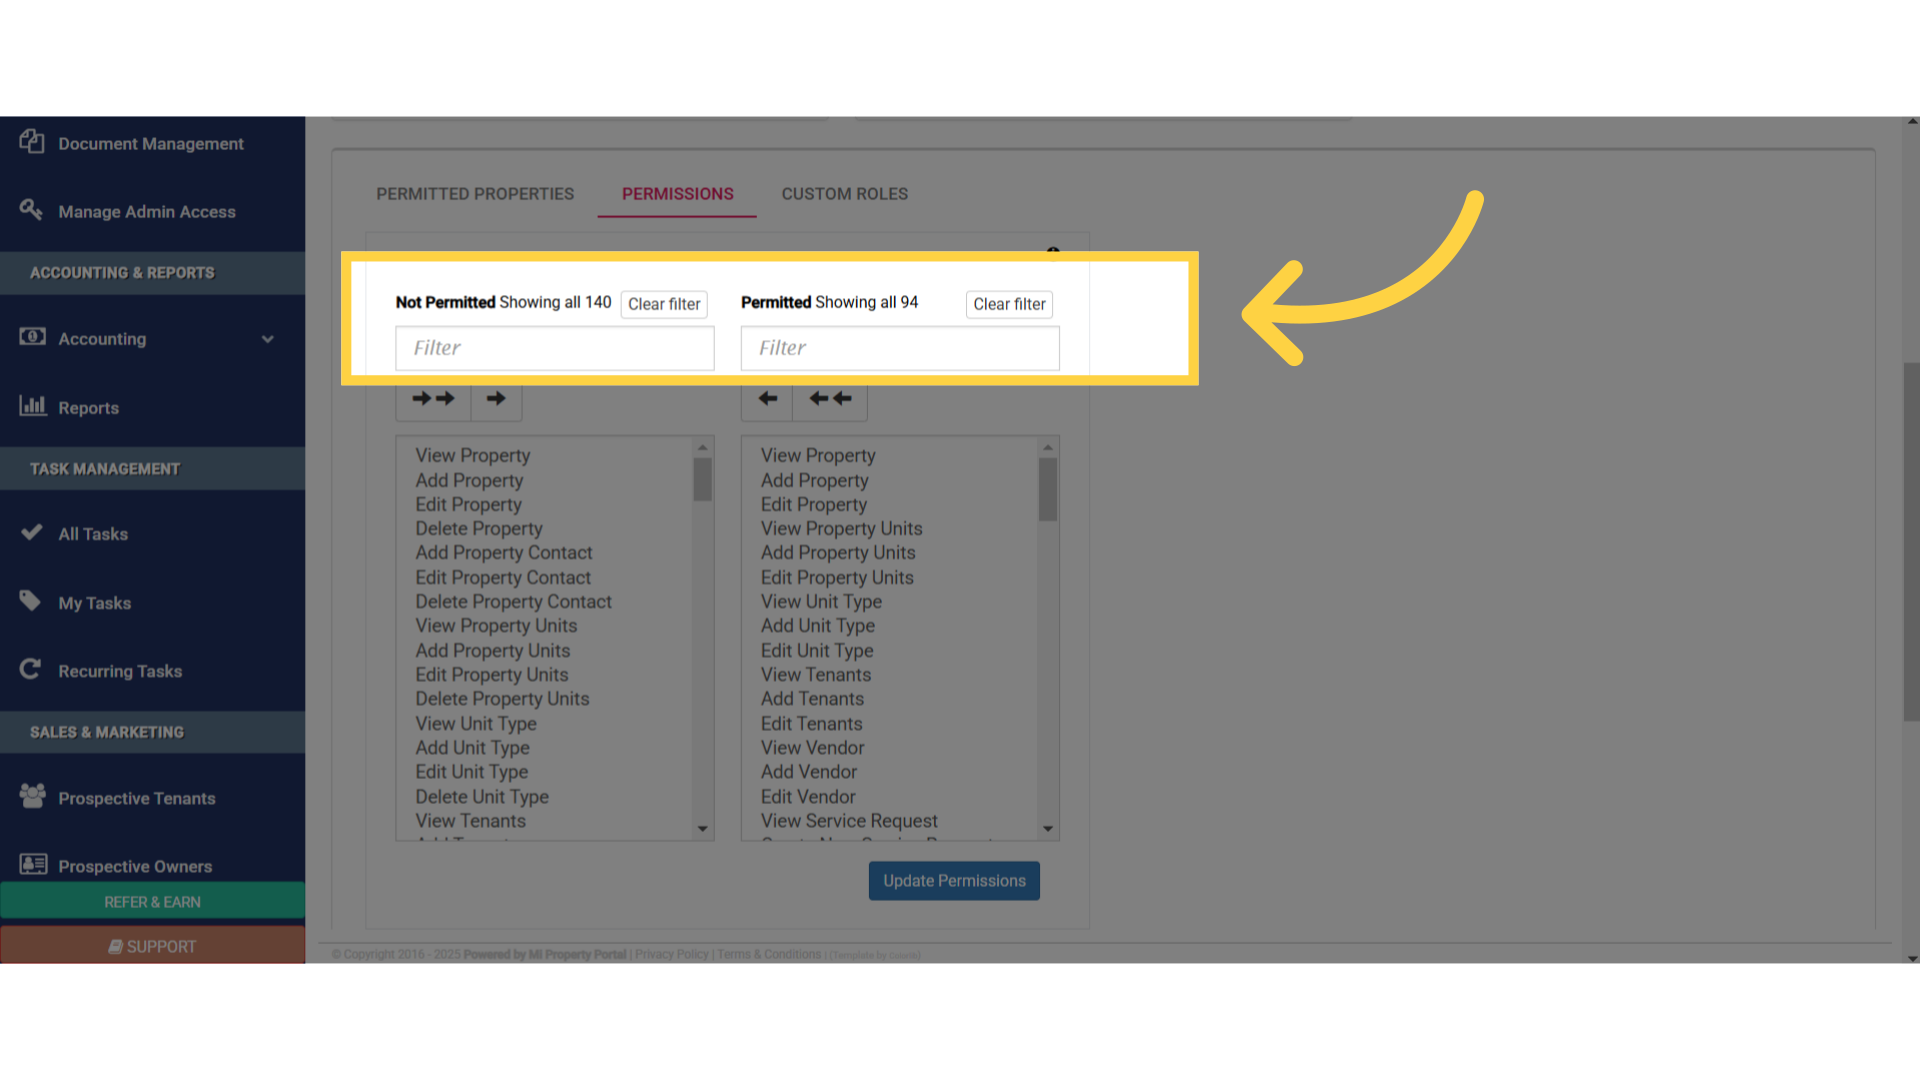
29. Let me quickly explain, what this double arrow icon does

30. When you click on the double arrow icon, under the Not Permitted section, all the actions listed on the left, will instantly move to the Permitted section on the right, just like this
31. If you want to move specific items, from the Not Permitted section to the Permitted section, you can select an item, then hold down the Shift key on your keyboard, while using the down arrow key to select multiple items like this
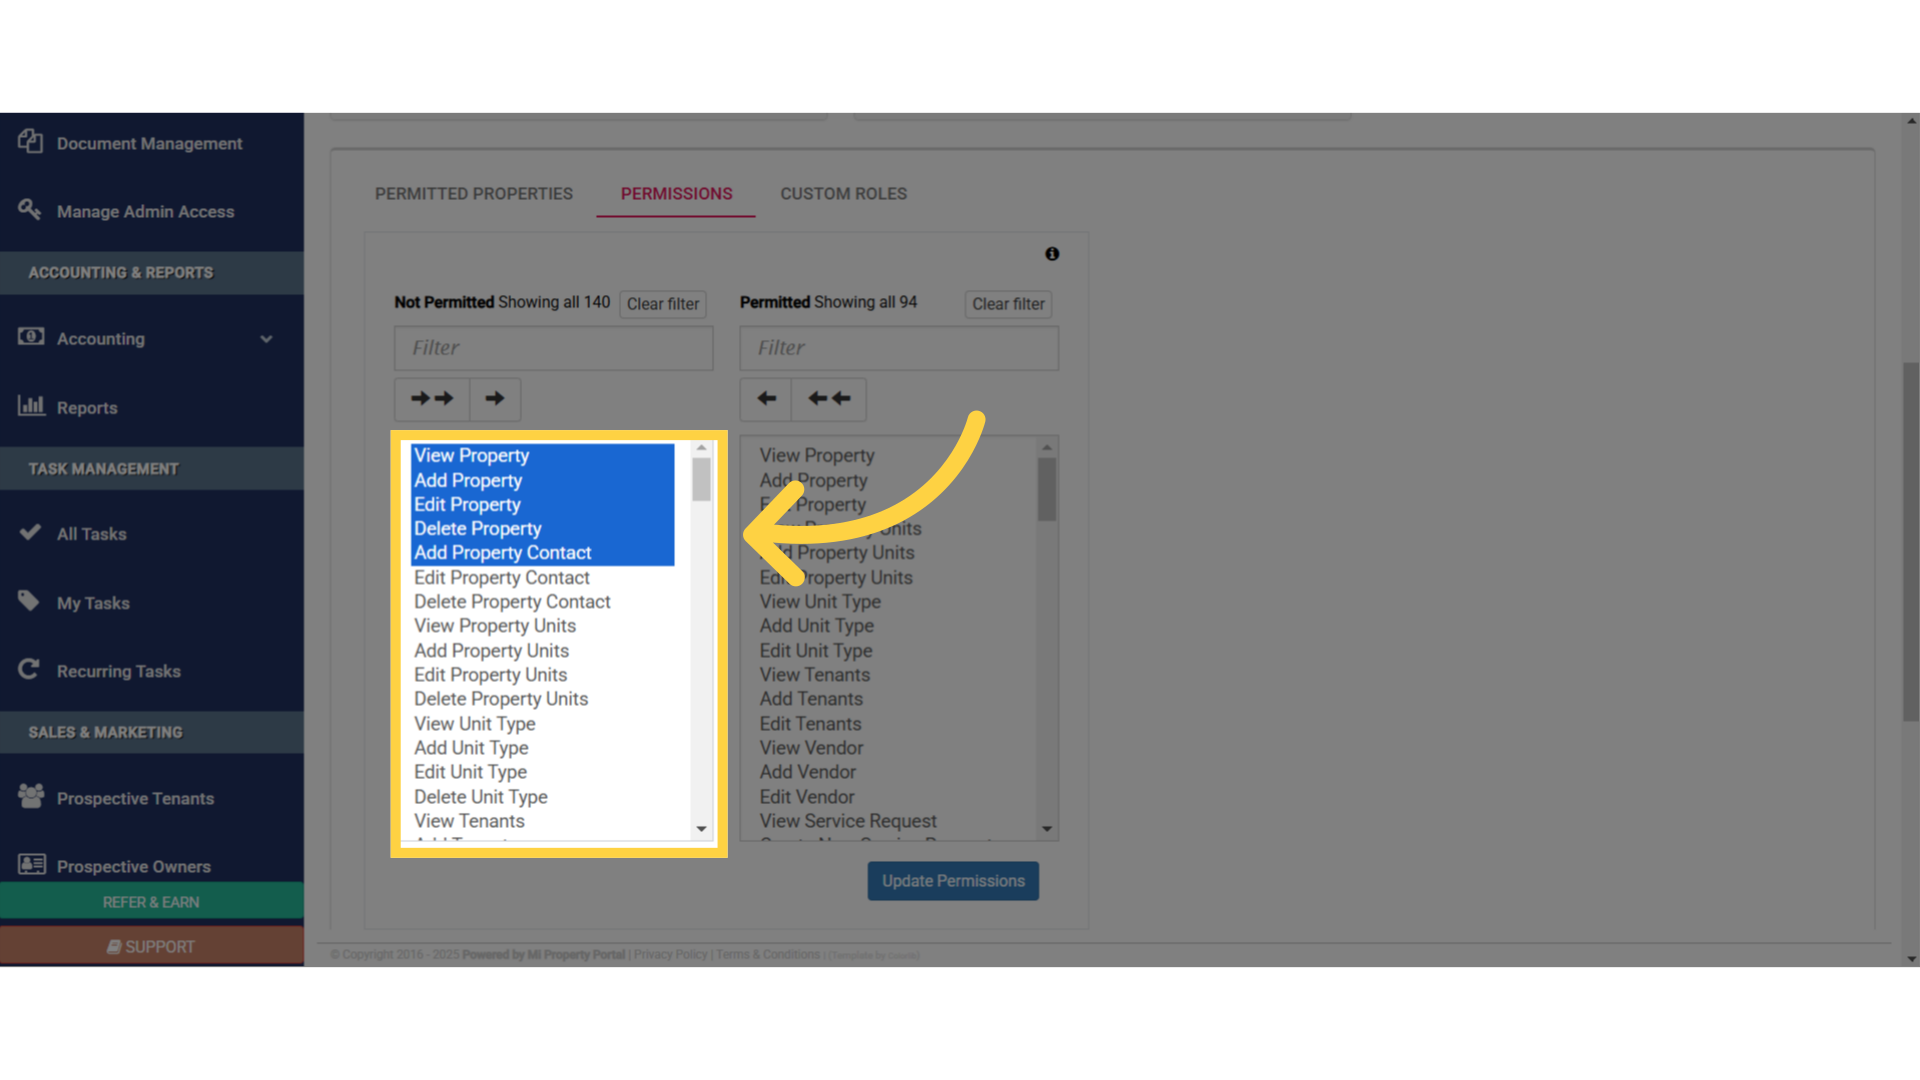
32. If the items you want to select, are not in order, you can hold down the CTRL key on your keyboard, and click on each item individually, to select multiple items, like this
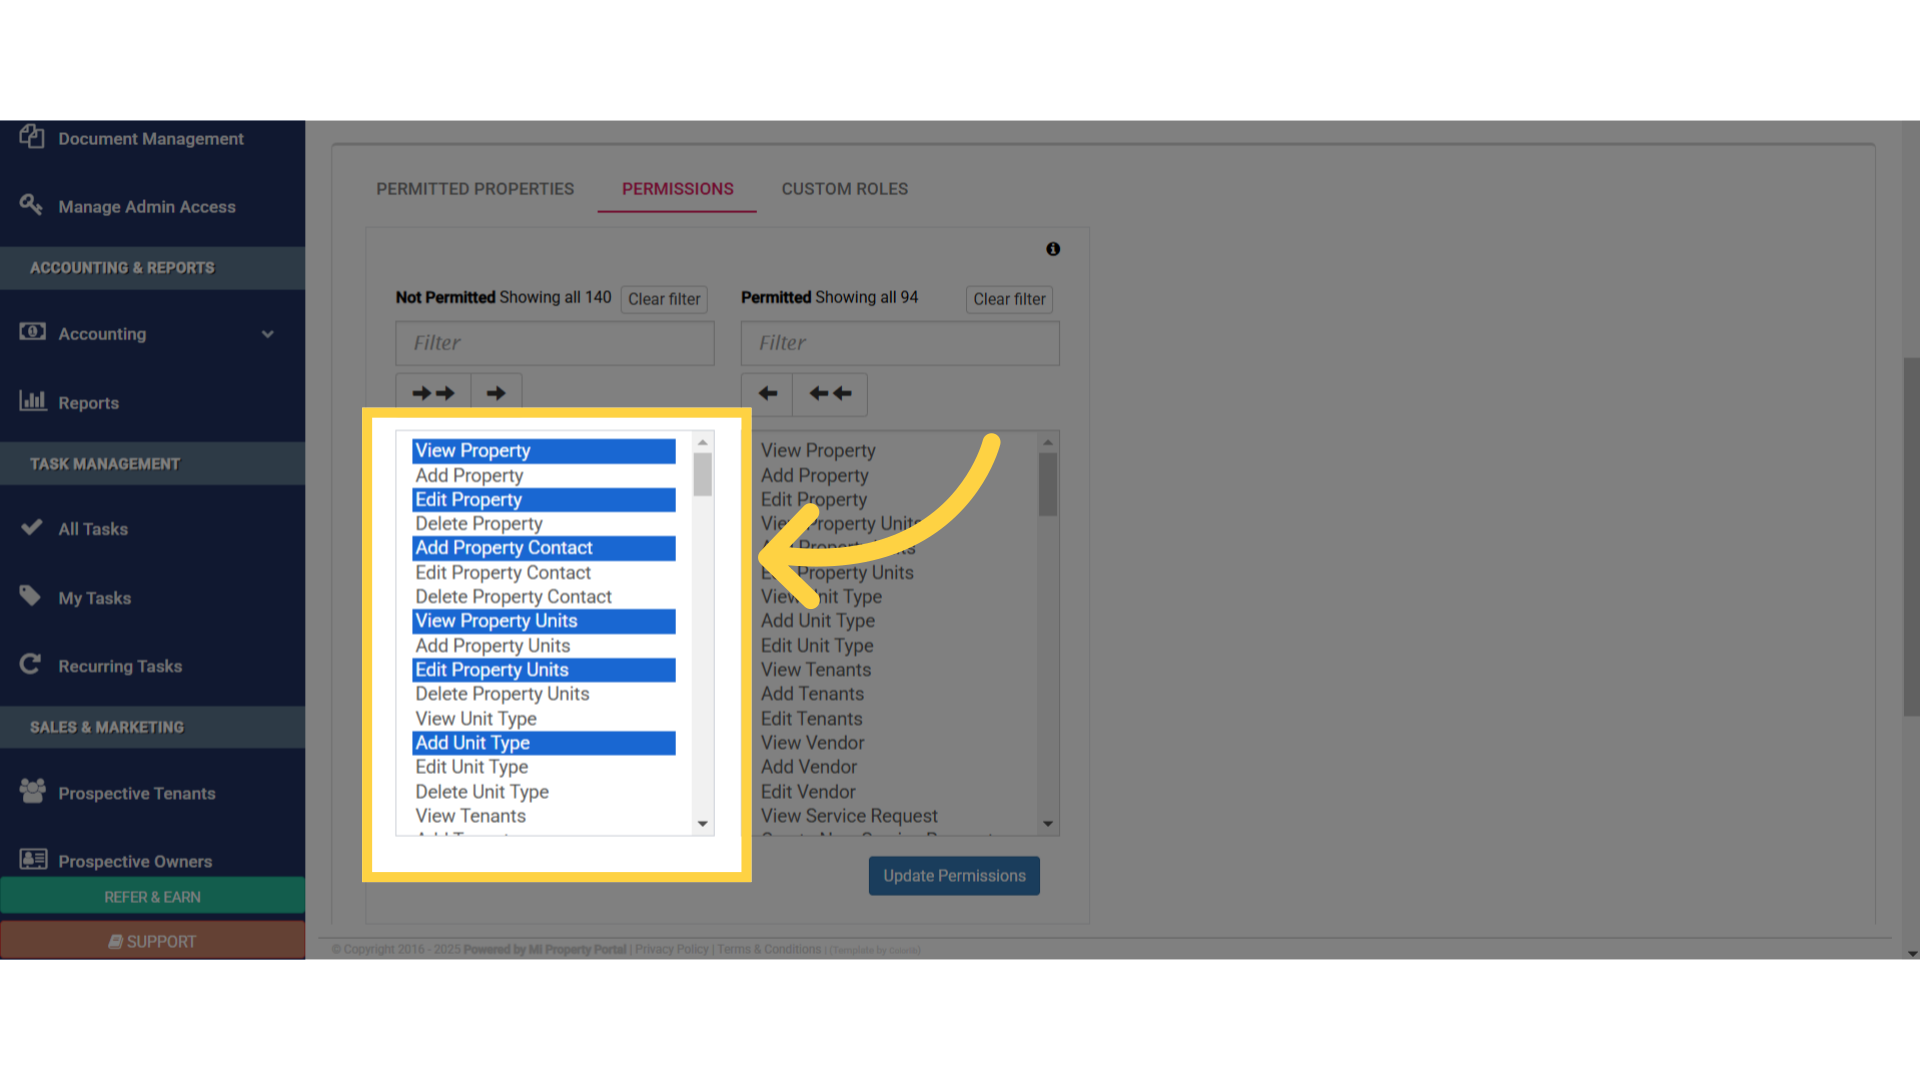
33. Use the single arrow icon, to move your selected items, from the Not Permitted section to the Permitted section
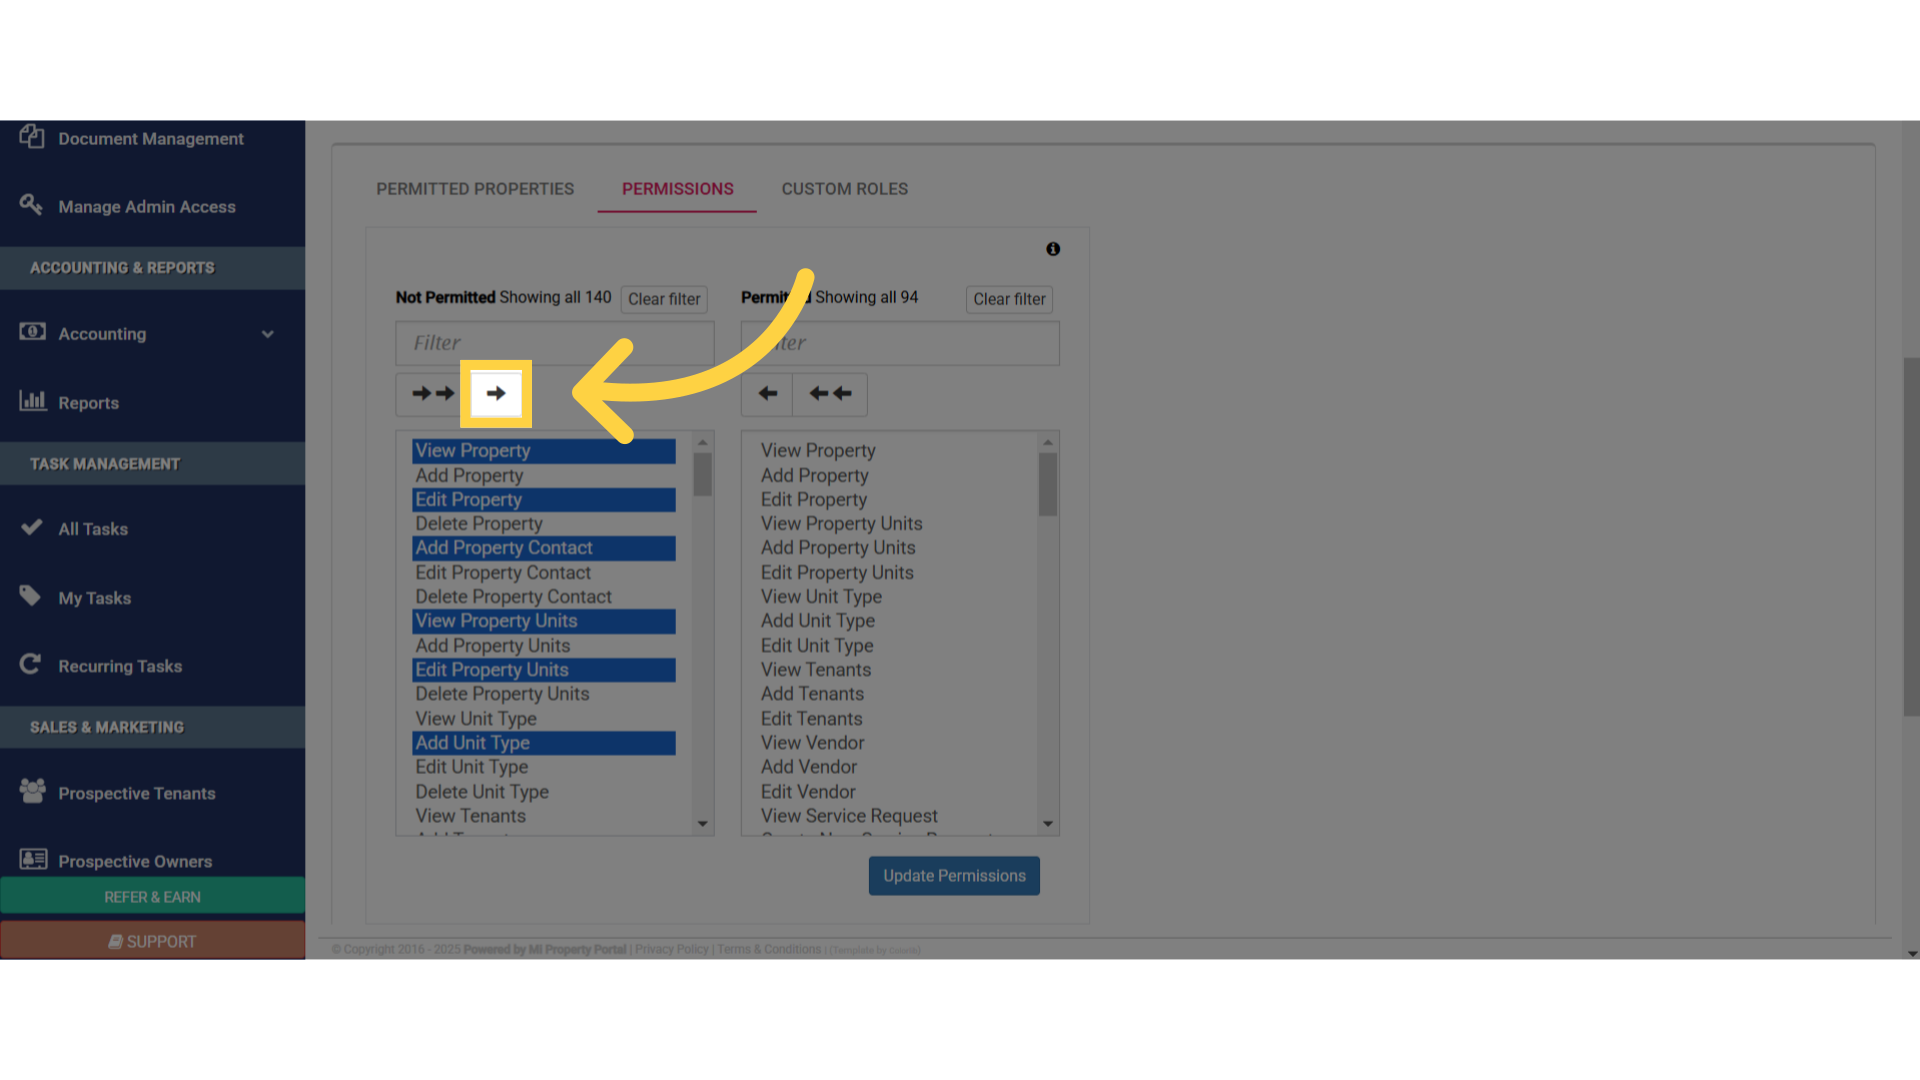
34. See? The selected items have now been moved to the Permitted section
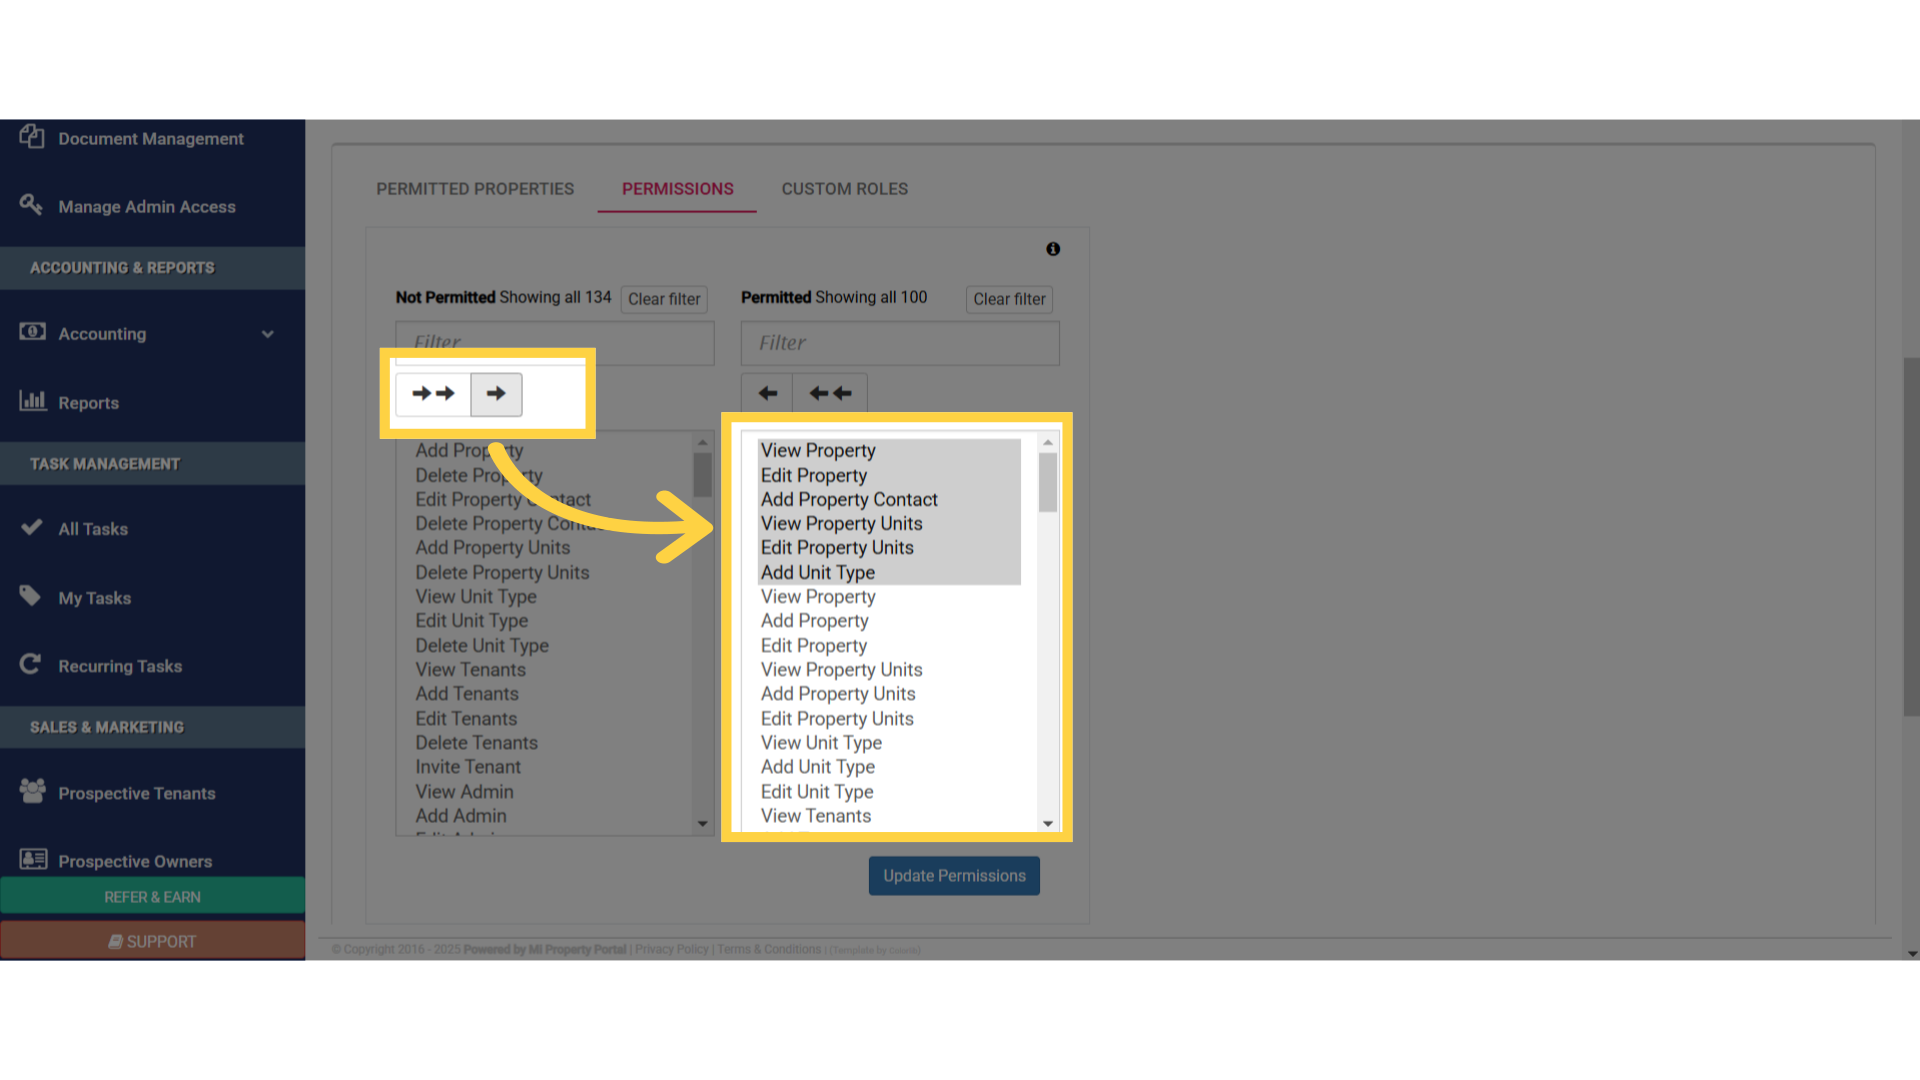
35. Once you’re done, don’t forget to click on the Update Permissions button, to save the settings!
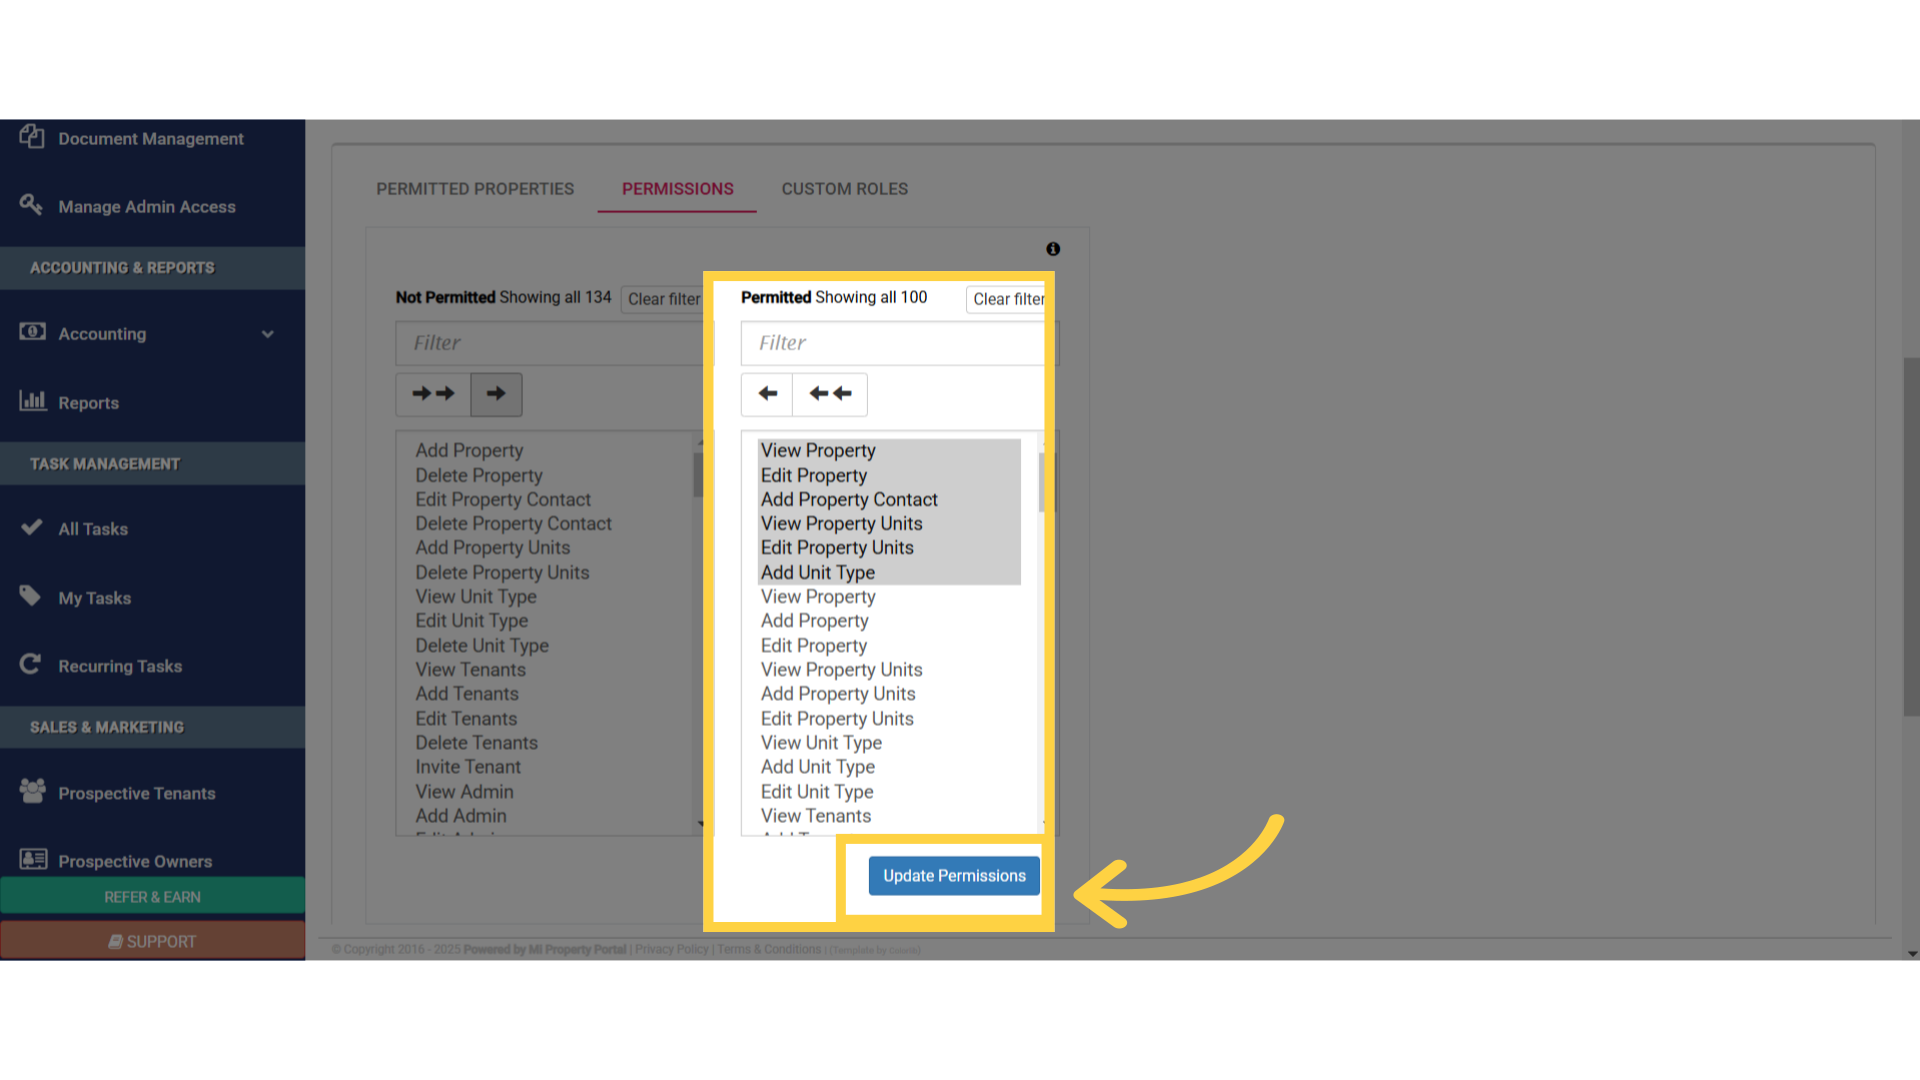
36. After updating the permitted actions in the Permissions tab, we’ll be taken back to this view. Now, let’s move on to the Custom Roles tab by clicking here
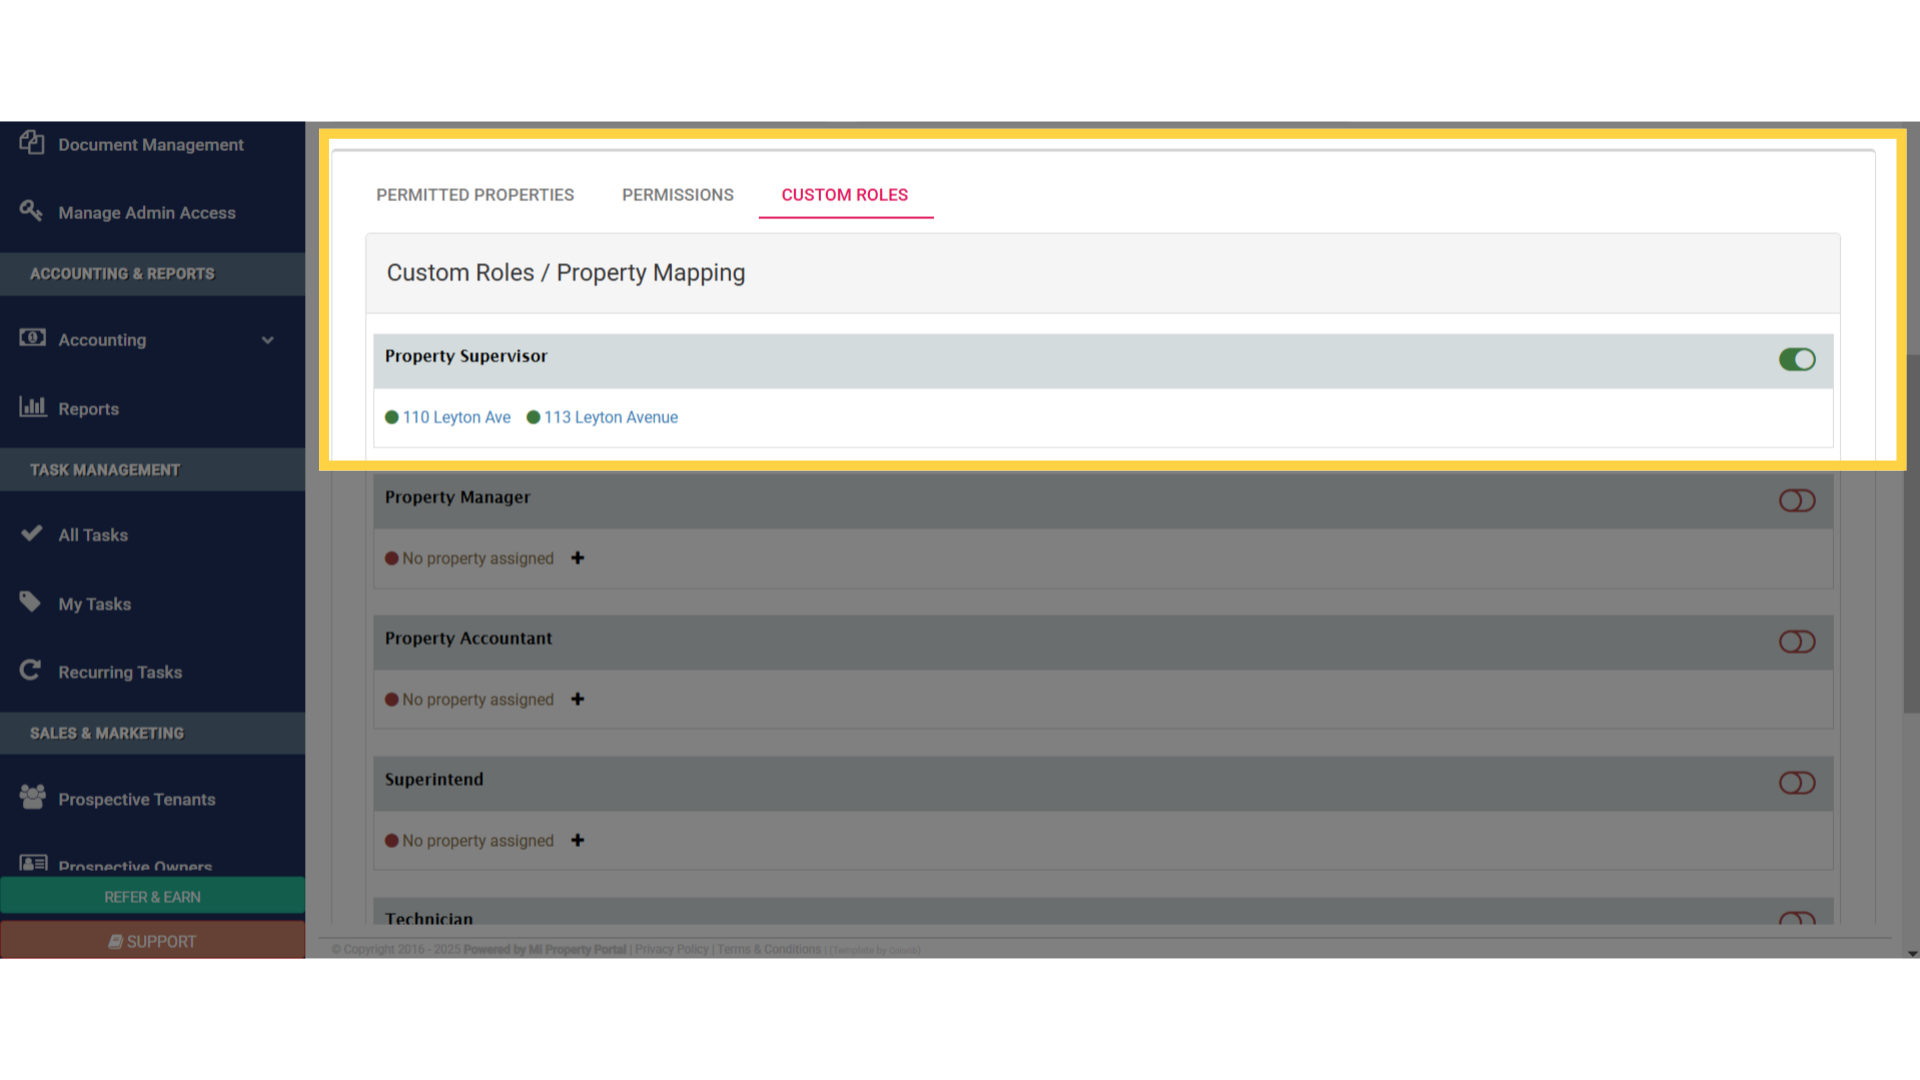
37. The Custom Roles page allows you to assign a specific role to your admin

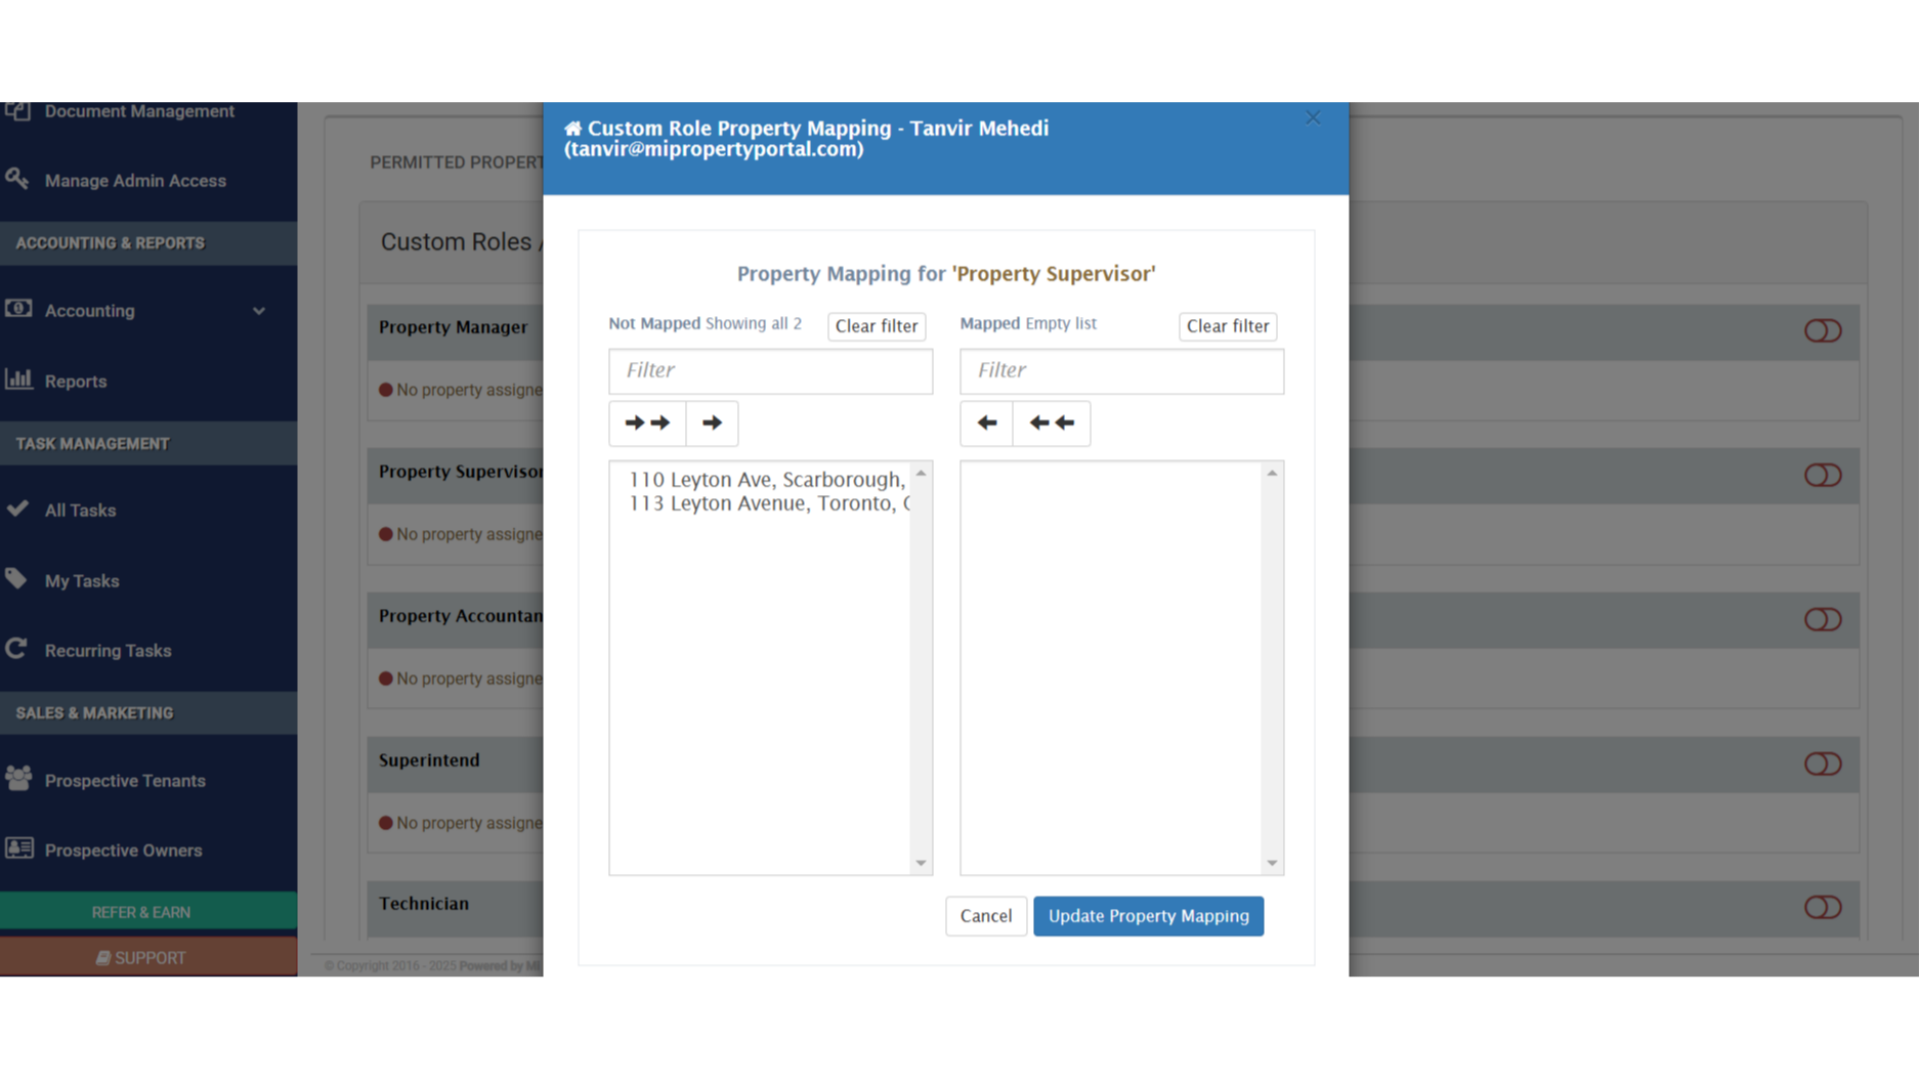
38. Let’s assign the admin as the Property Supervisor. Simply toggle the button, next to the Property Supervisor heading, to turn it on
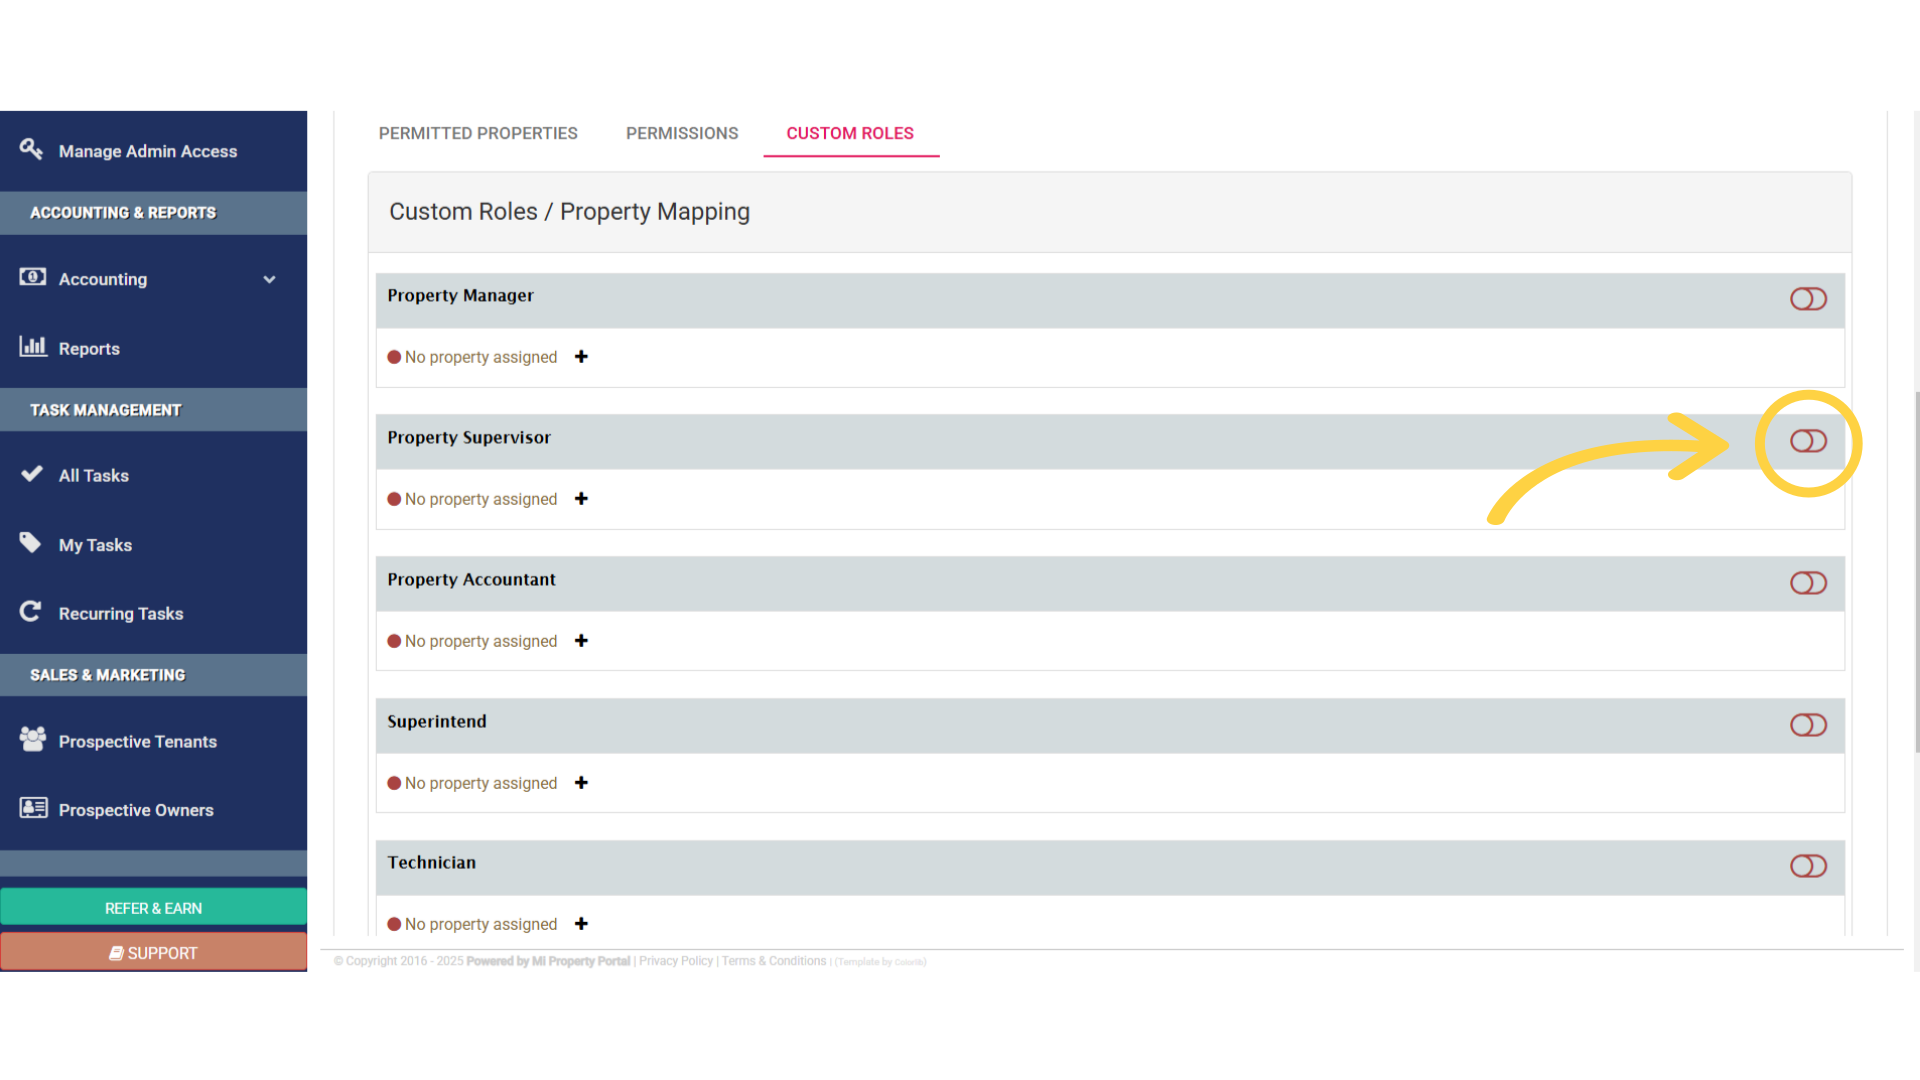
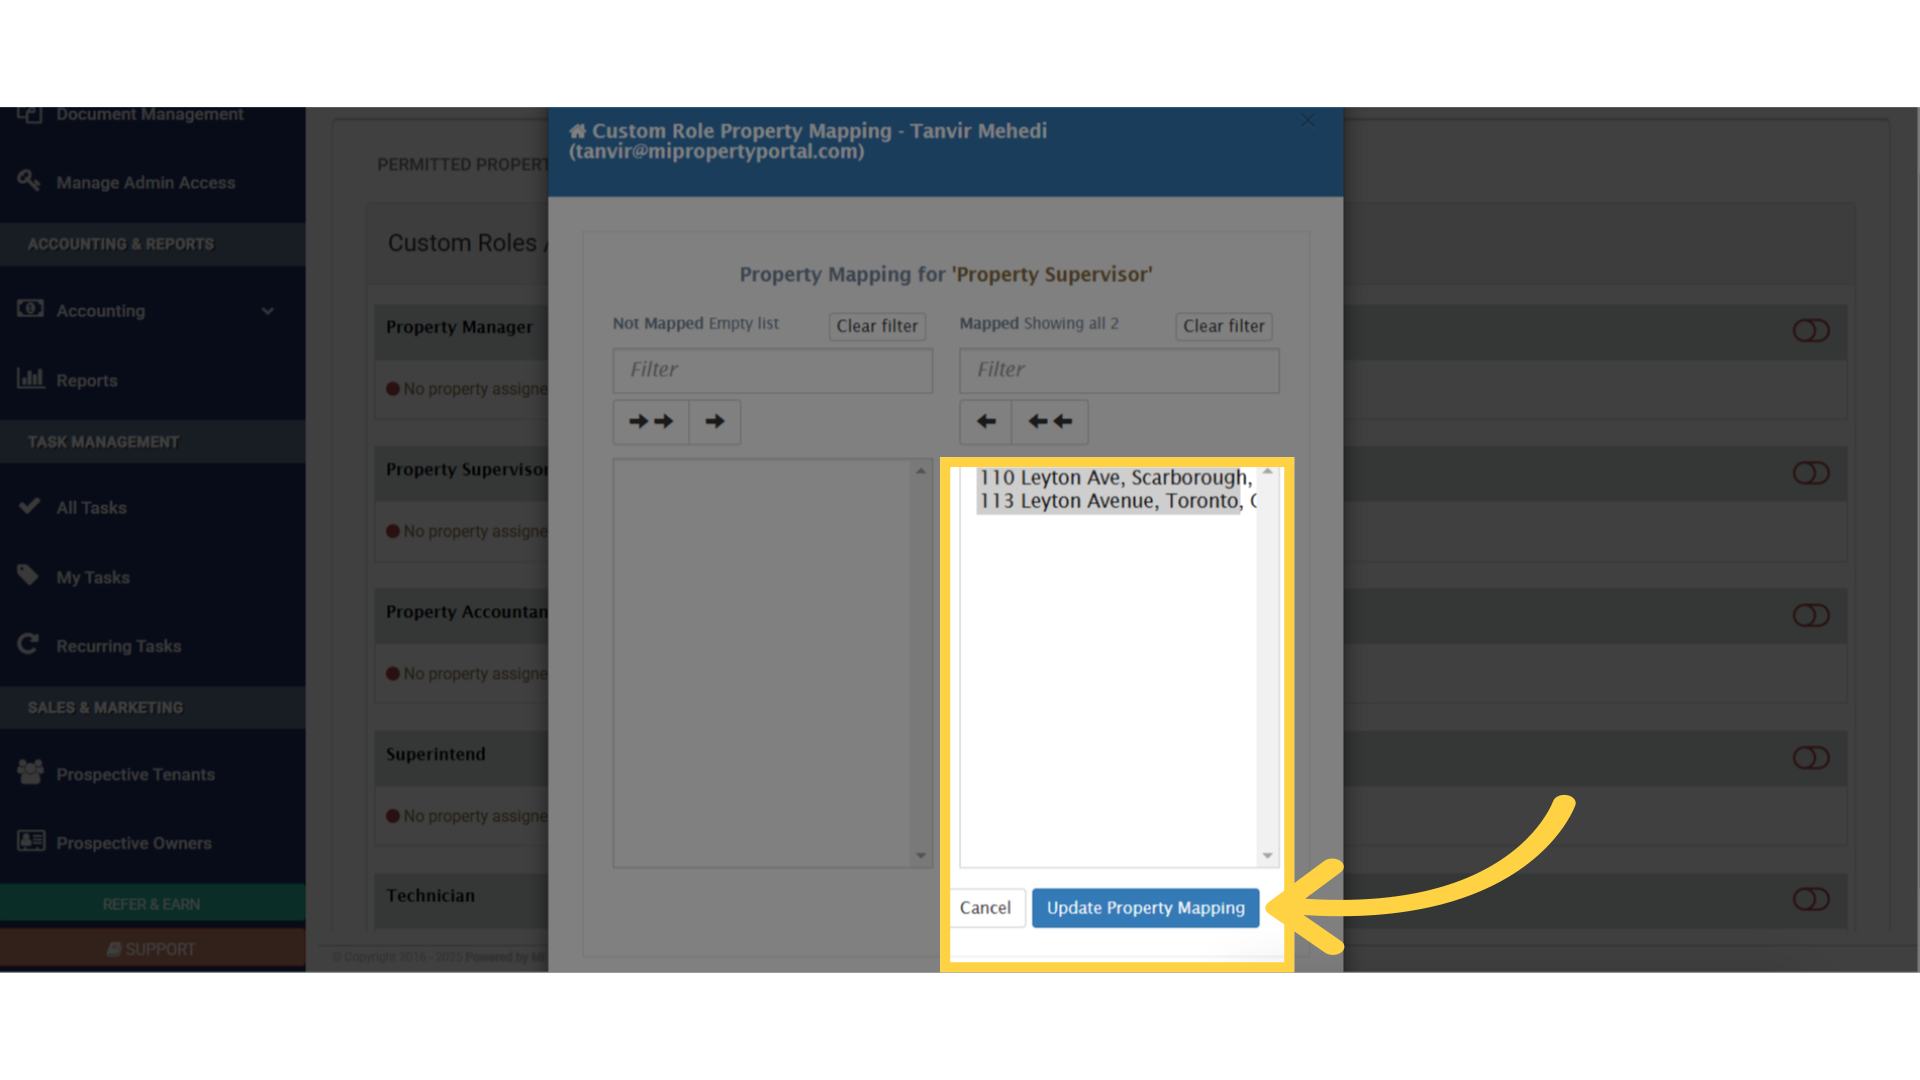
39. This interface will appear, allowing you to assign properties. Simply move the properties from the Not Mapped section, to the Mapped section.
40. Once you’re done, click on the Update Property Mapping button right here, to save the changes.
41. As you can see, the toggle button, beside the Property Supervisor is now green, indicating that we’ve successfully set up the custom roles!