So, in this video, we’ll walk you through the process of creating a Rental Invoice step by step. Ready to dive in? Let’s get started!
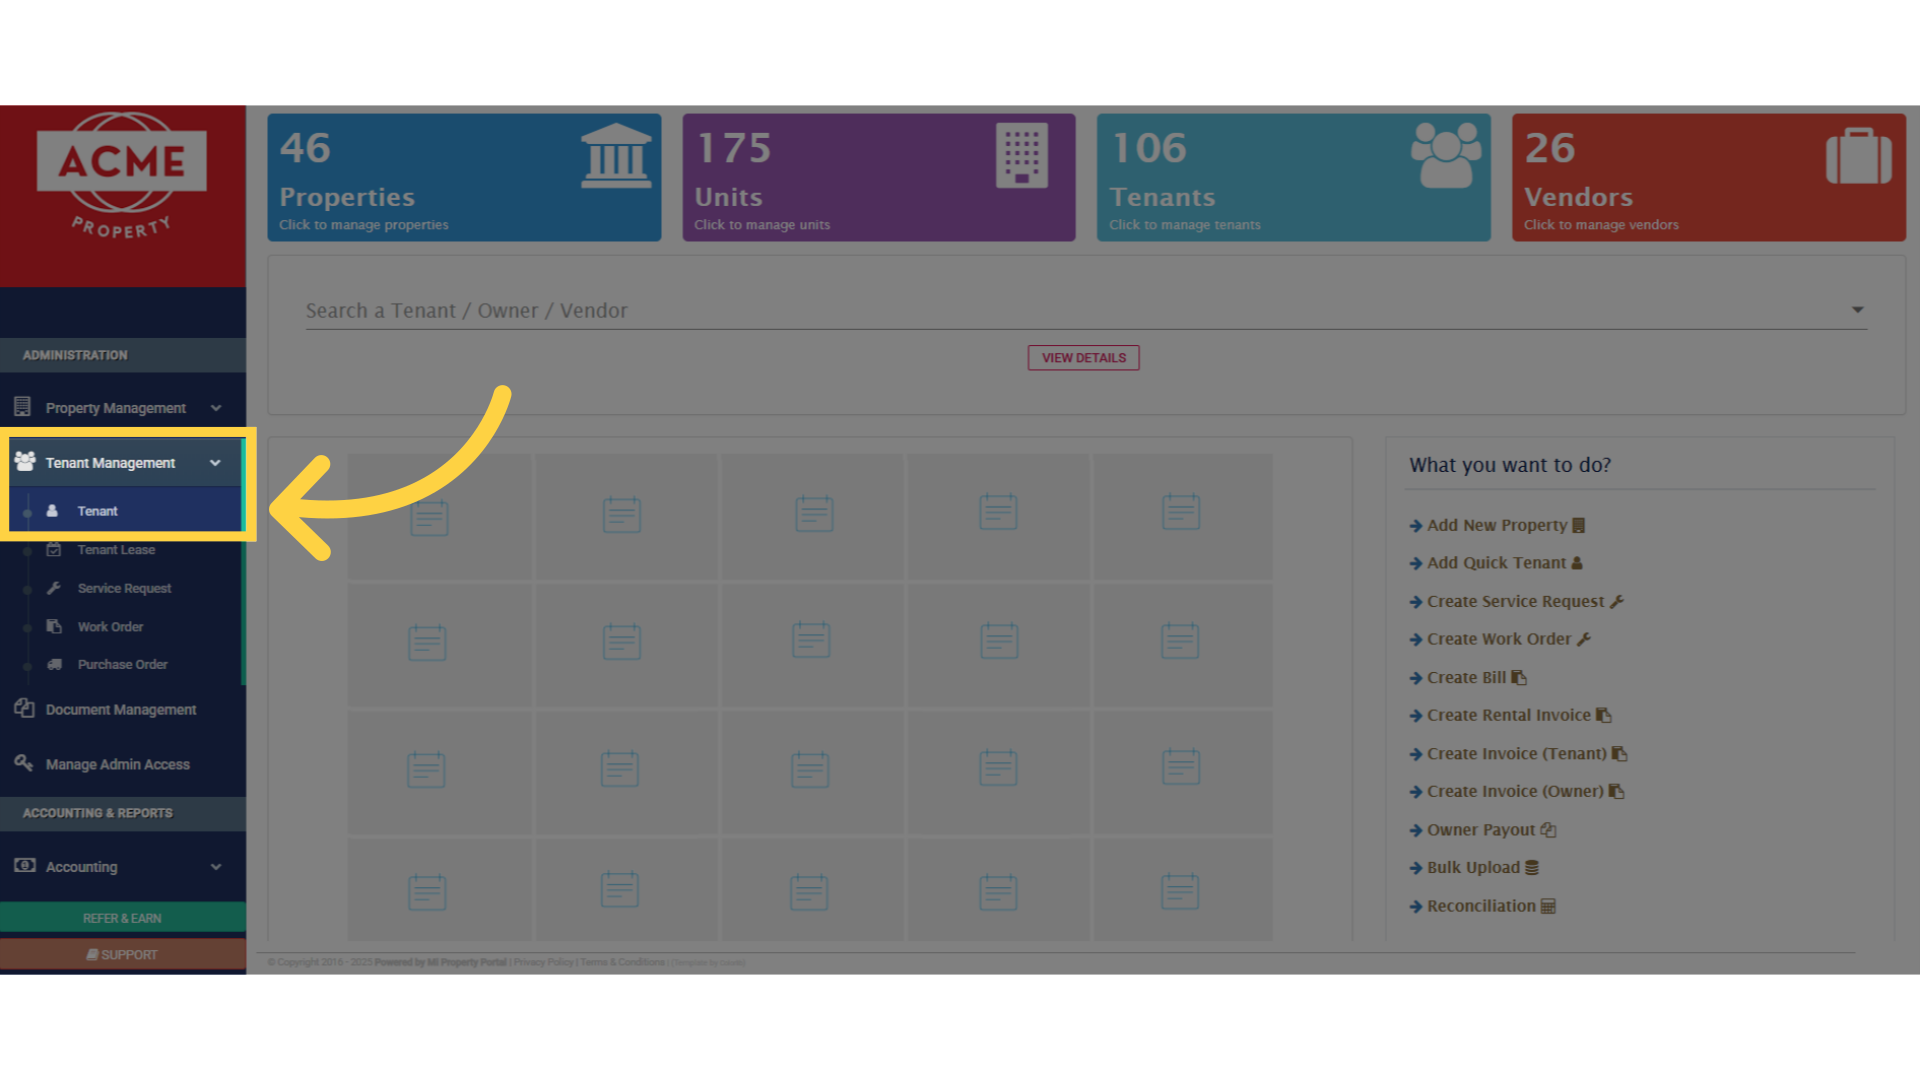
1.From the dashboard, go to the left navigation menu. Click on Tenant Management dropdown and select Tenant
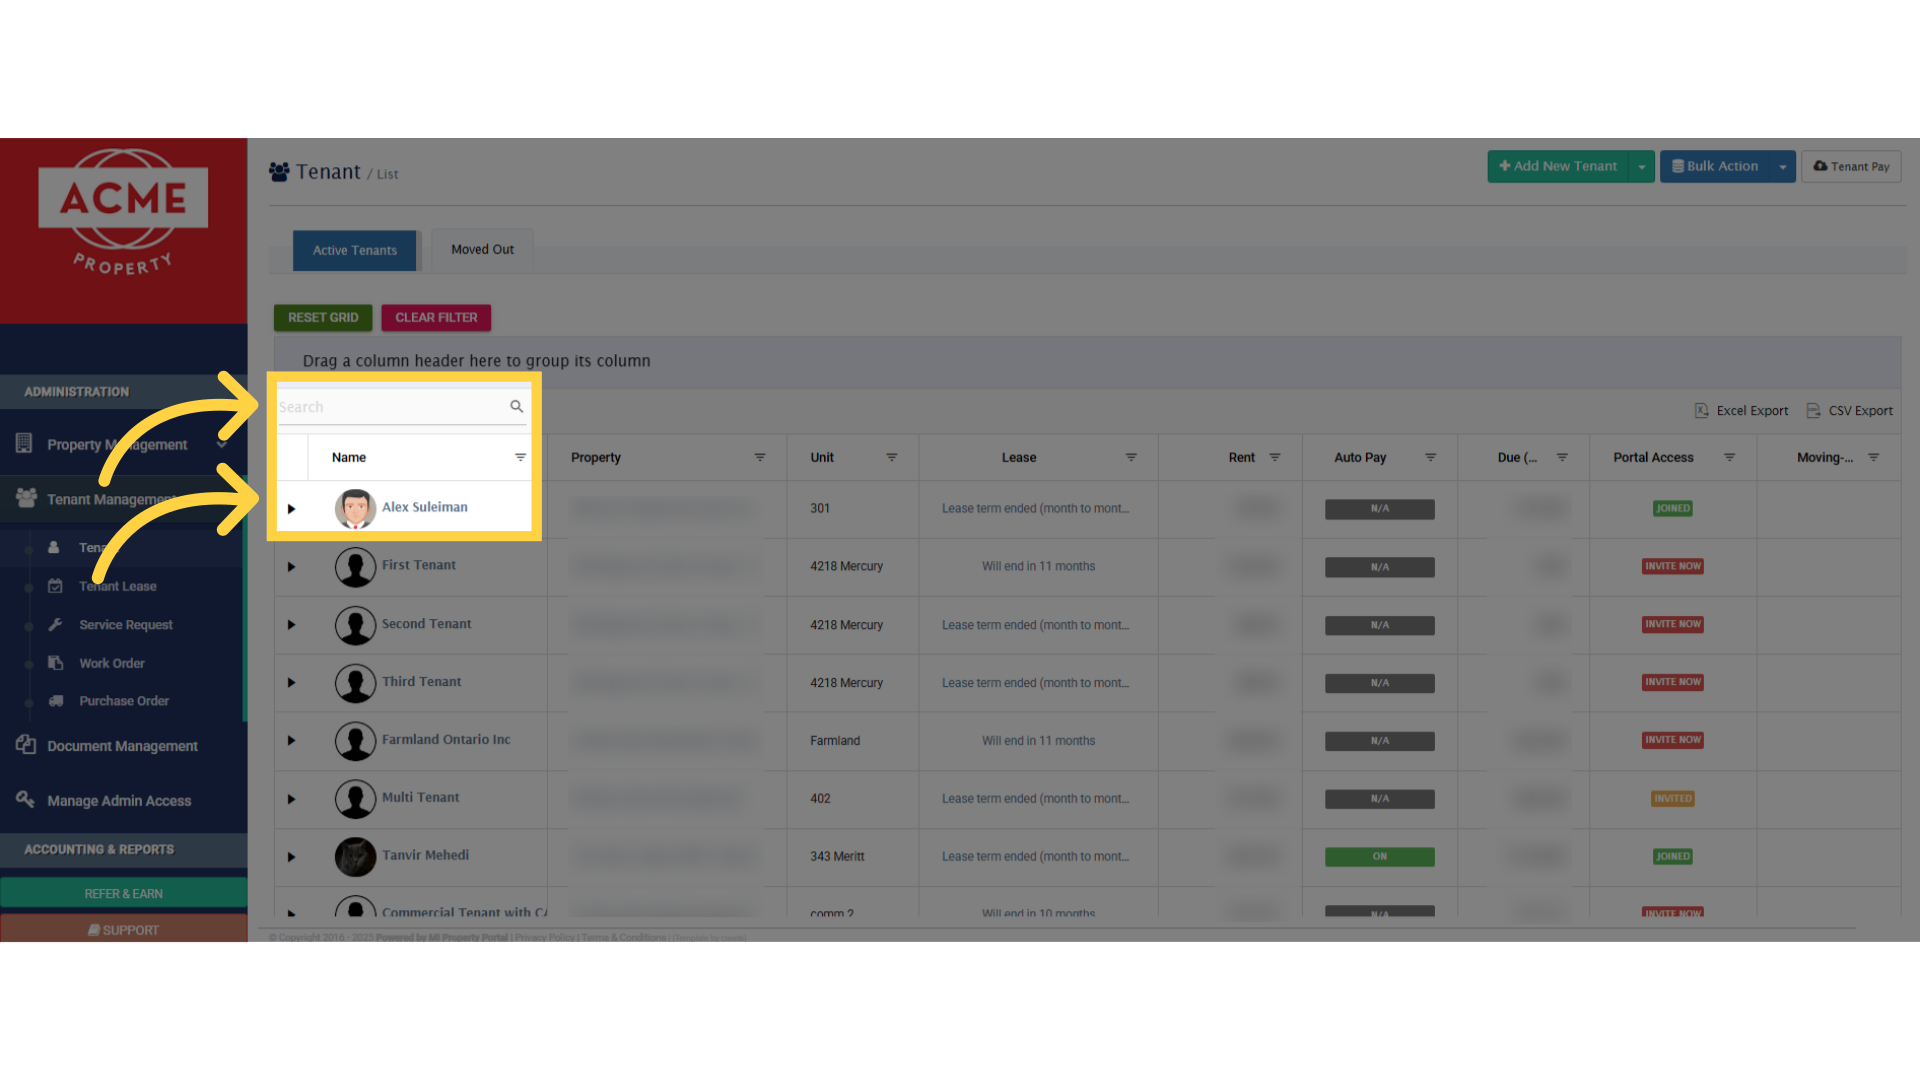
2. This is the tenant list view page. Use the search box or click on a tenant’s name to open their profile
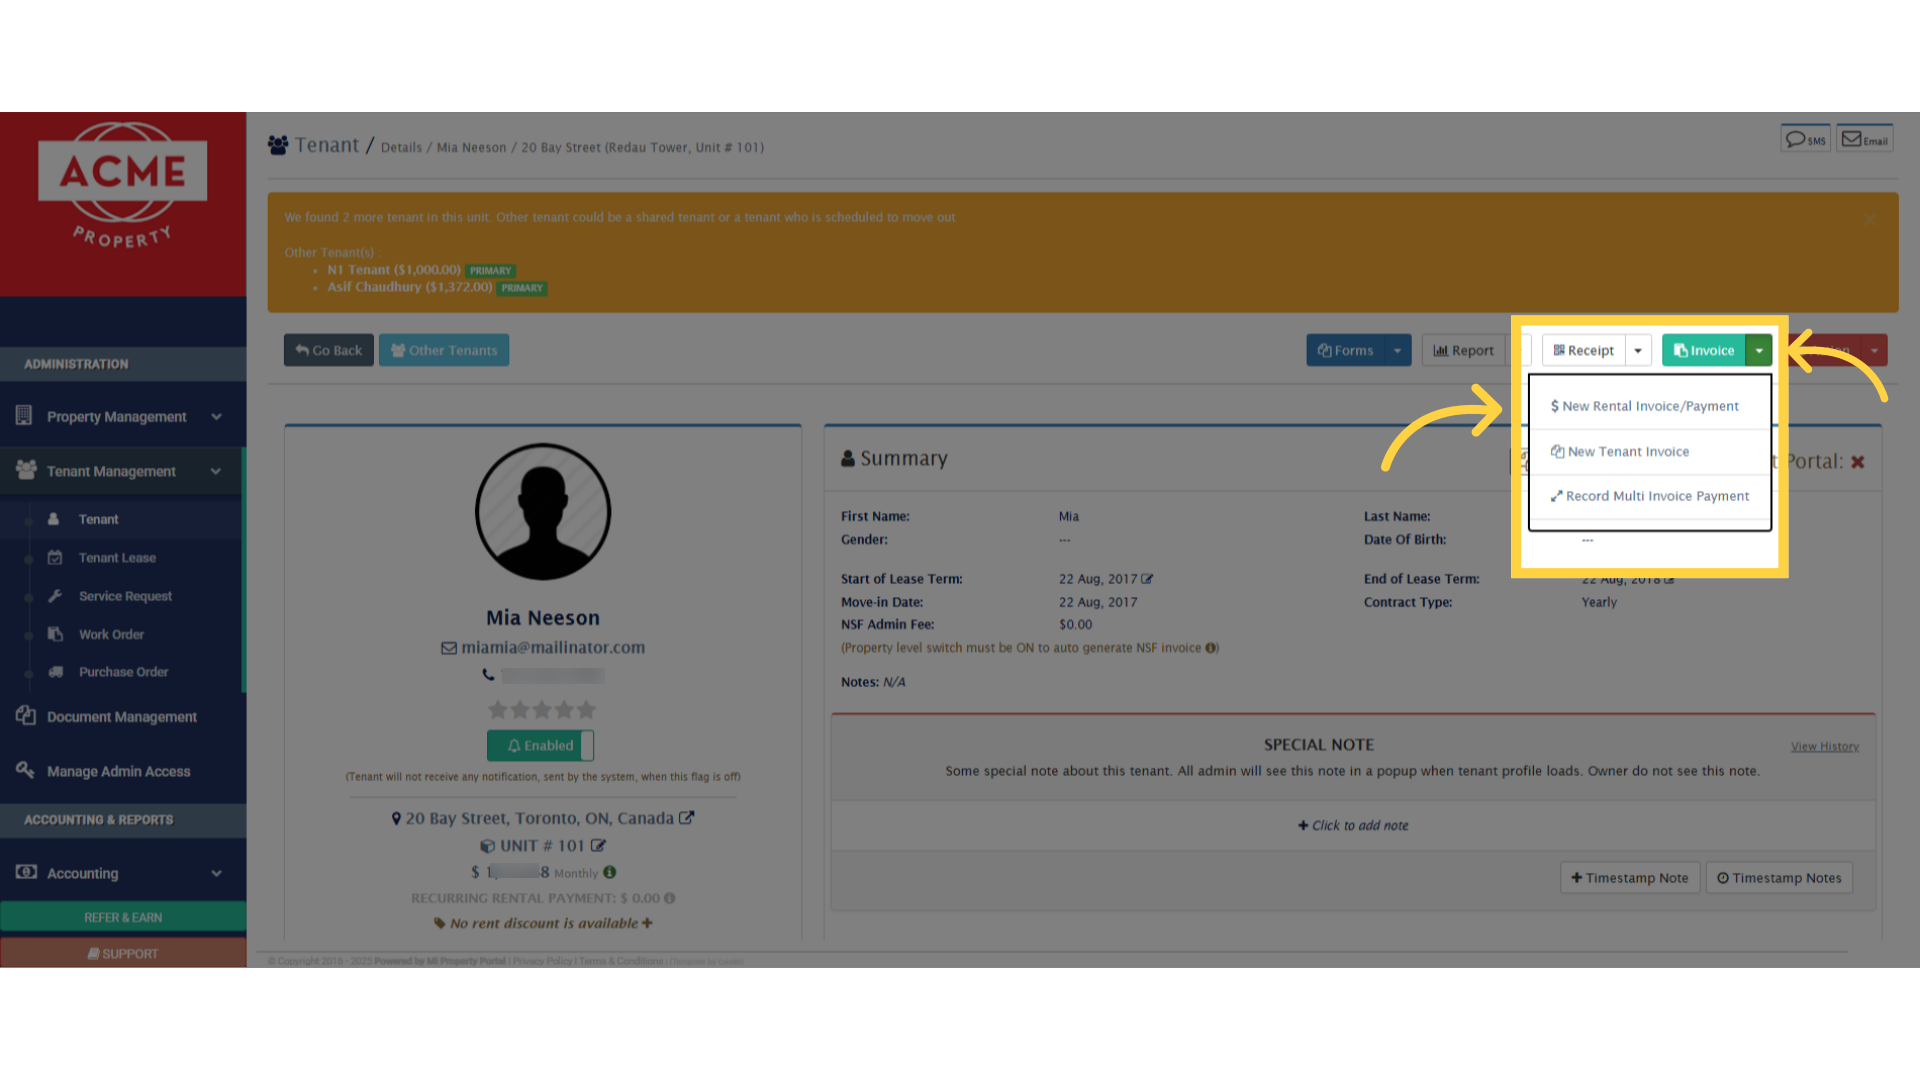
3. Click on the Invoice dropdown. Select New Rental Invoice Payment to proceed
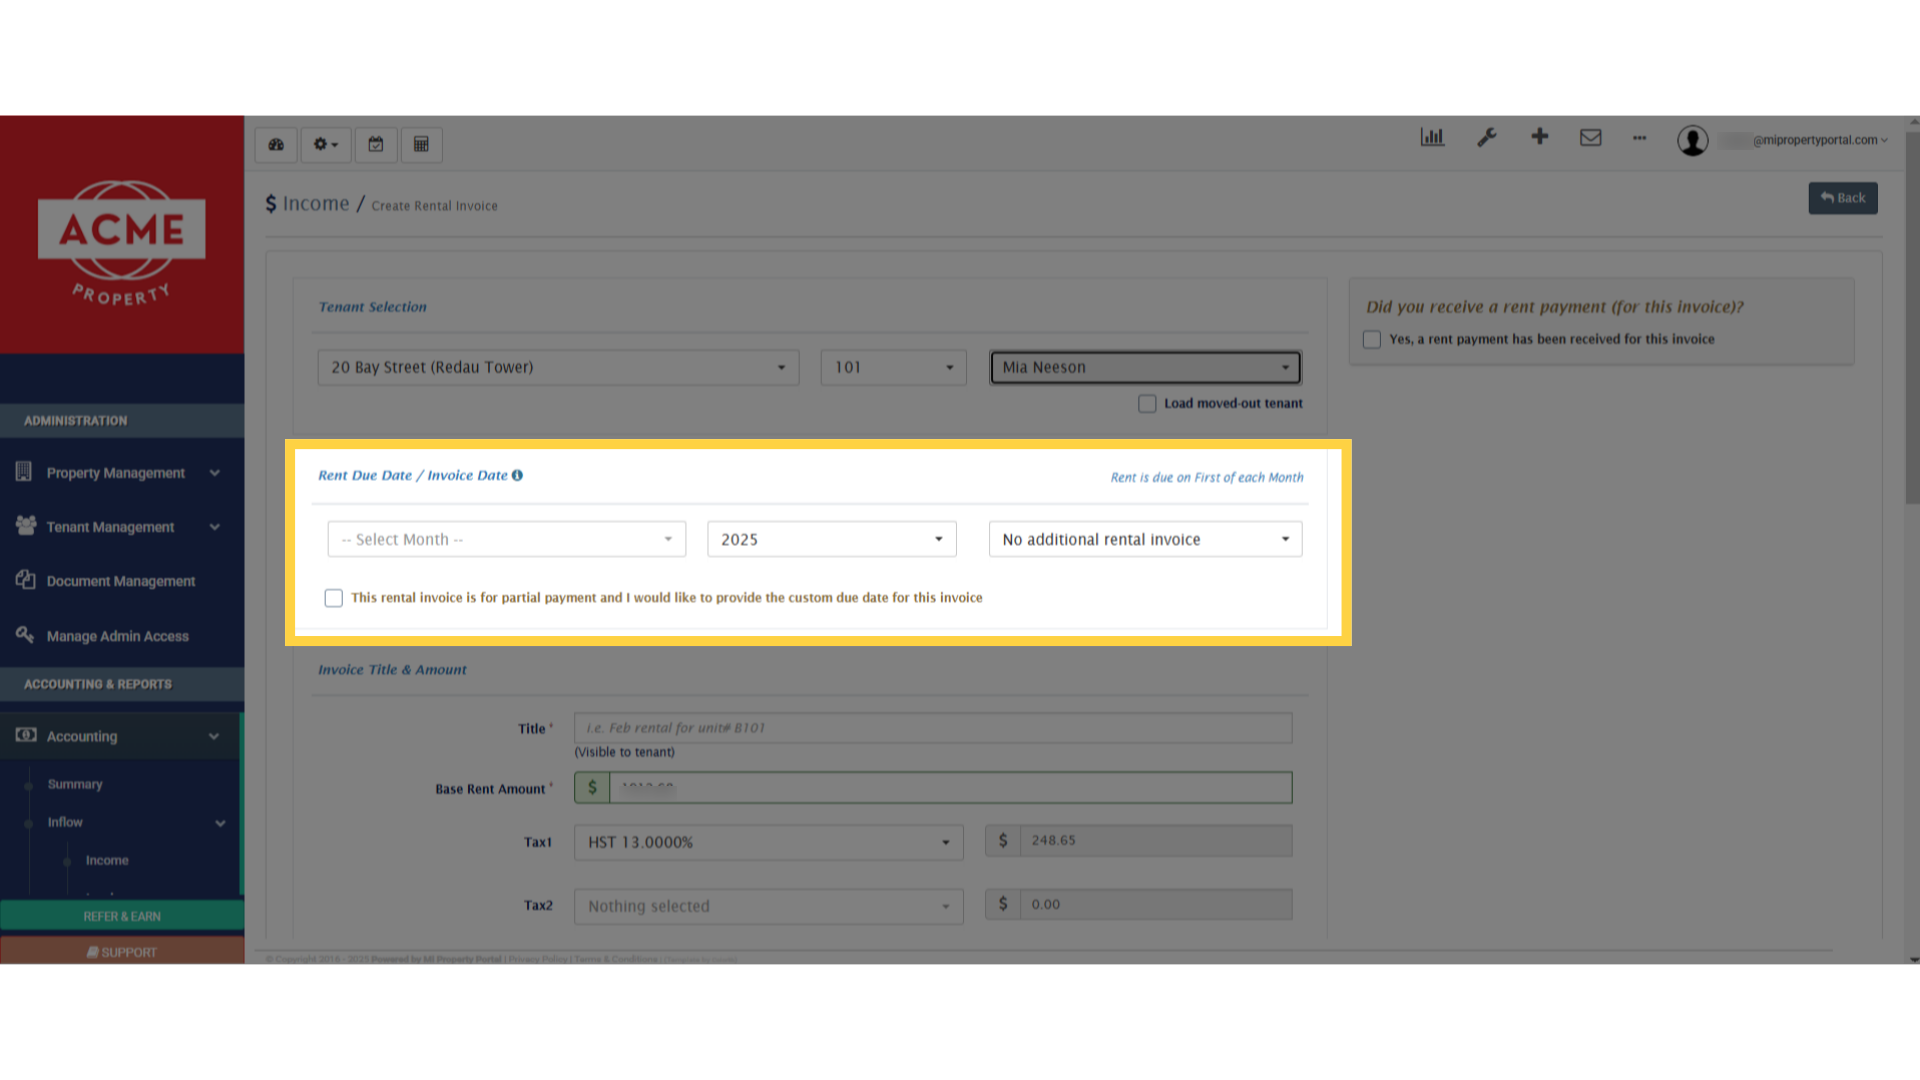
4. It’ll redirect you to this invoice creation page. The system will auto-fill the tenant’s property, unit, and name
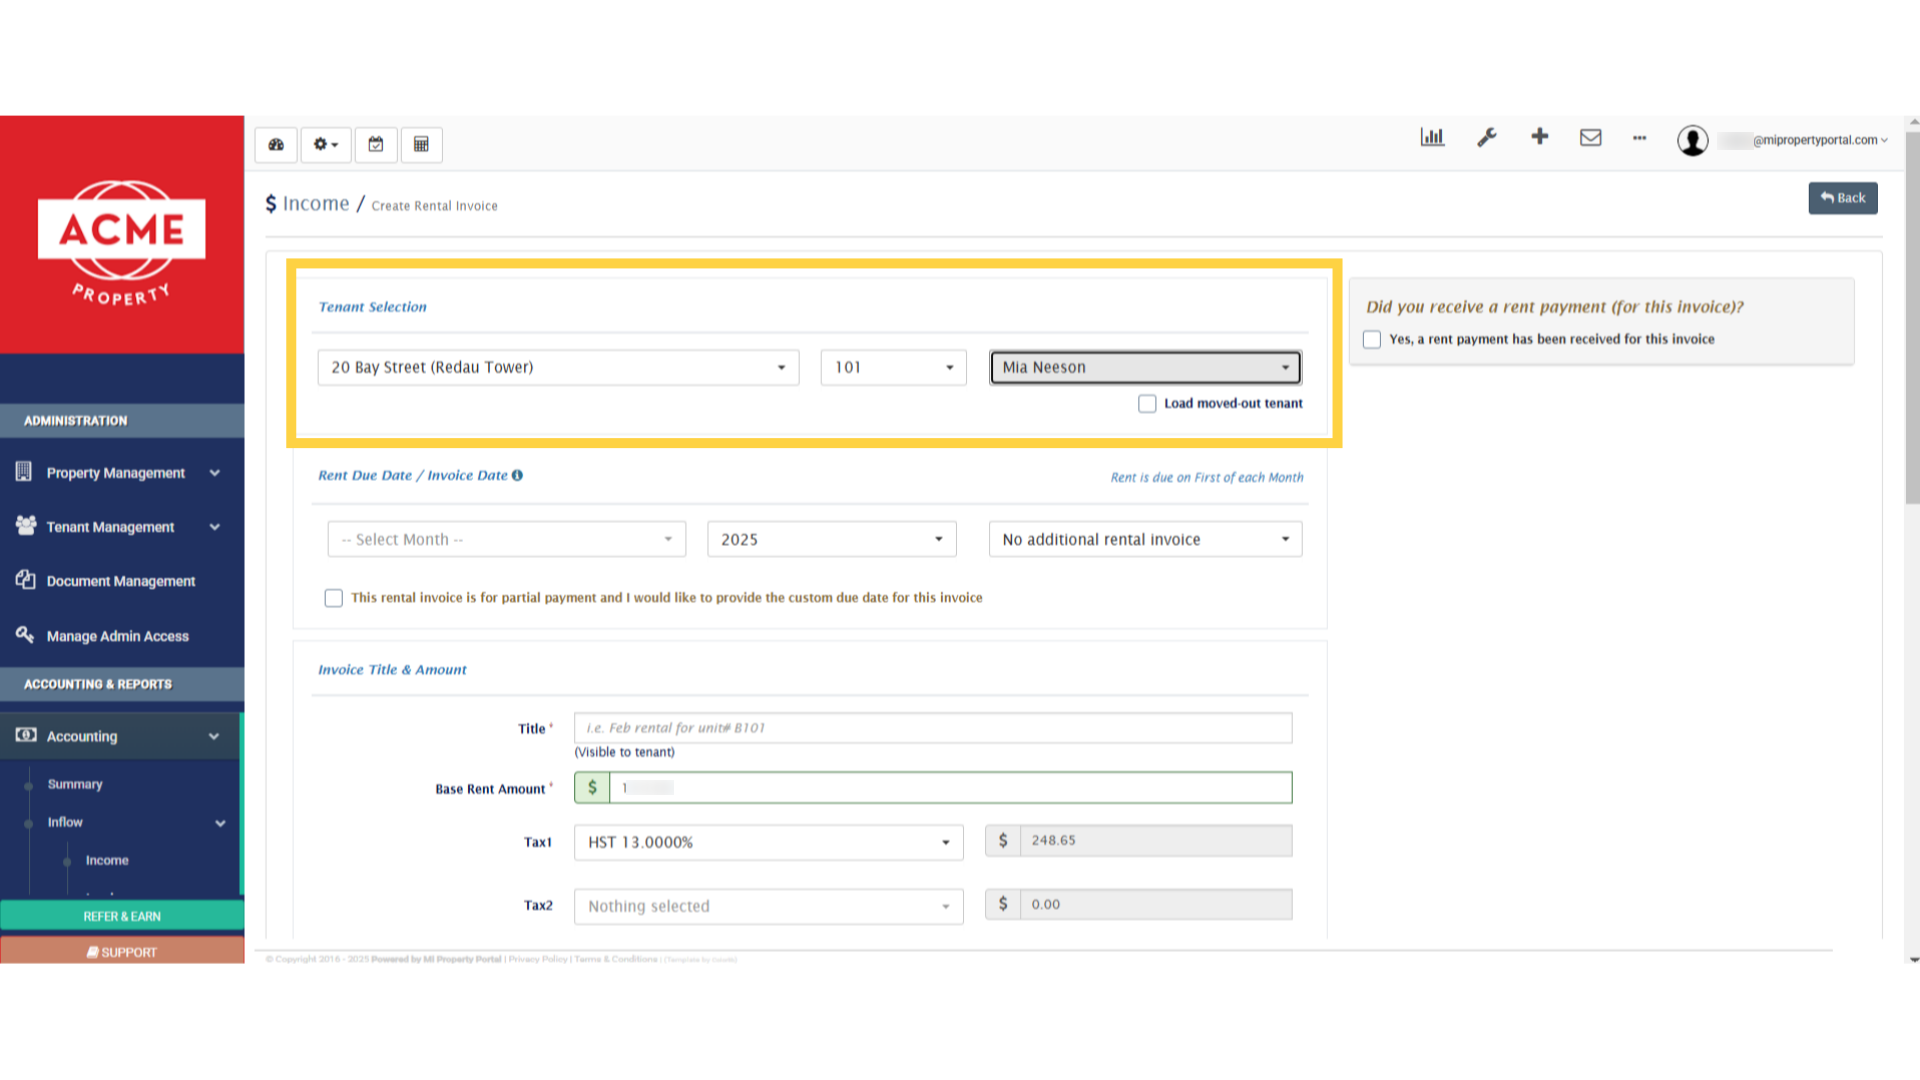
5. Choose the Month & Year for the invoice
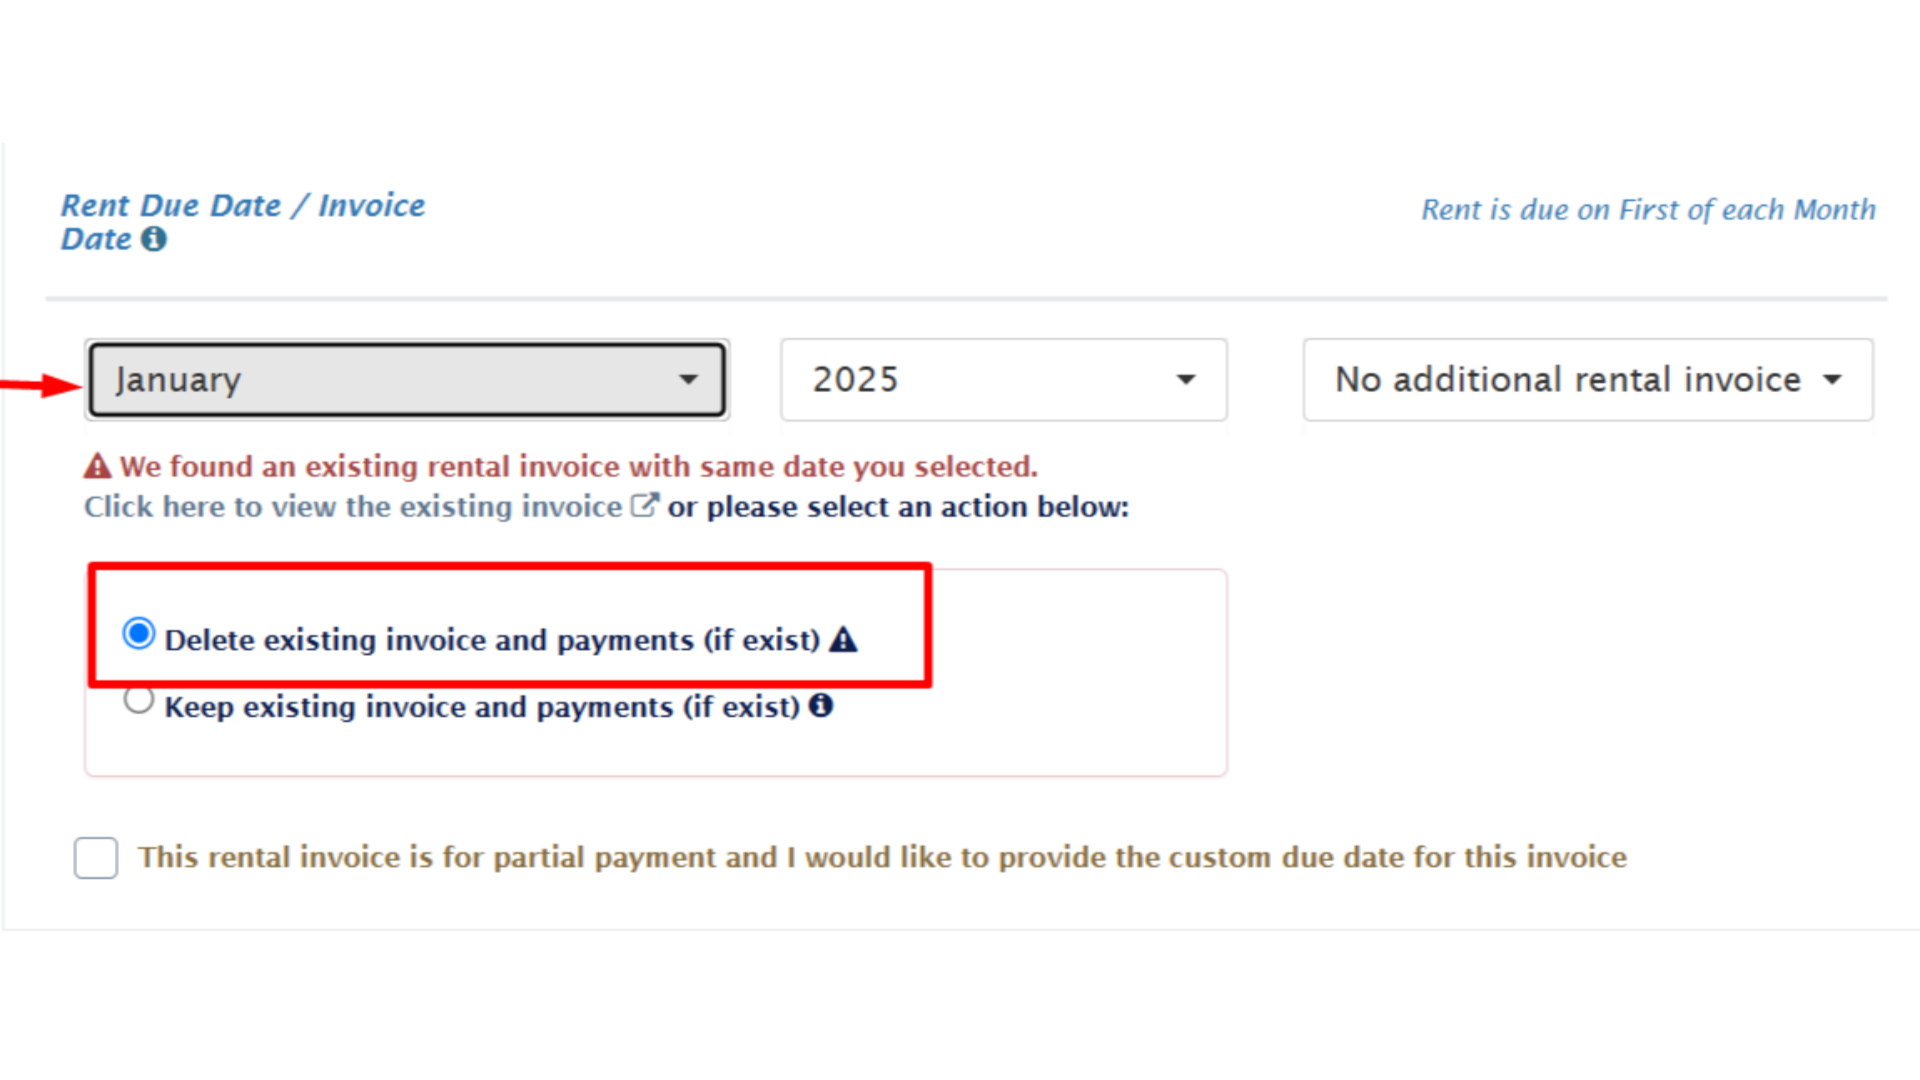
6. If a rental invoice already exist for the selected month, you will get the option to delete the existing invoice
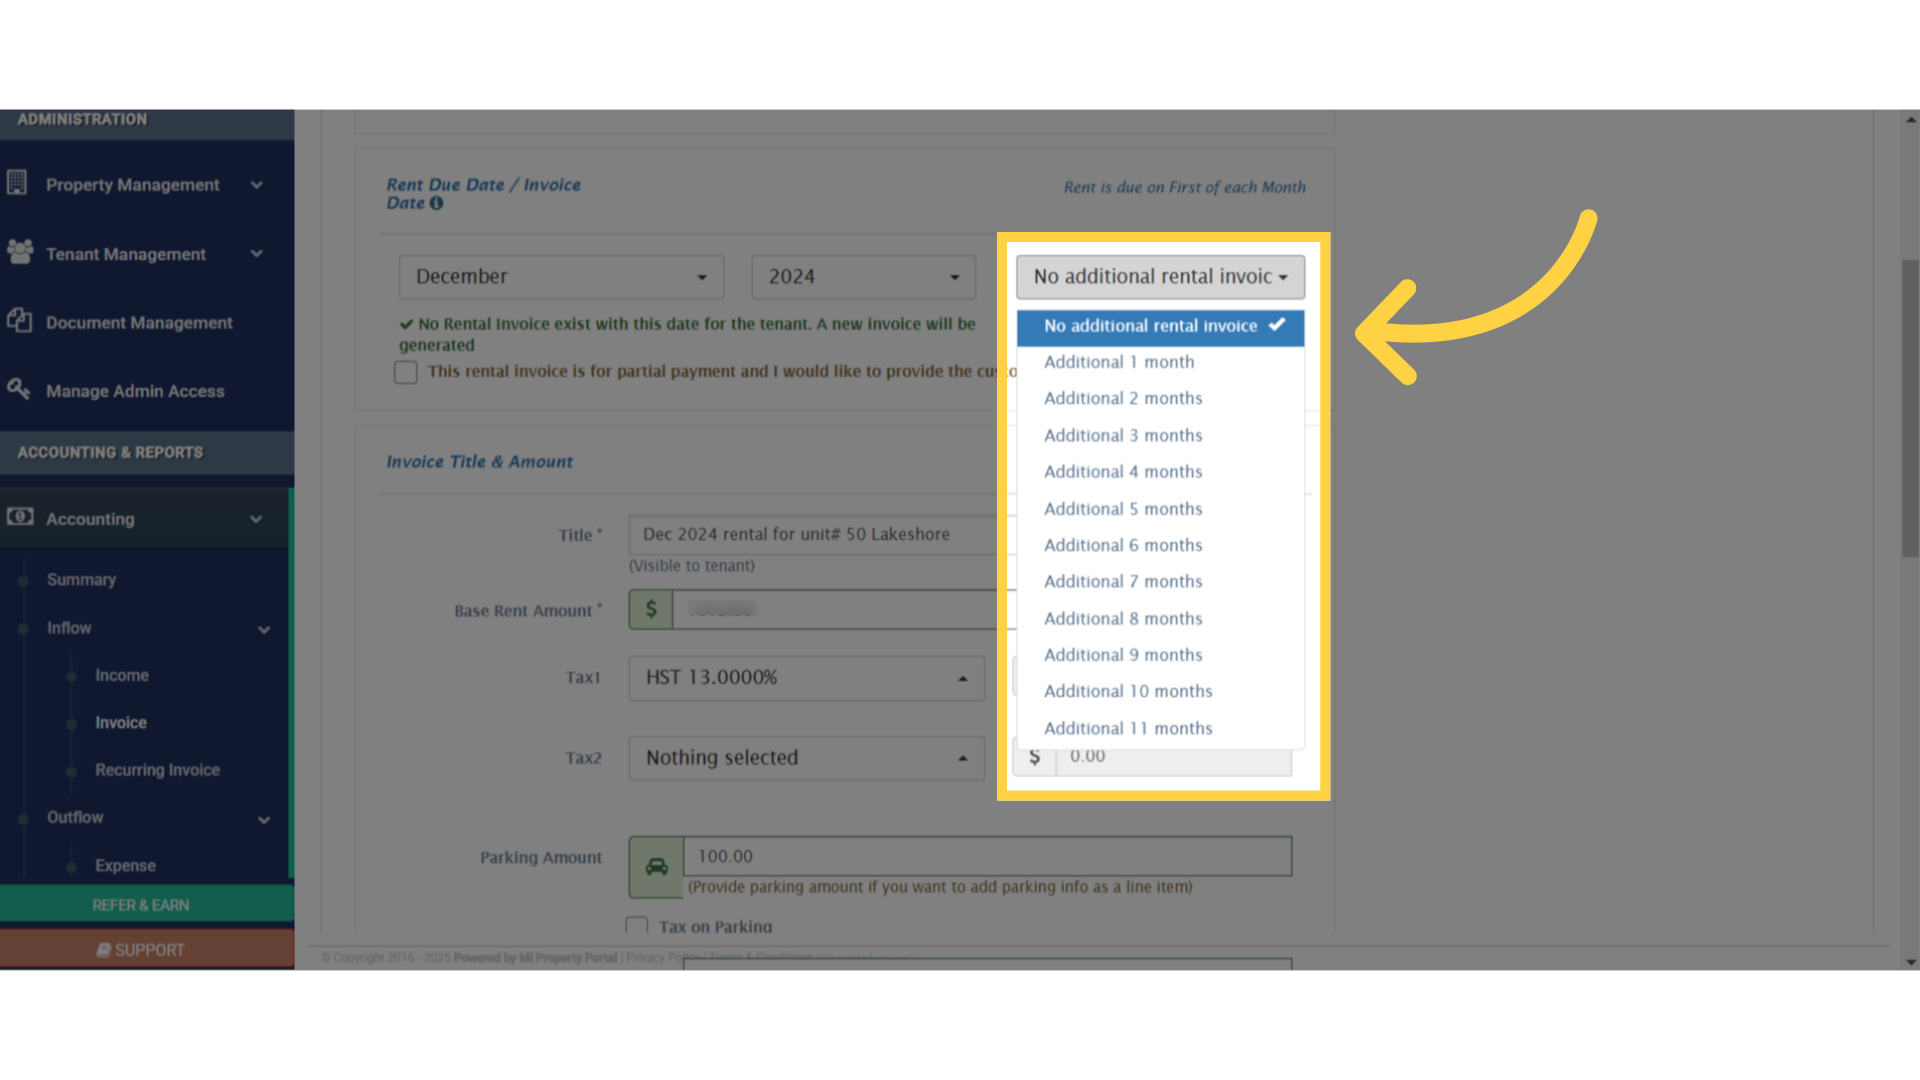
7. Use this dropdown primarily to generate invoices from the past. However, you also have the flexibility to create rental invoices dated up to 11 months in the past, or future relative to the month you select
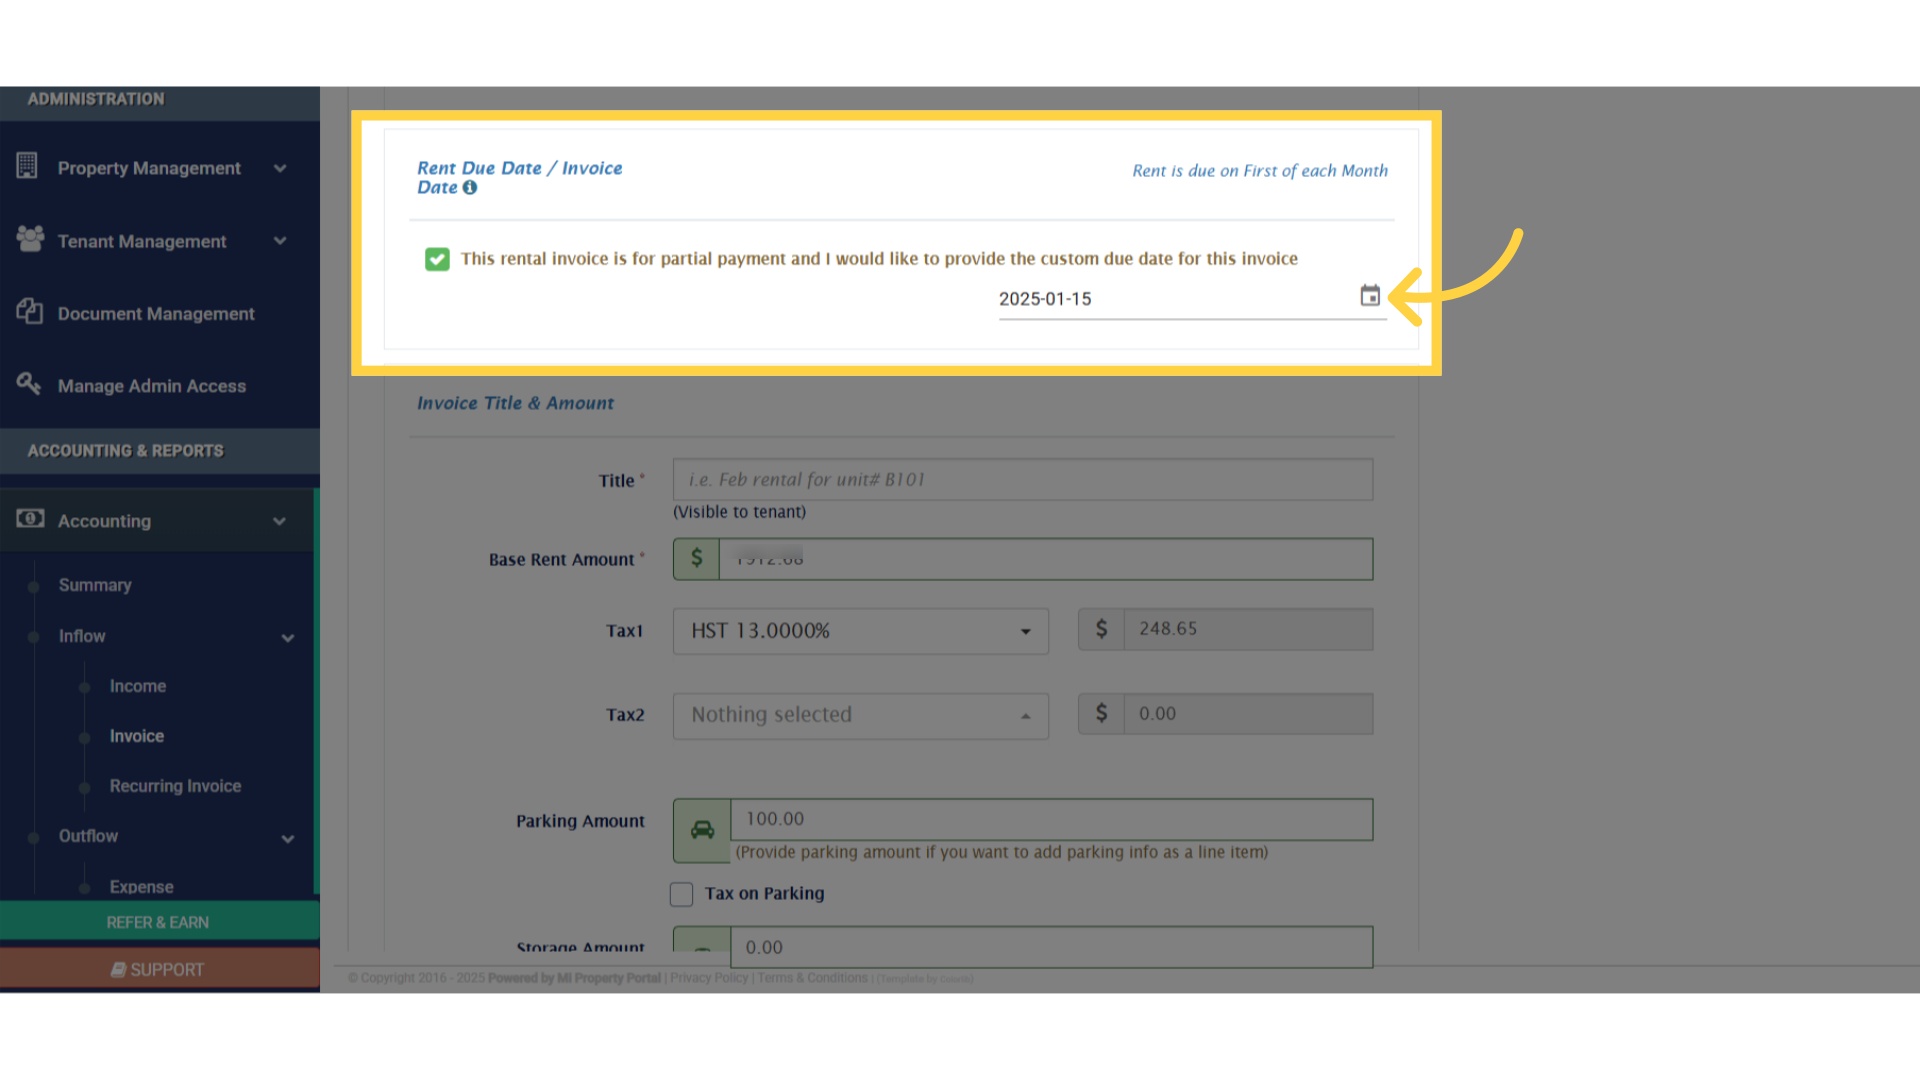
8. Check this box if you are charging for a partial month. Click here. The calendar icon sets an invoice date for a partial rental invoice
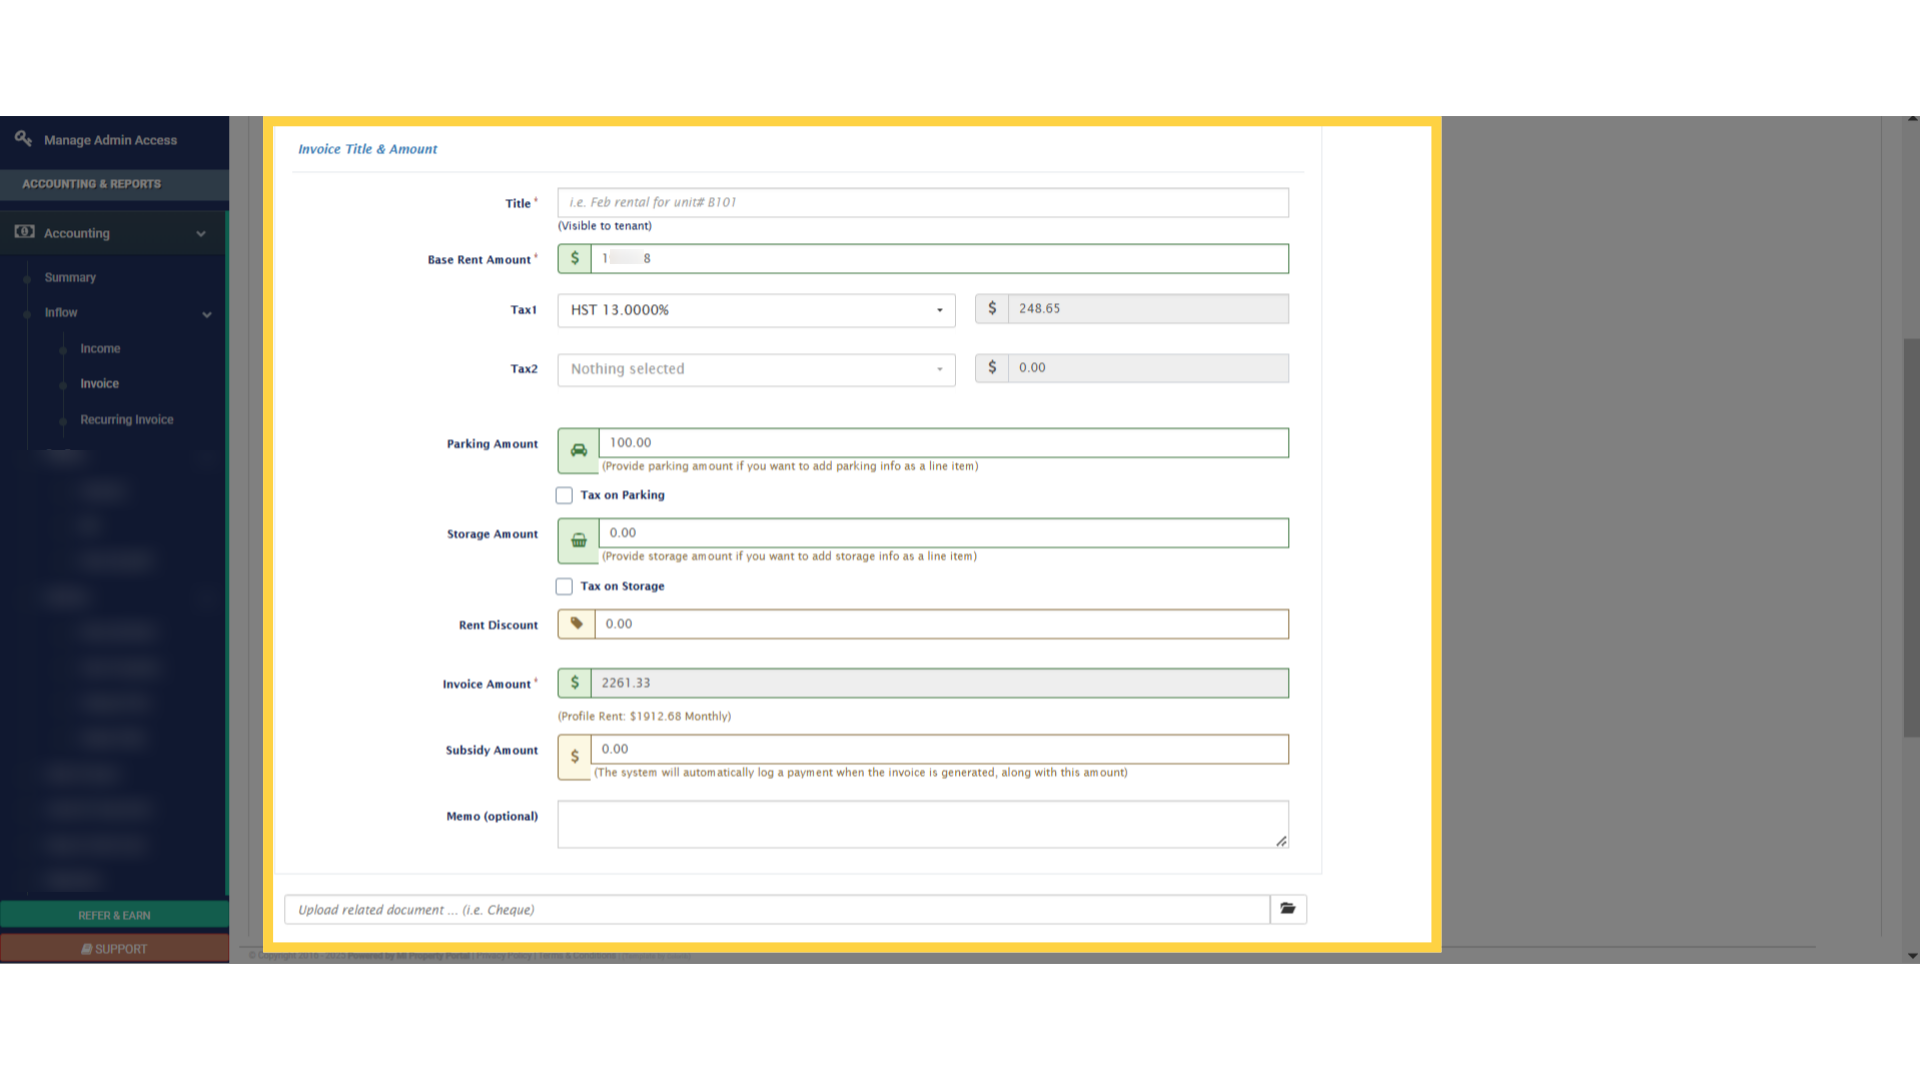
9. The invoice title will be auto-filled for the monthly rental invoice. For partial, you need to type in. The base rent will be automatically filled; adjust it if necessary.
If the unit is commercial, the applicable sales tax will be auto-calculated.
Add parking, storage, discounts, or subsidies (Optional). Attach relevant documents (Optional)
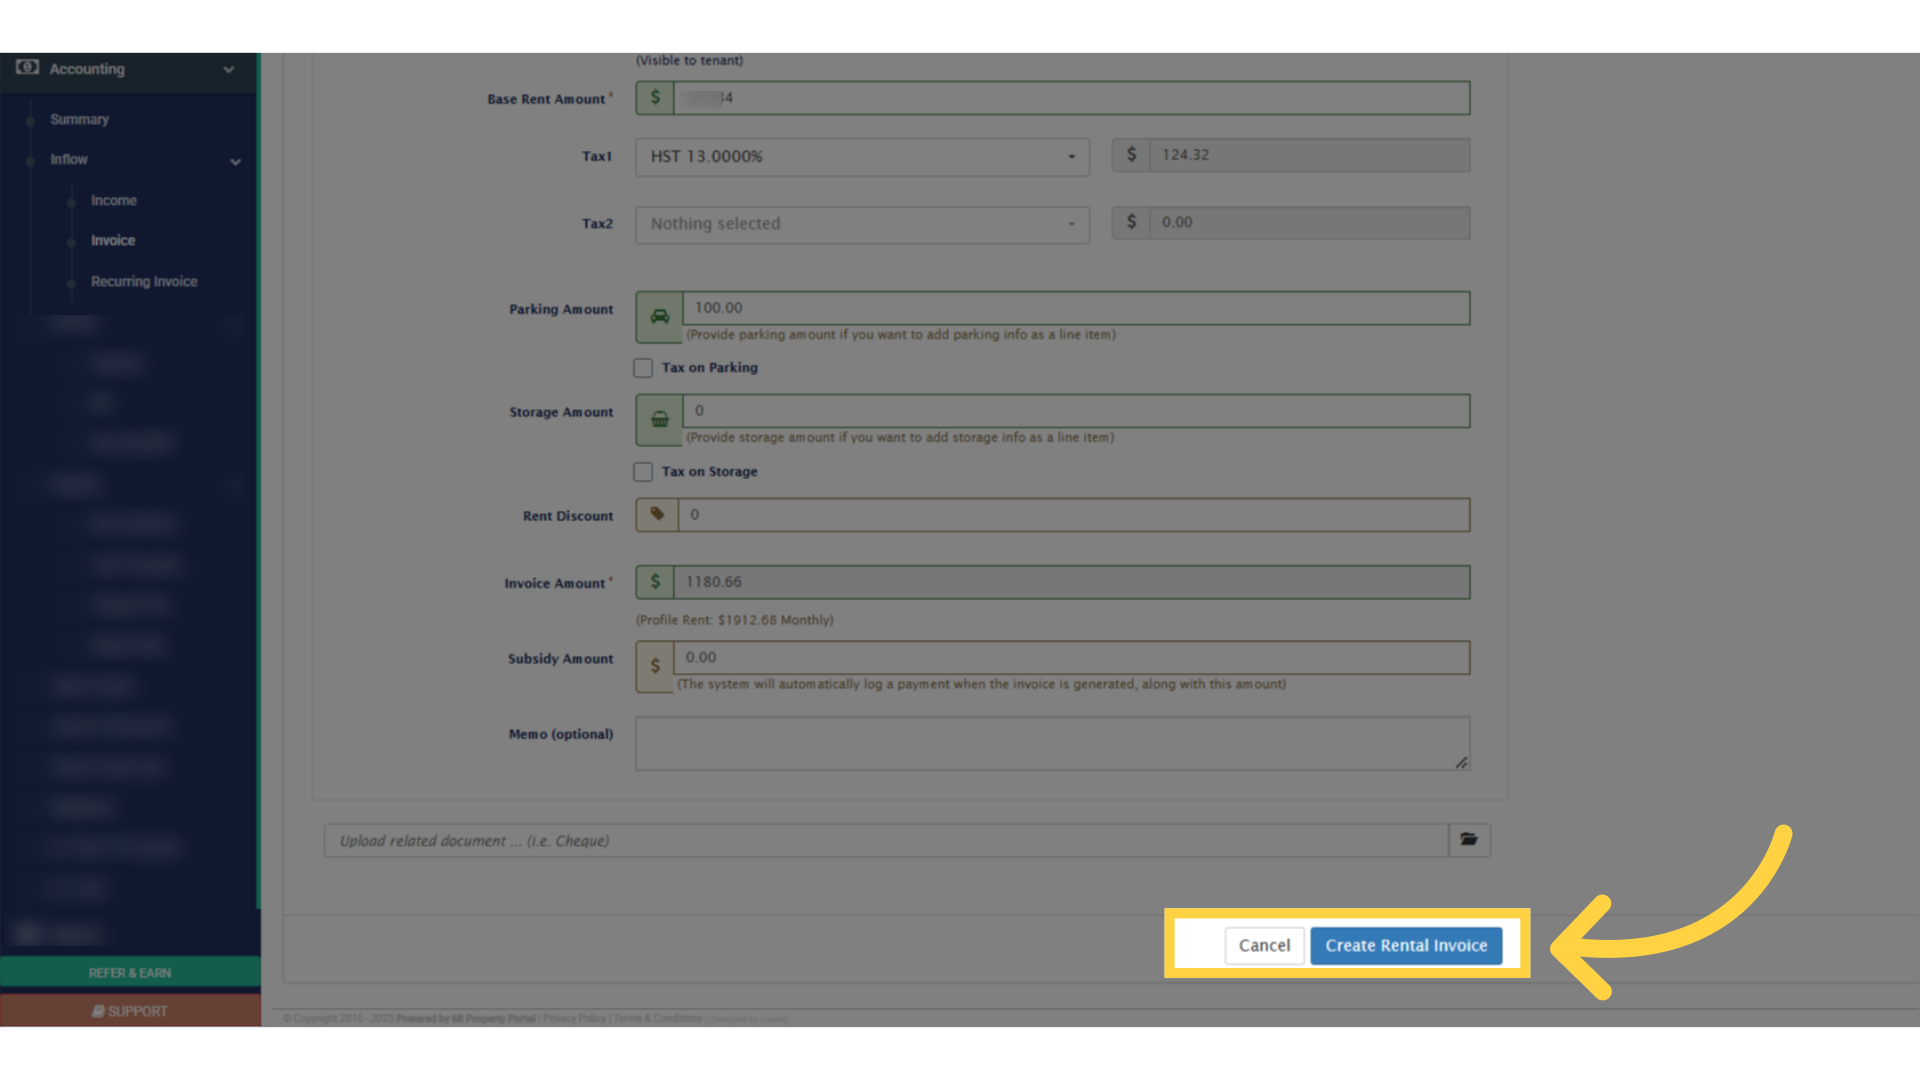
10. Click Create Rental Invoice to finalize
11. You’ll be redirected to the invoice view page
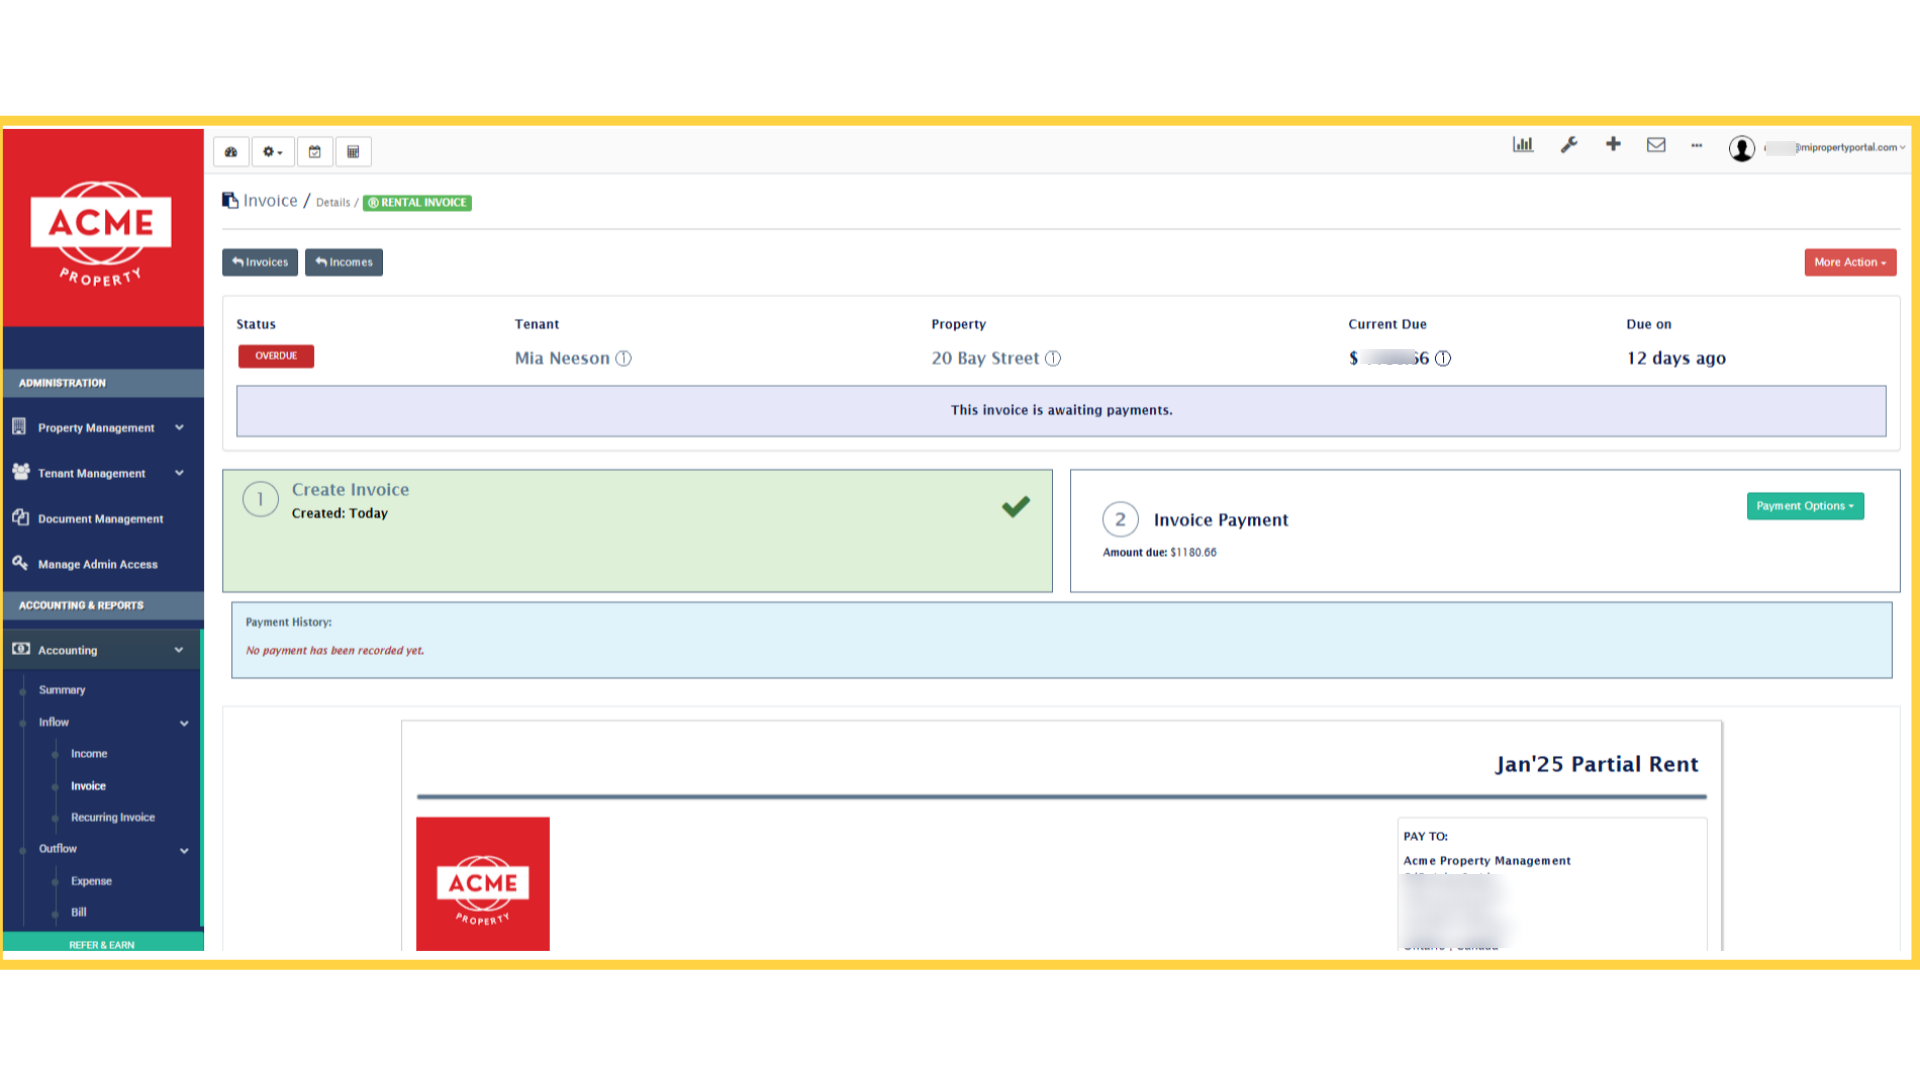
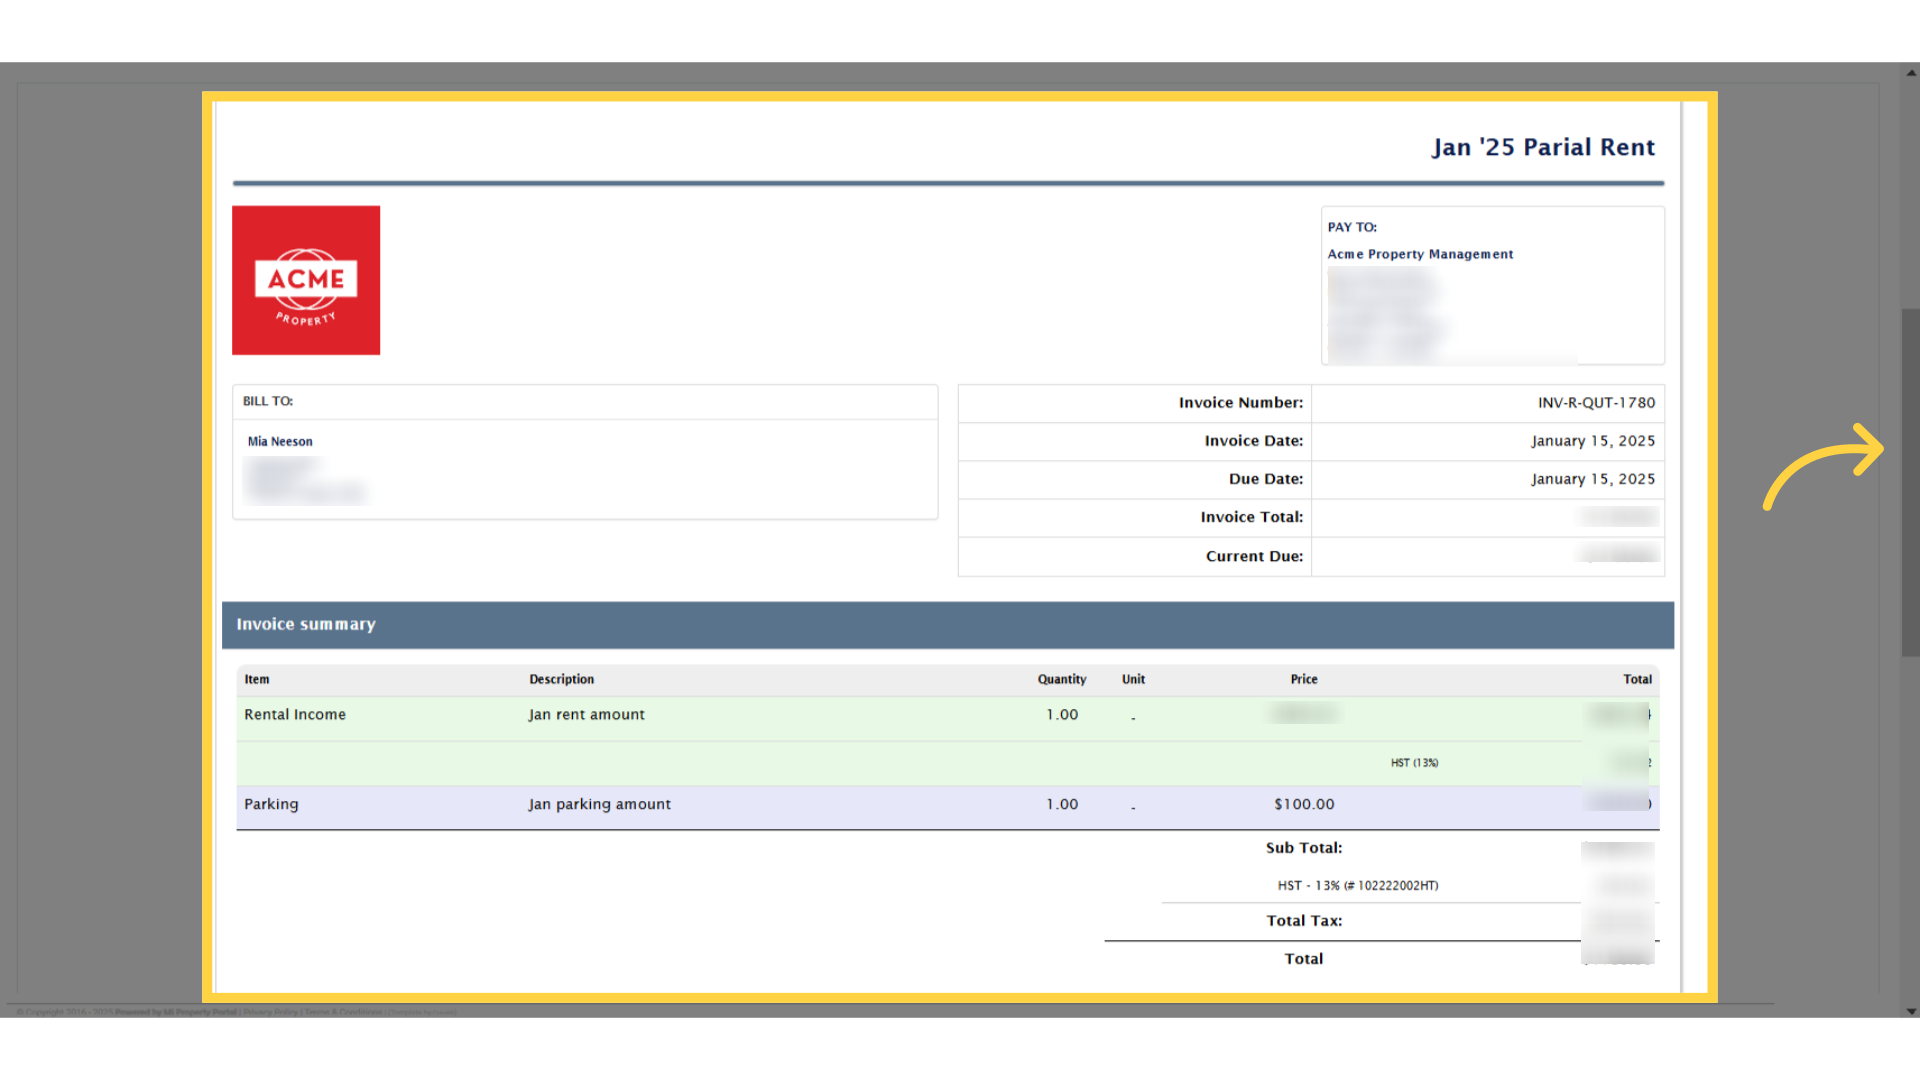
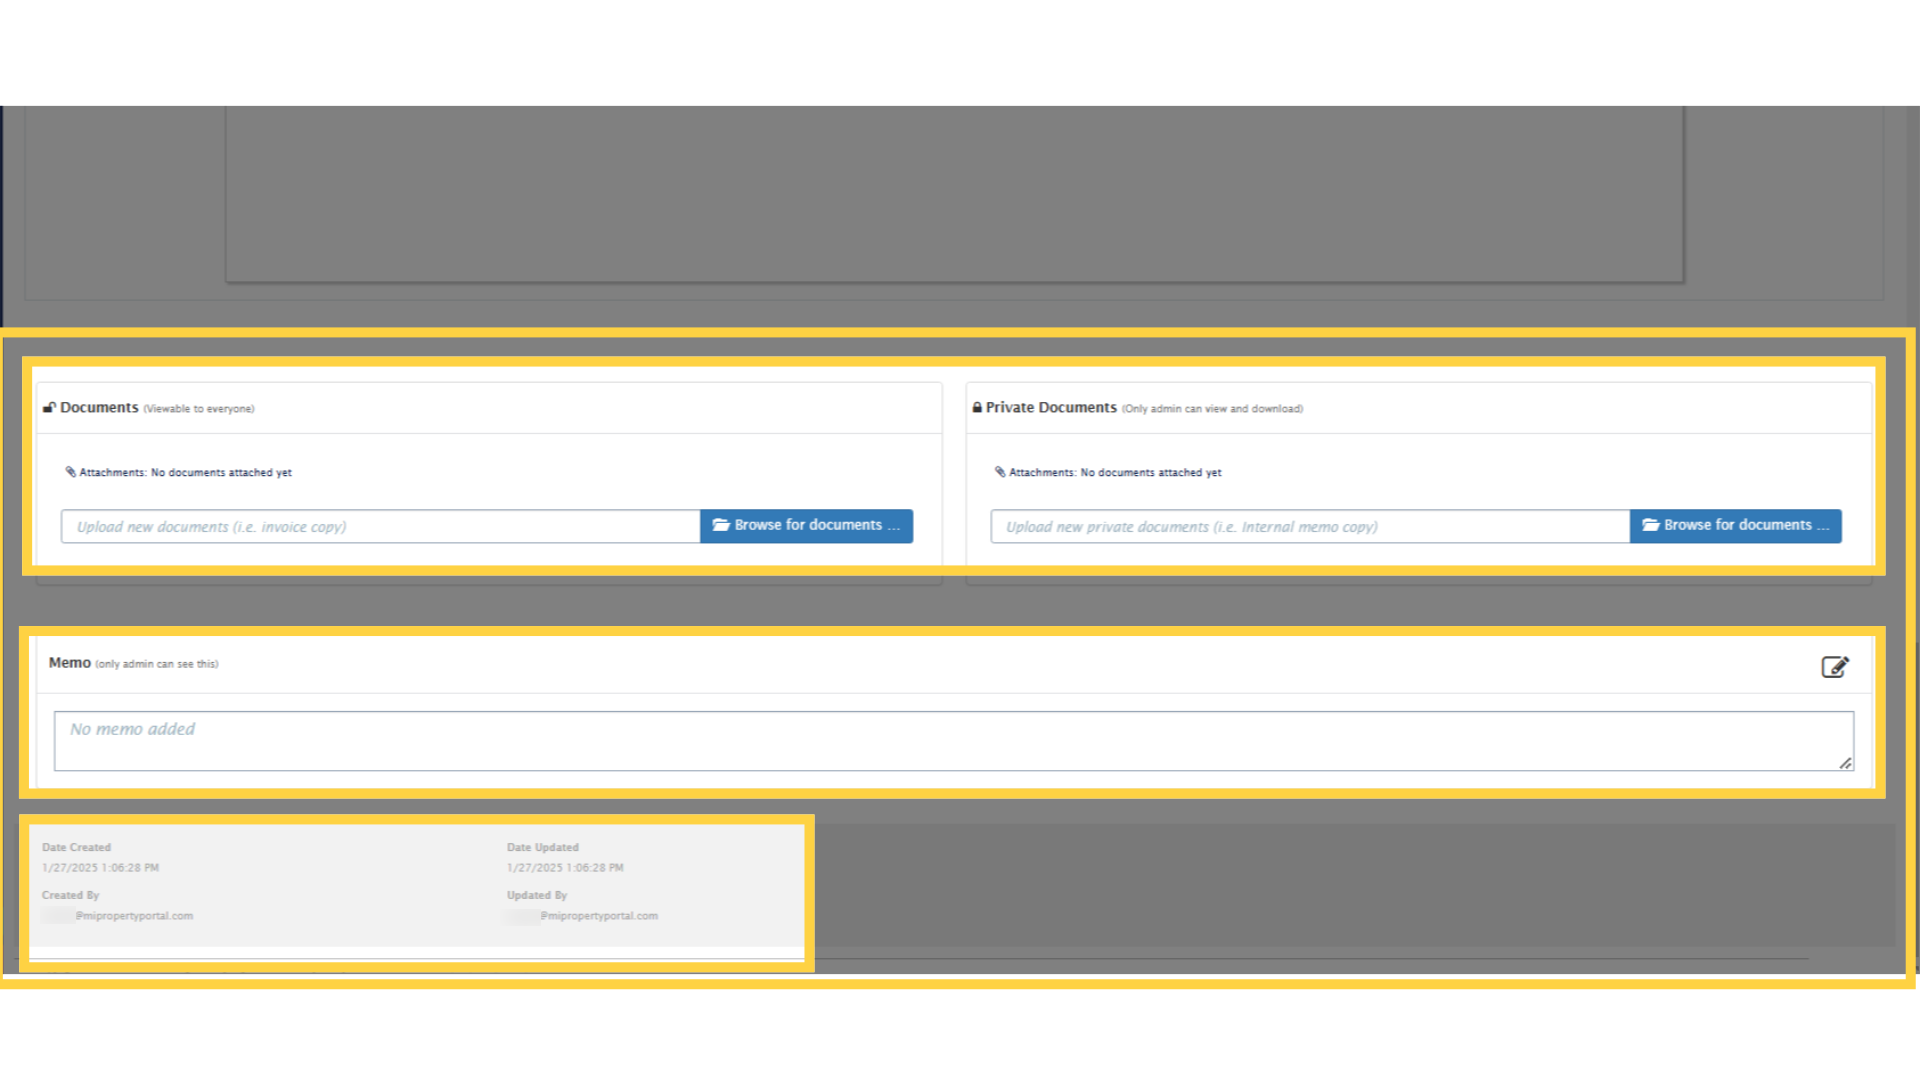
12. Review the details, scroll down
13. For memos, and attach more documents (Optional)
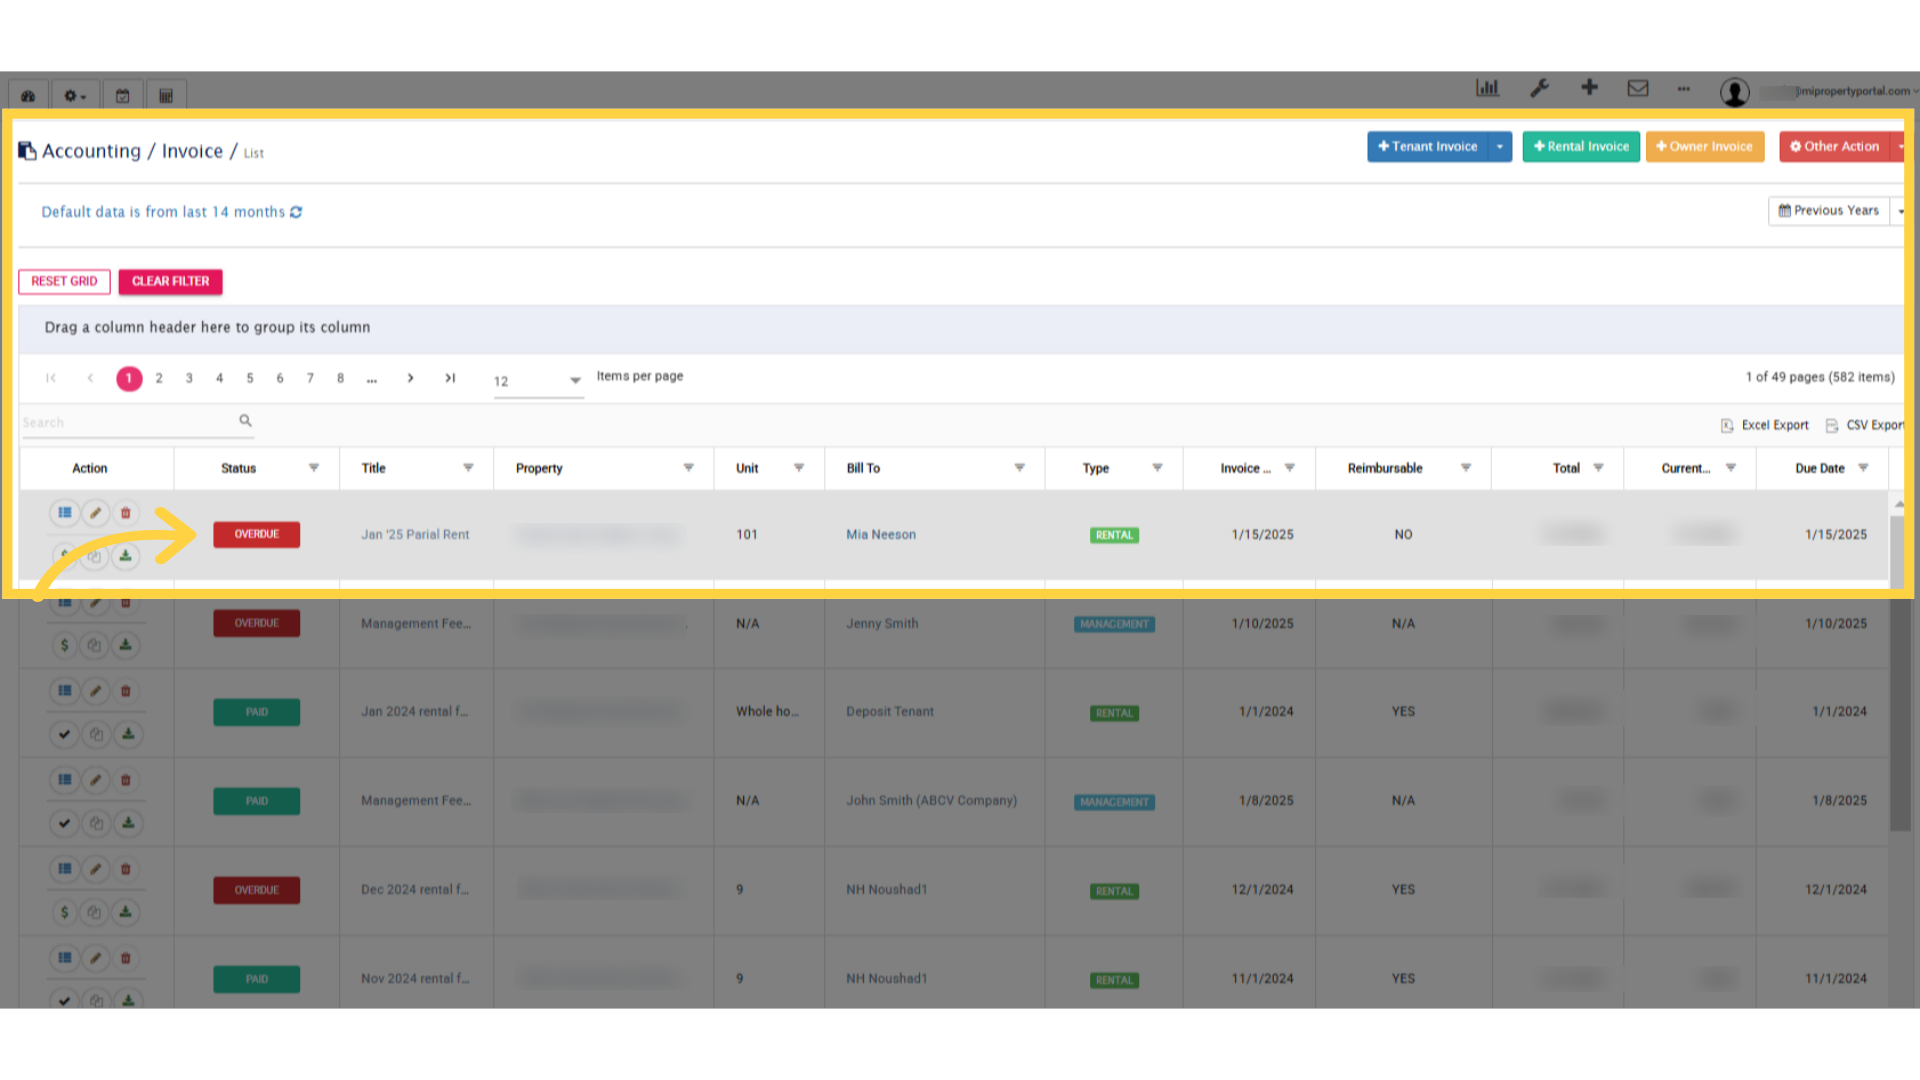
14. The invoice is now accessible under the Invoices section in Accounting
In this video, we learned How to create a Rental Invoice. See you on the next one.