How to Add or Remove Your Signature in the Portal?
222 views 0 December 1, 2022 Updated on April 28, 2025 mippsupportadmin
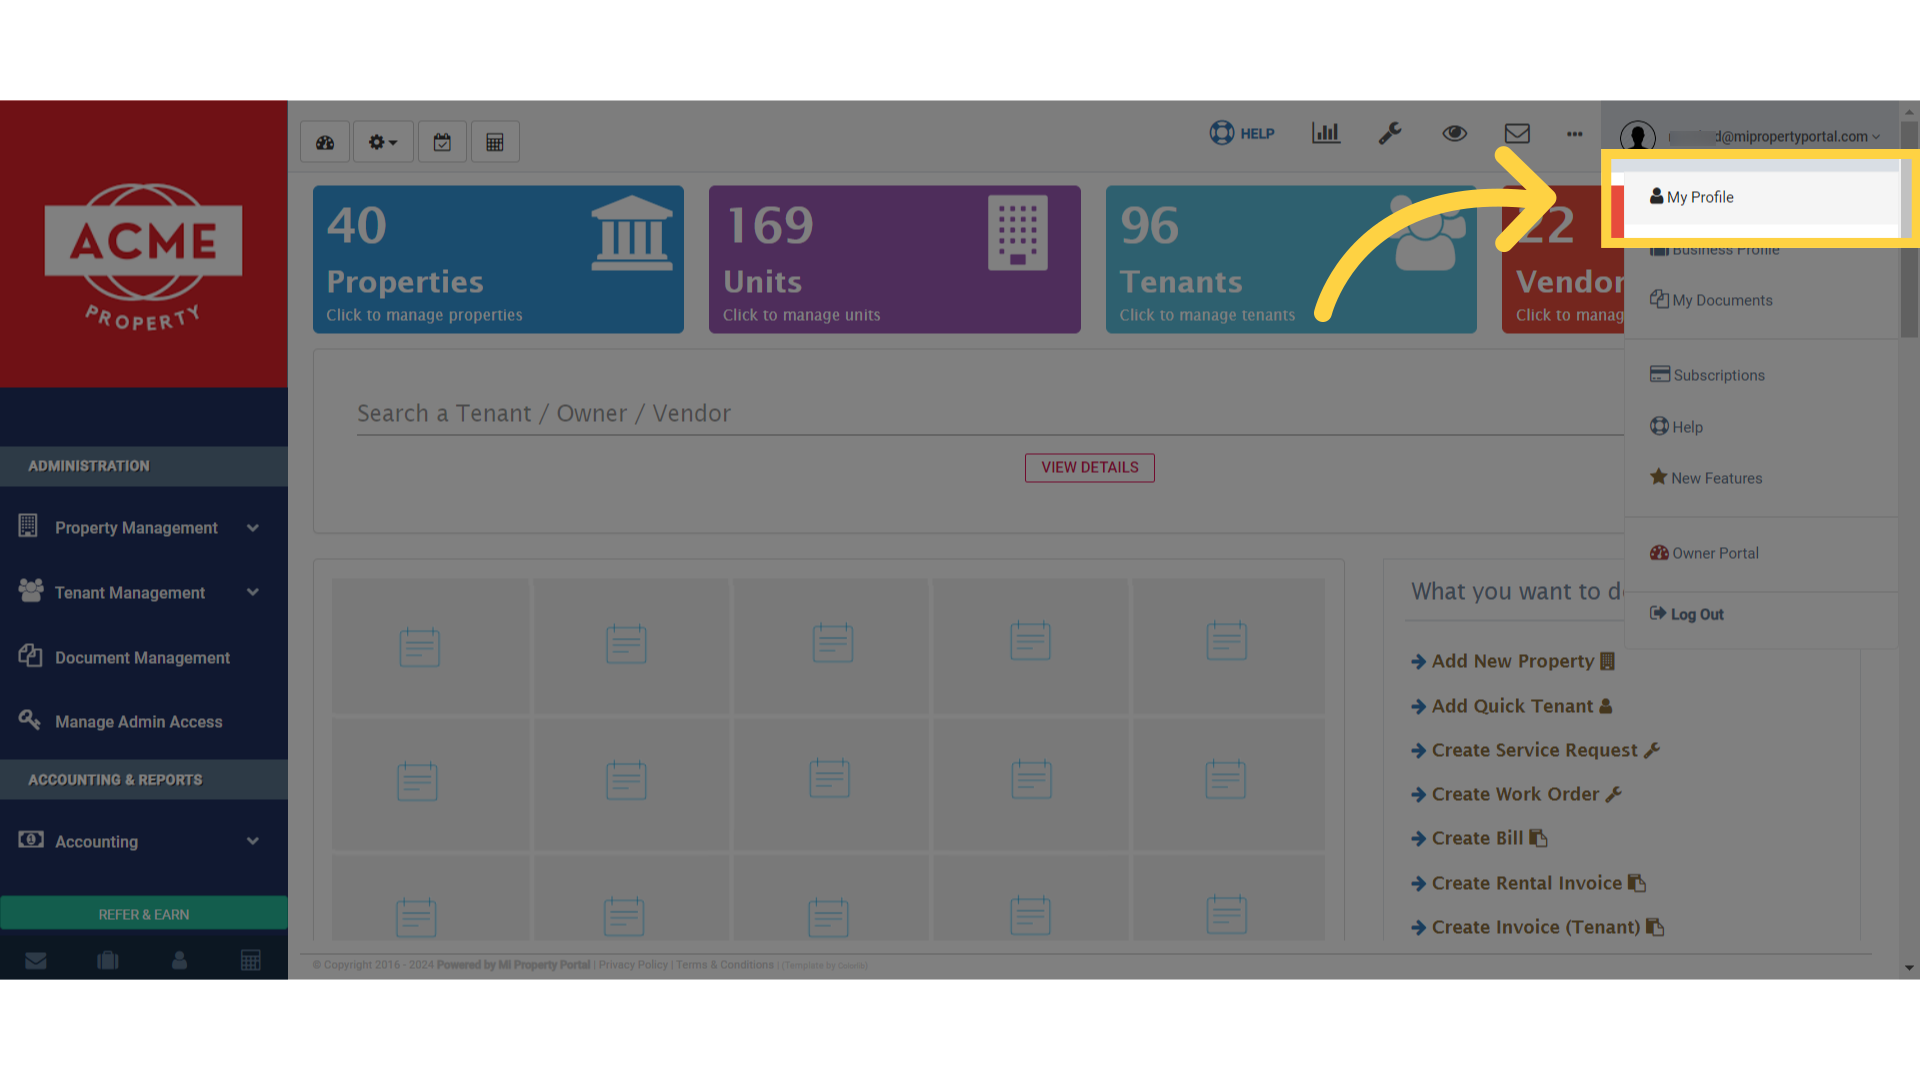
1. From the dashboard, click “My Profile” from the user drop down menu.
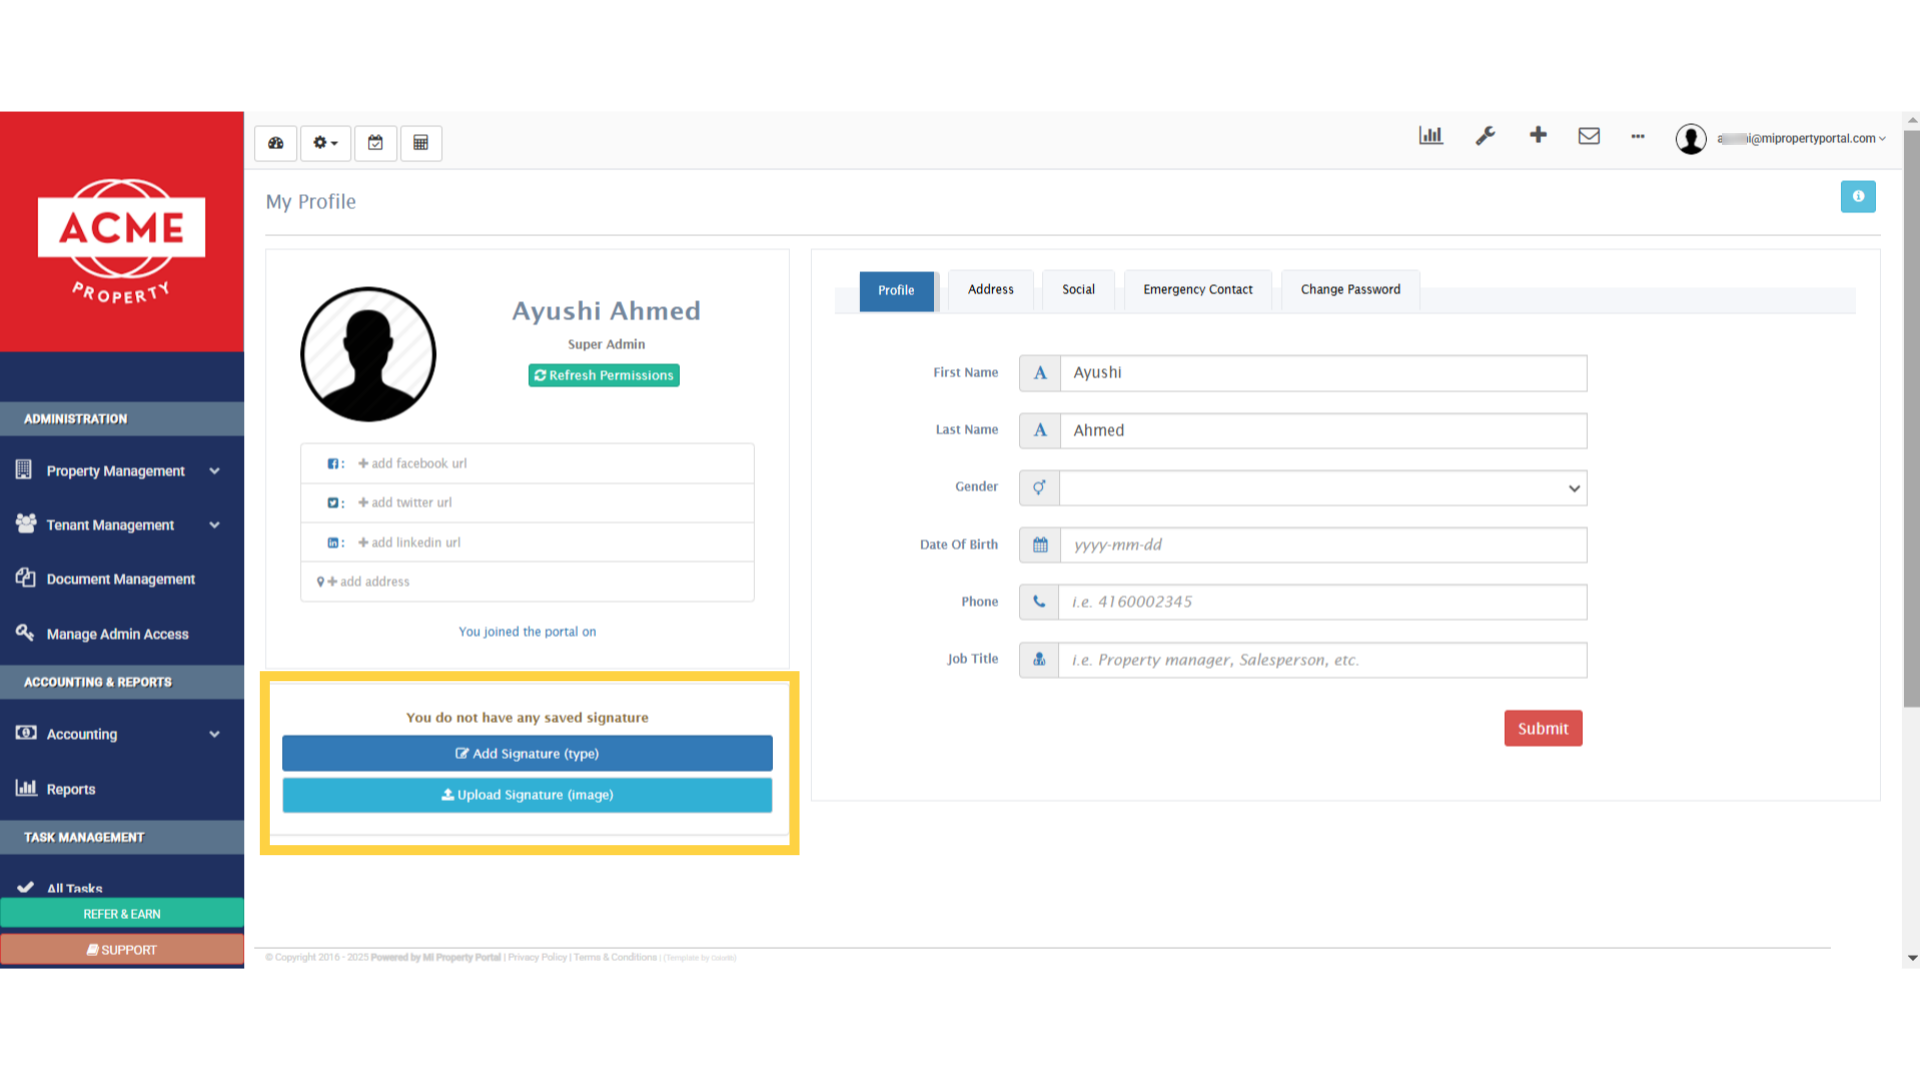
2. This is how your My Profile page will appear

3. Notice this section here, that says you don’t have any saved signature yet.
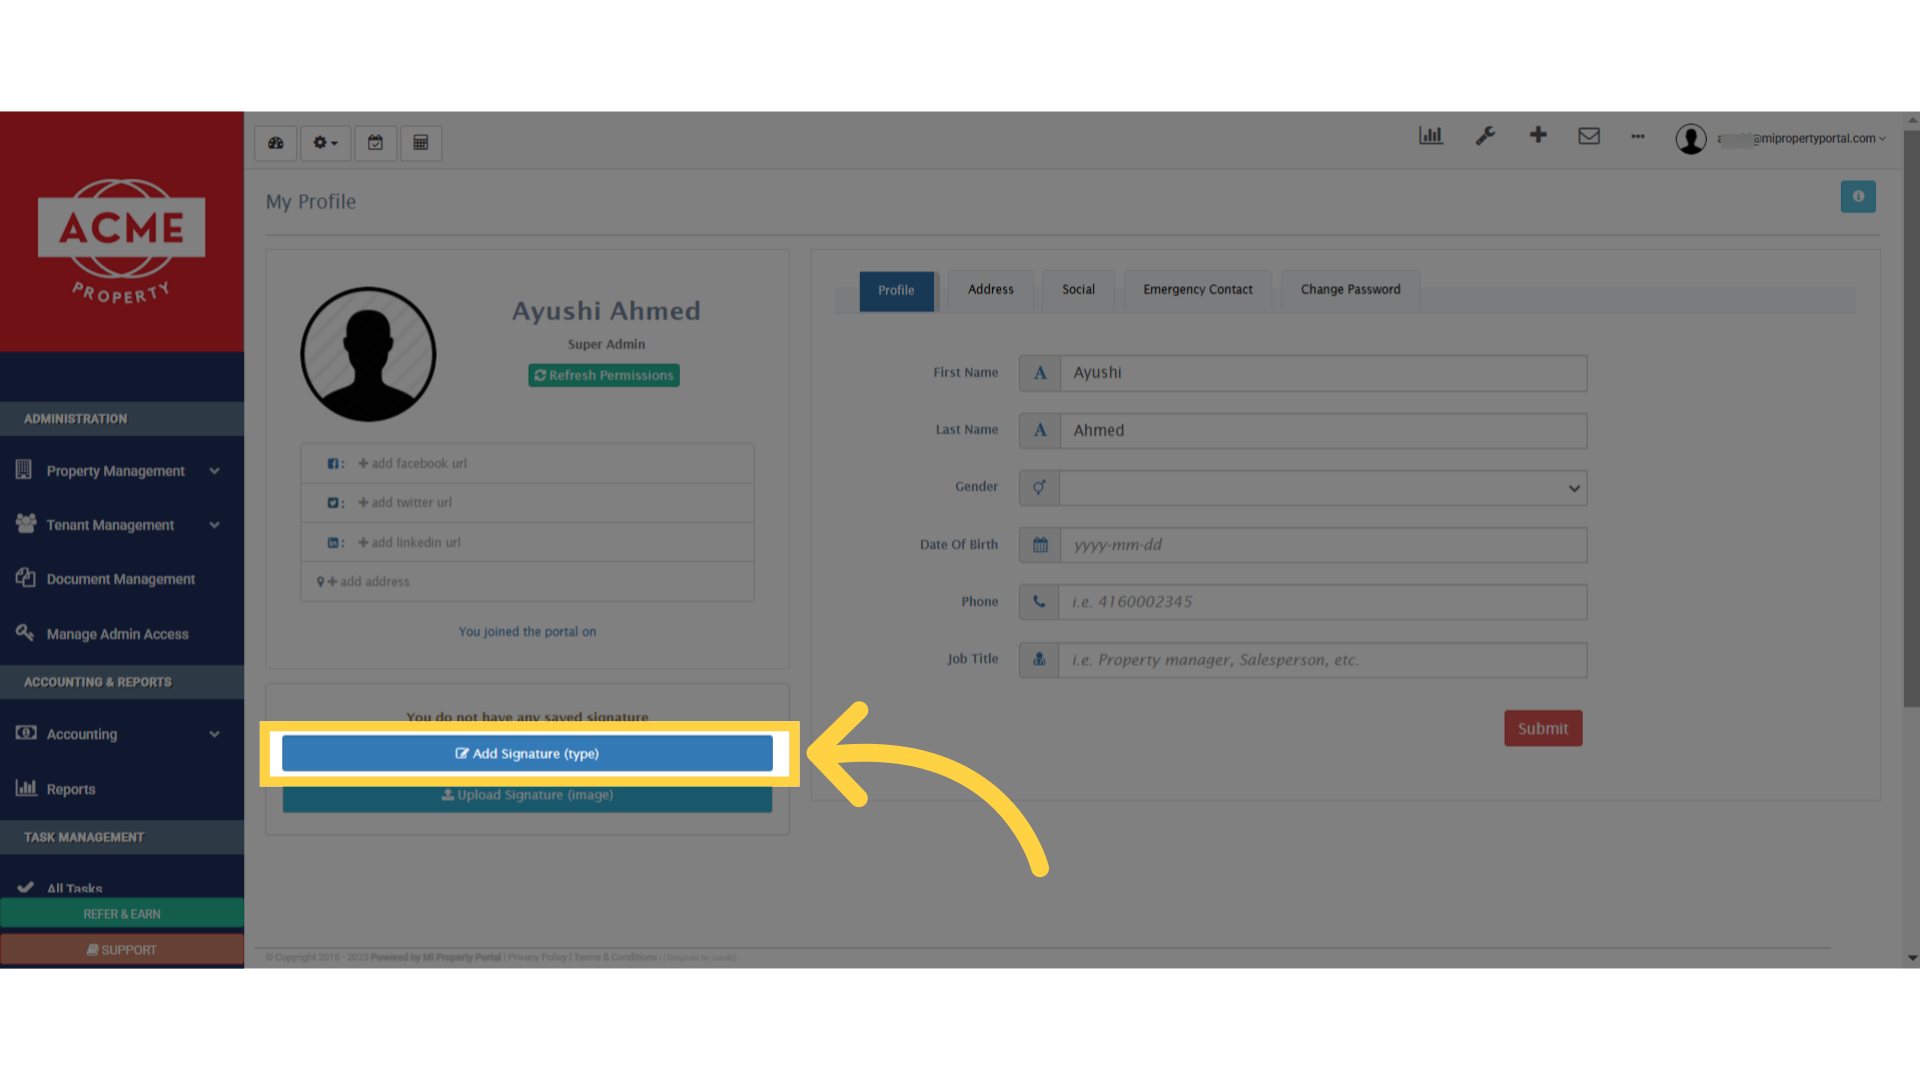
4. First, click on the Add Signature button. It’s a quick and easy way to create a system-generated signature, within the portal!
5. Simply type your signature, directly into this box, under Type Your Name
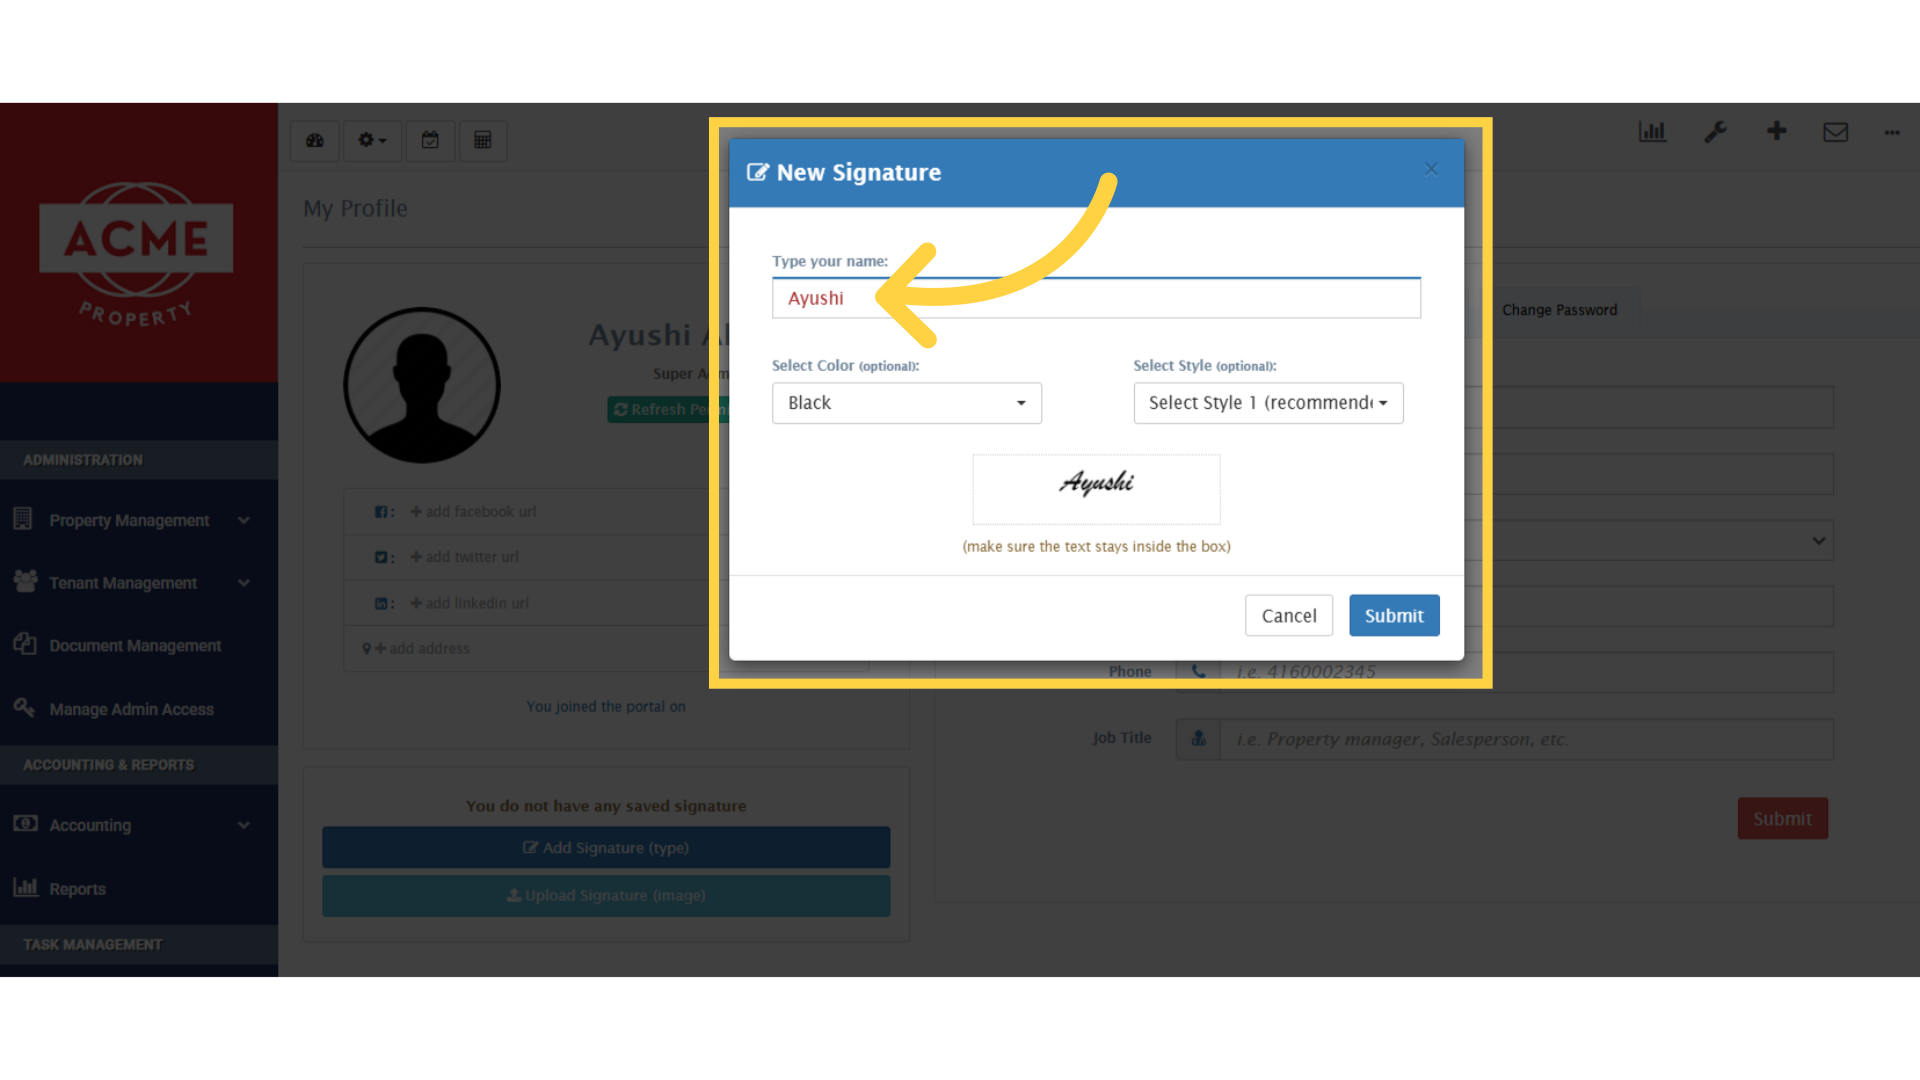
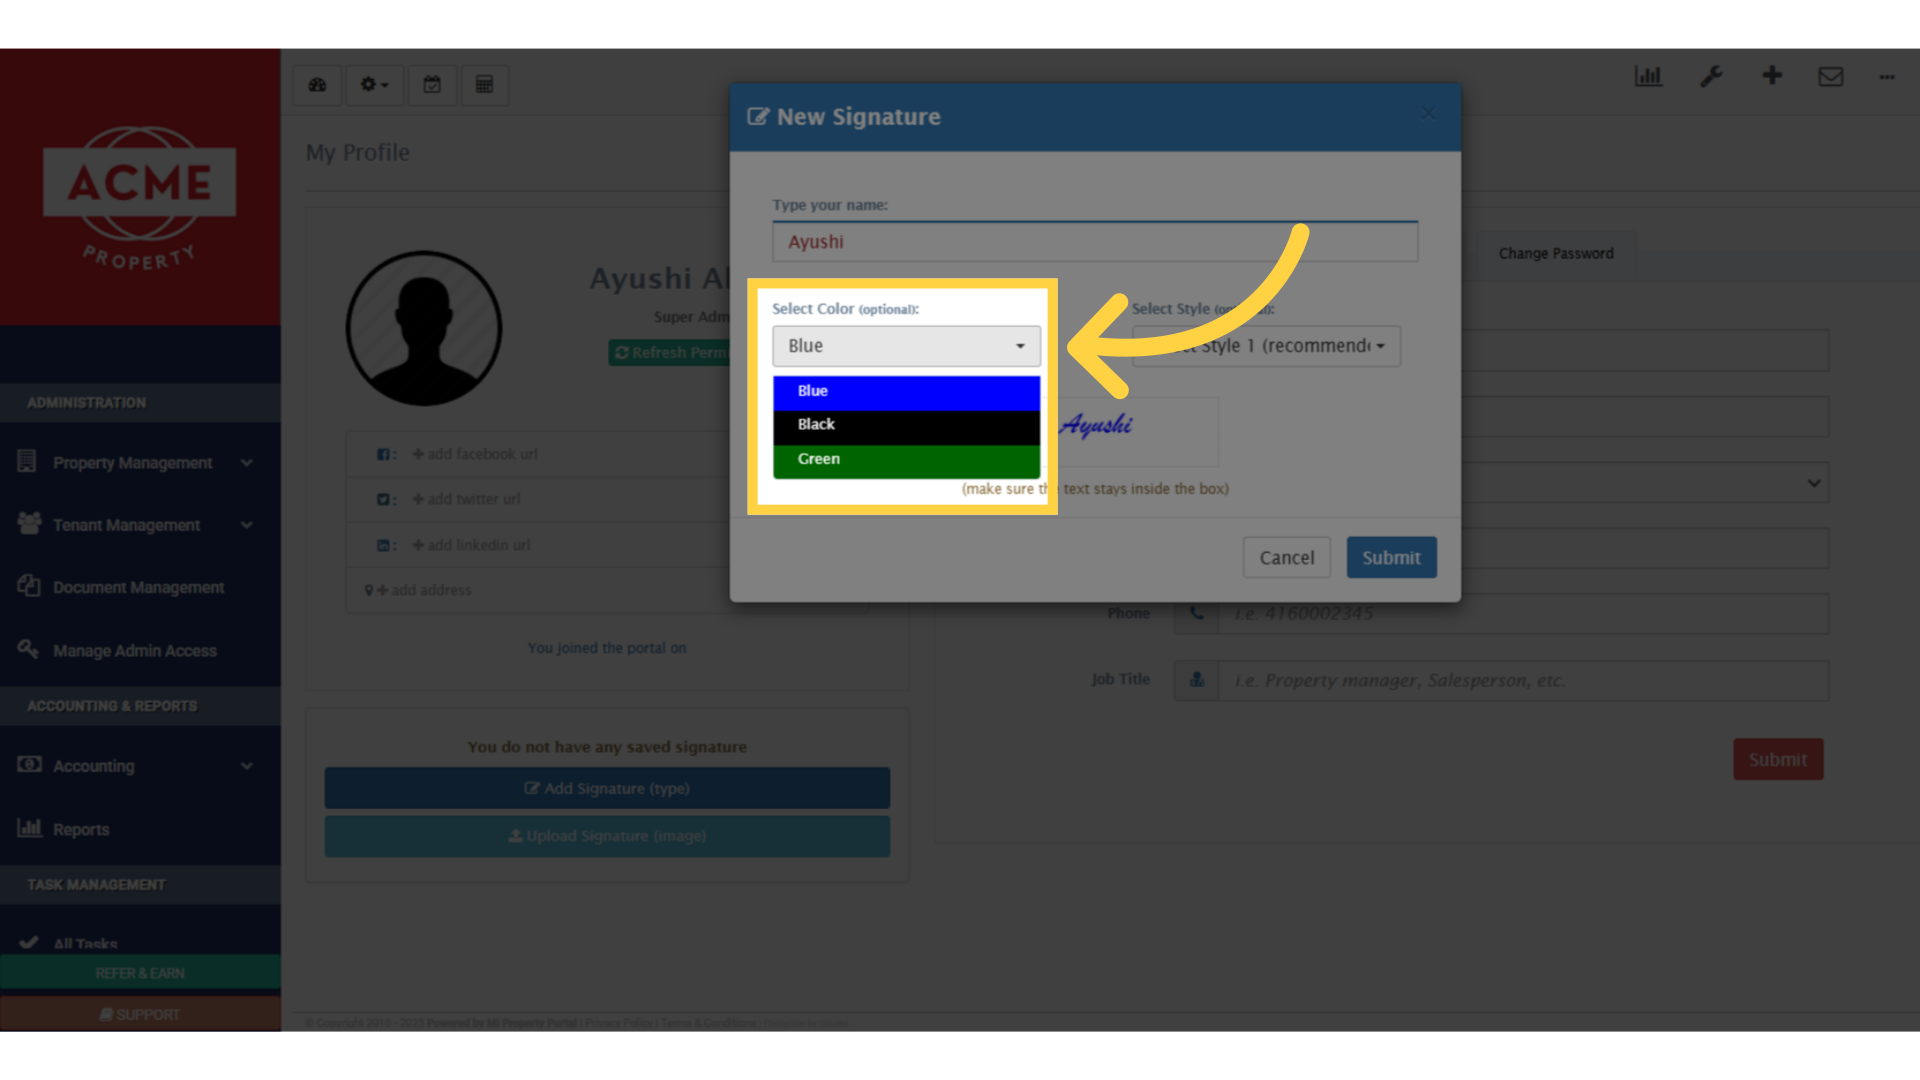
6. You can click on the Select Color dropdown to choose a colour for your signature.
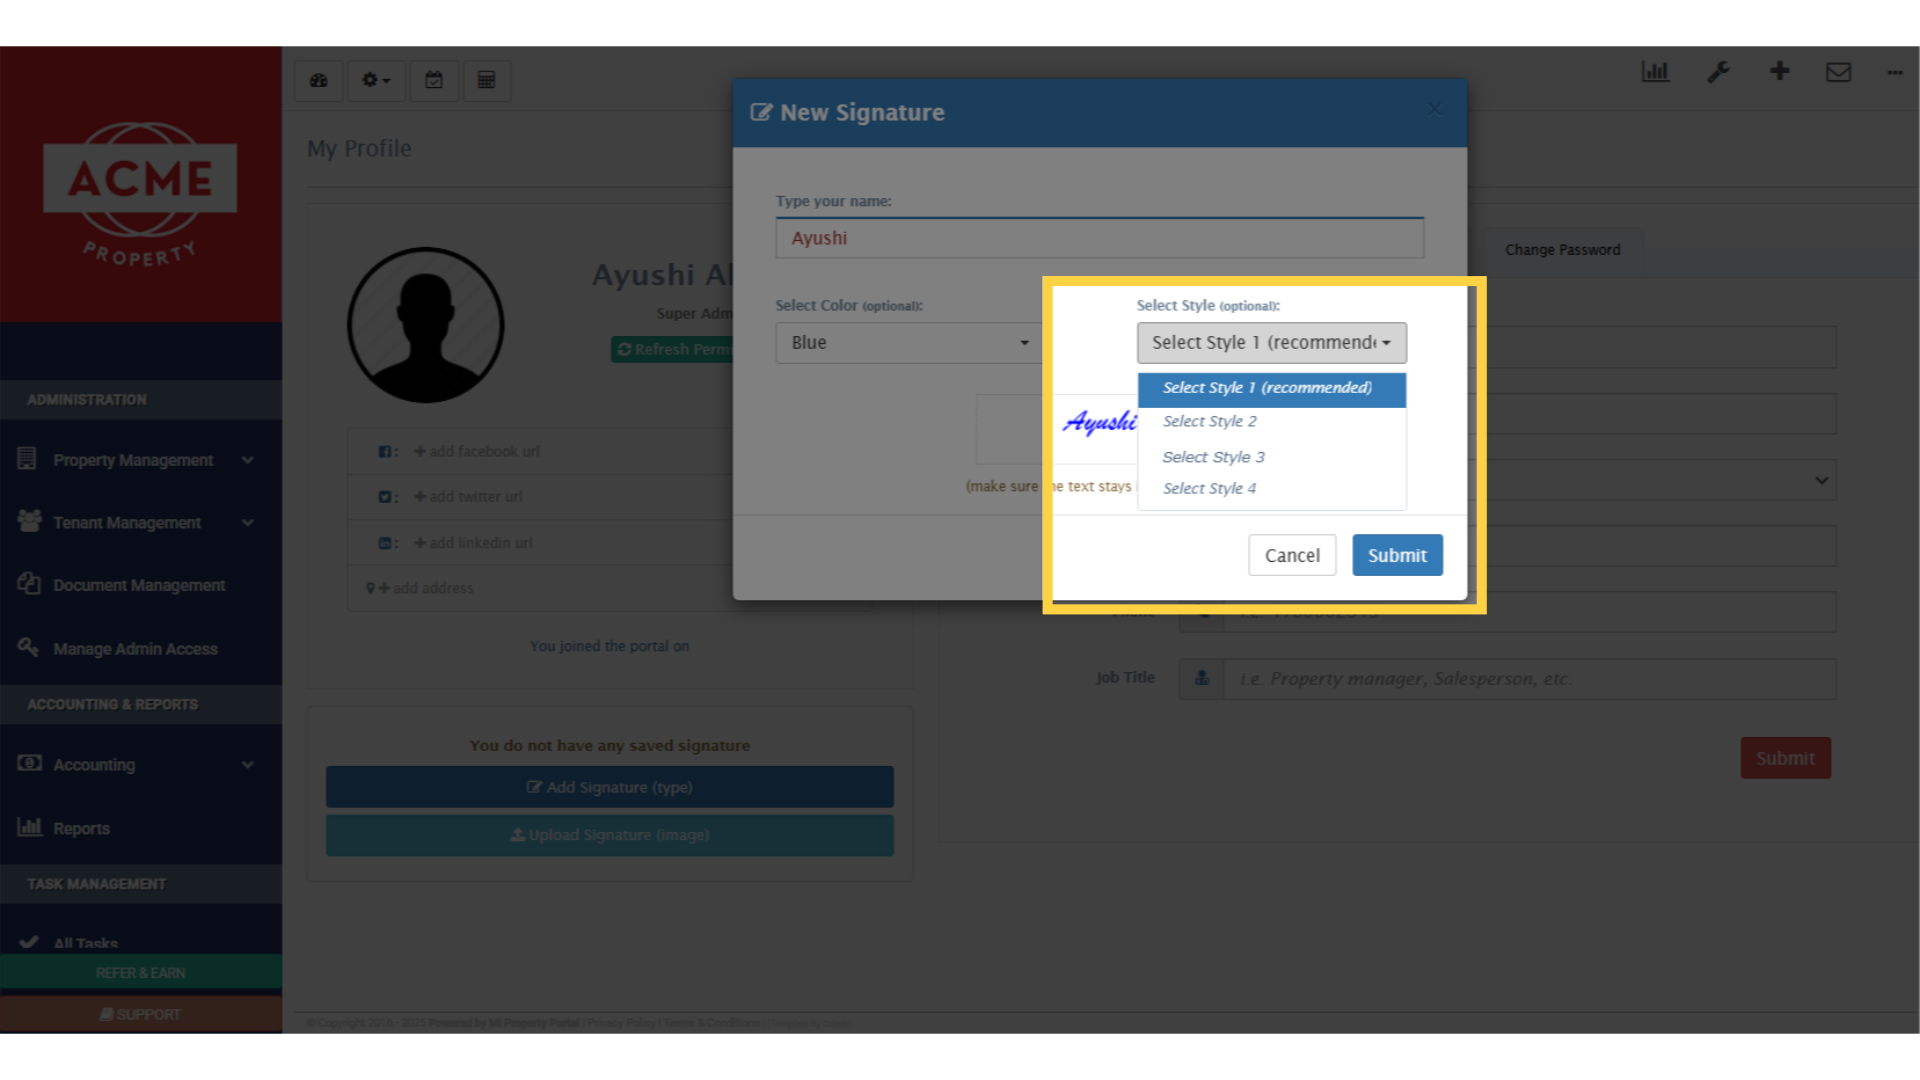
7. And using the Select Style dropdown, you can pick a font style for your signature.
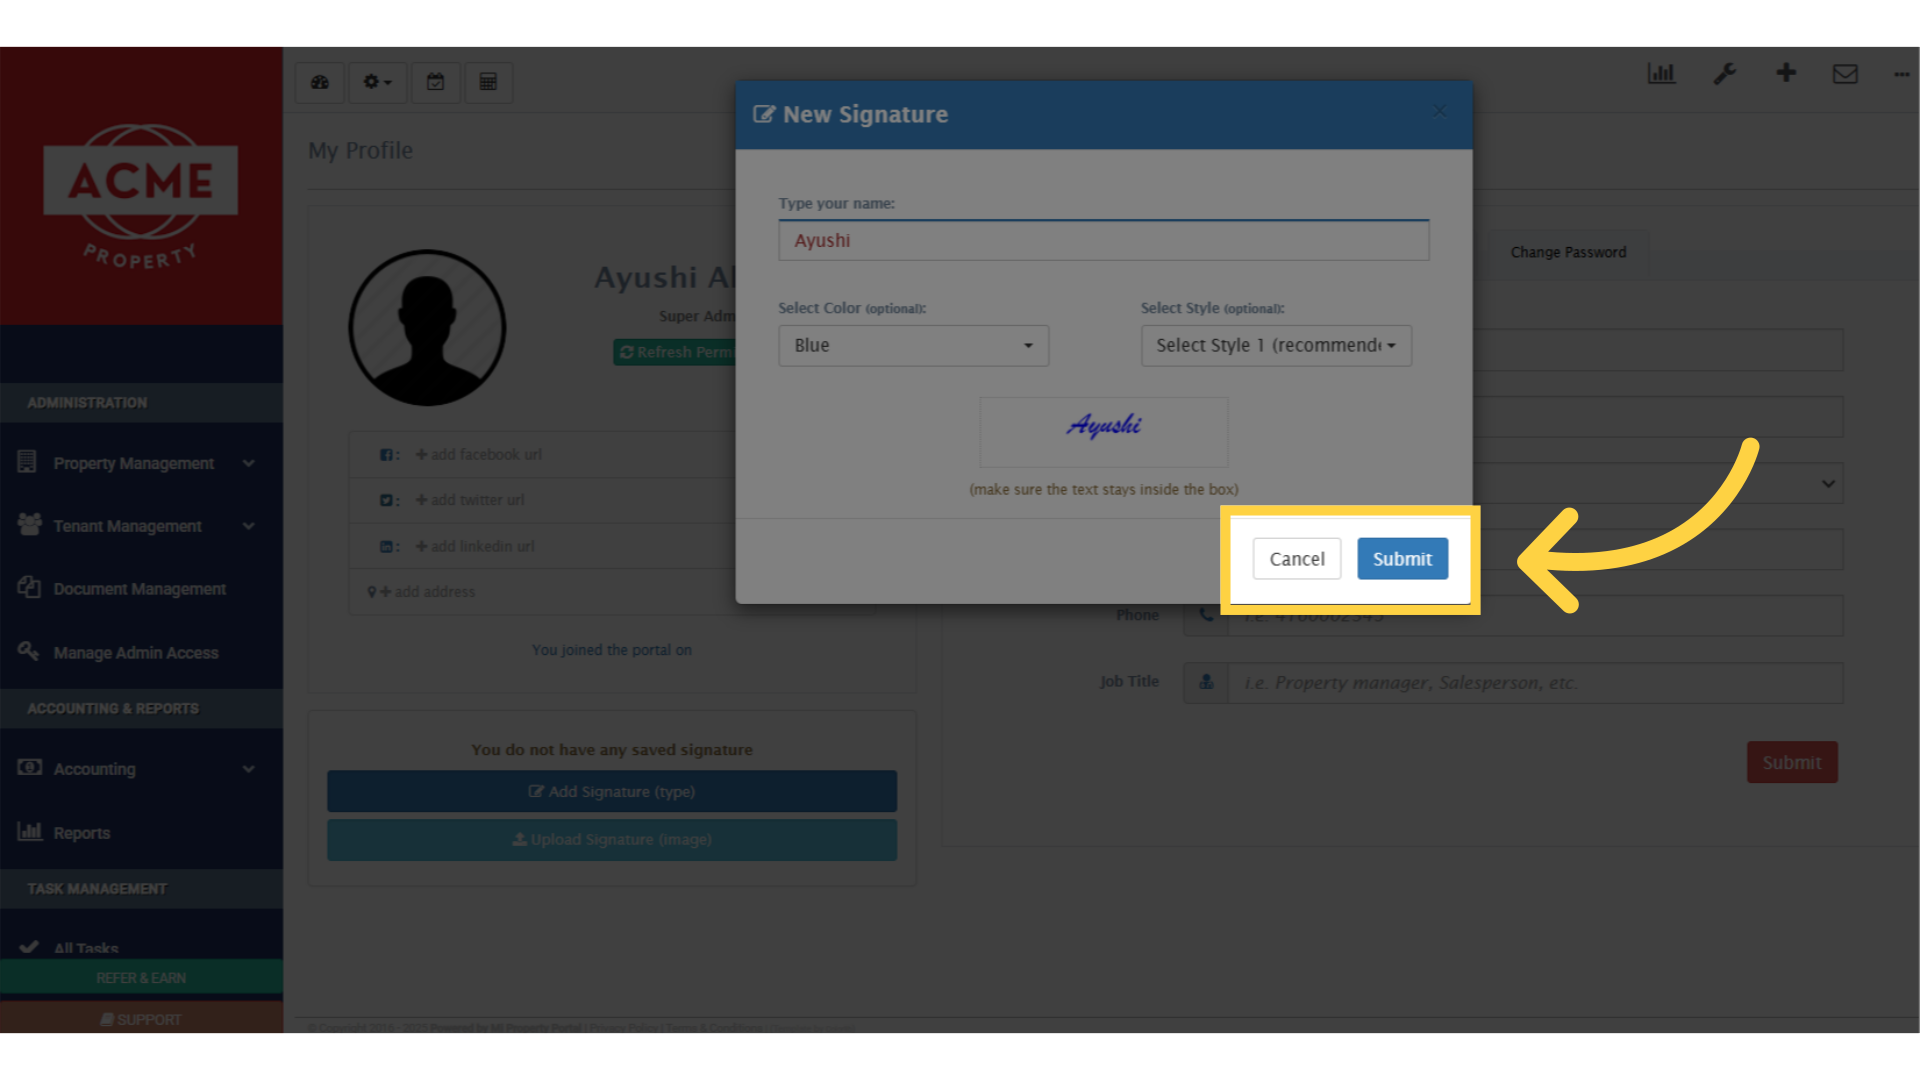
8. Once you’ve made your selections, just click on the Submit button to save your signature. That’s it! Your system-typed signature is now ready to use
9. As you can see, your saved signature now appears right here

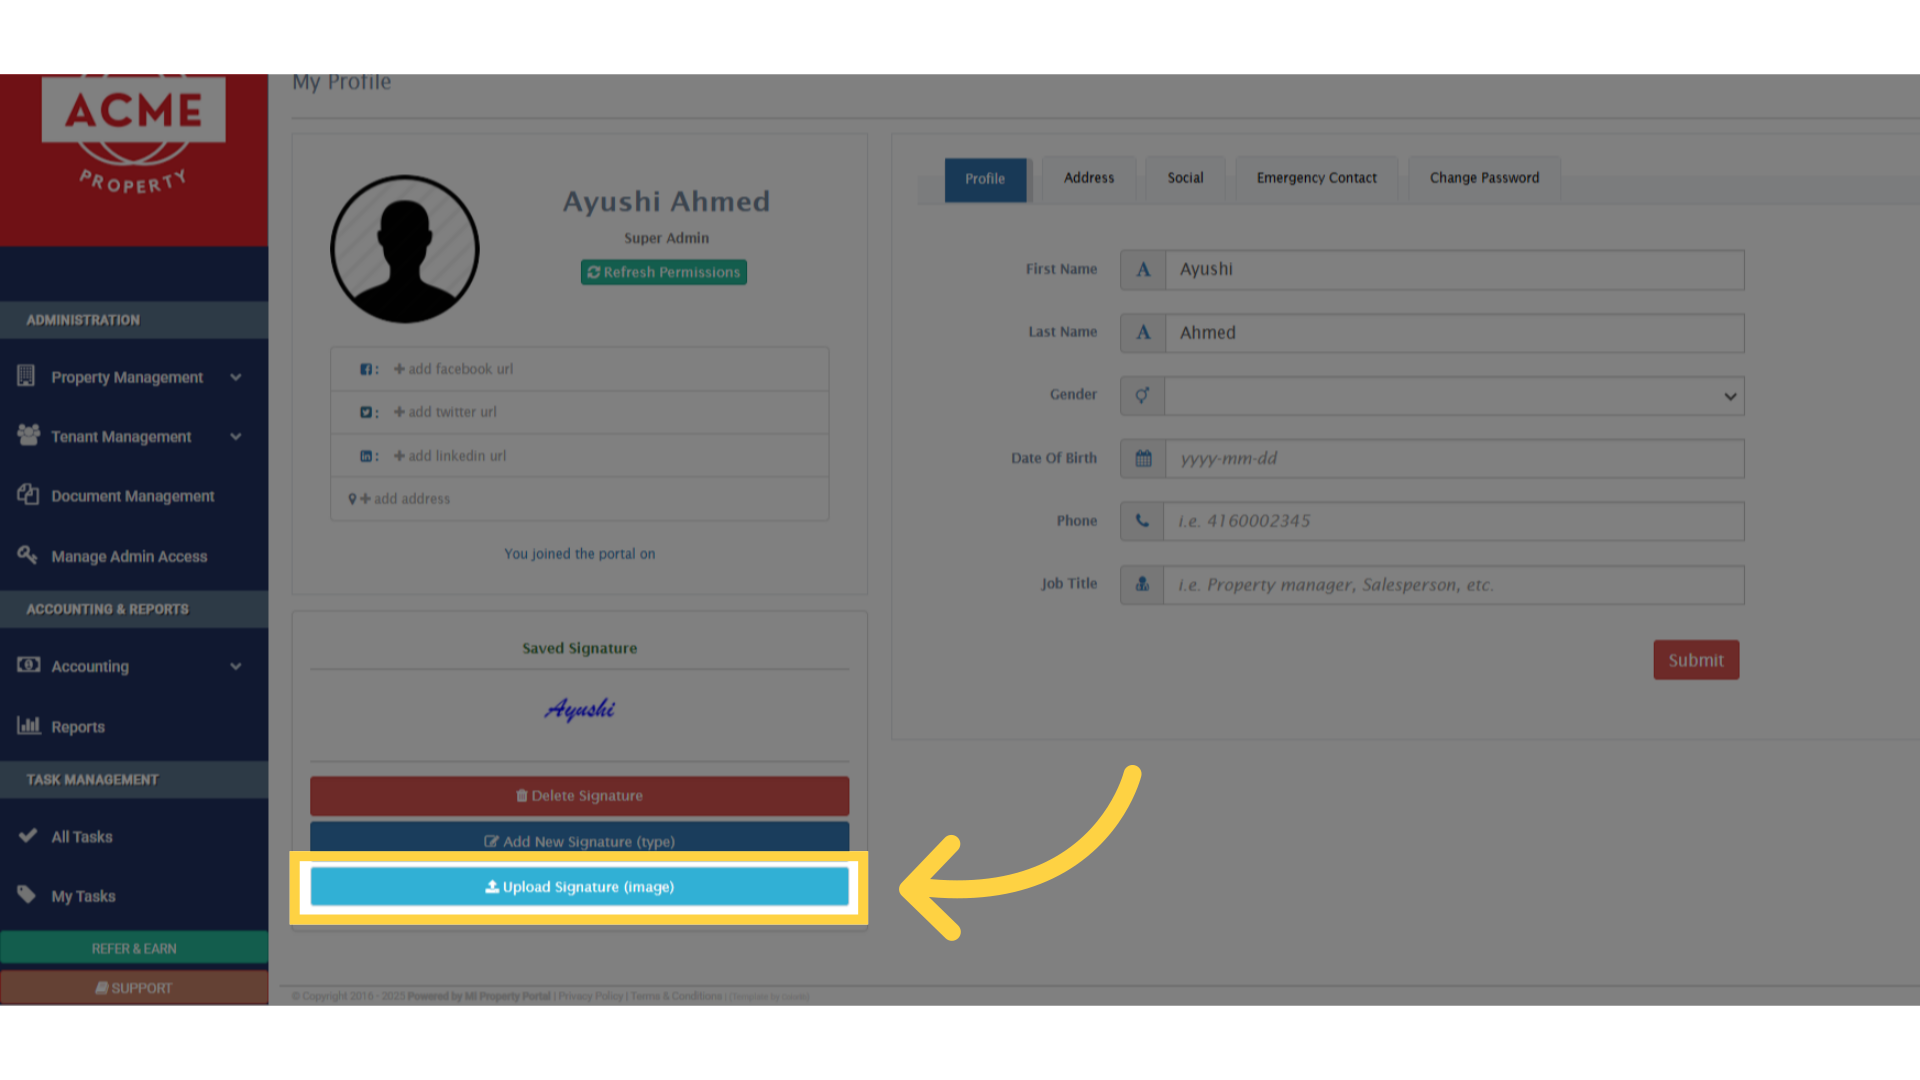
10. Now, if you’d prefer to upload your signature, instead of typing it, simply click on this, Upload Signature button, right here
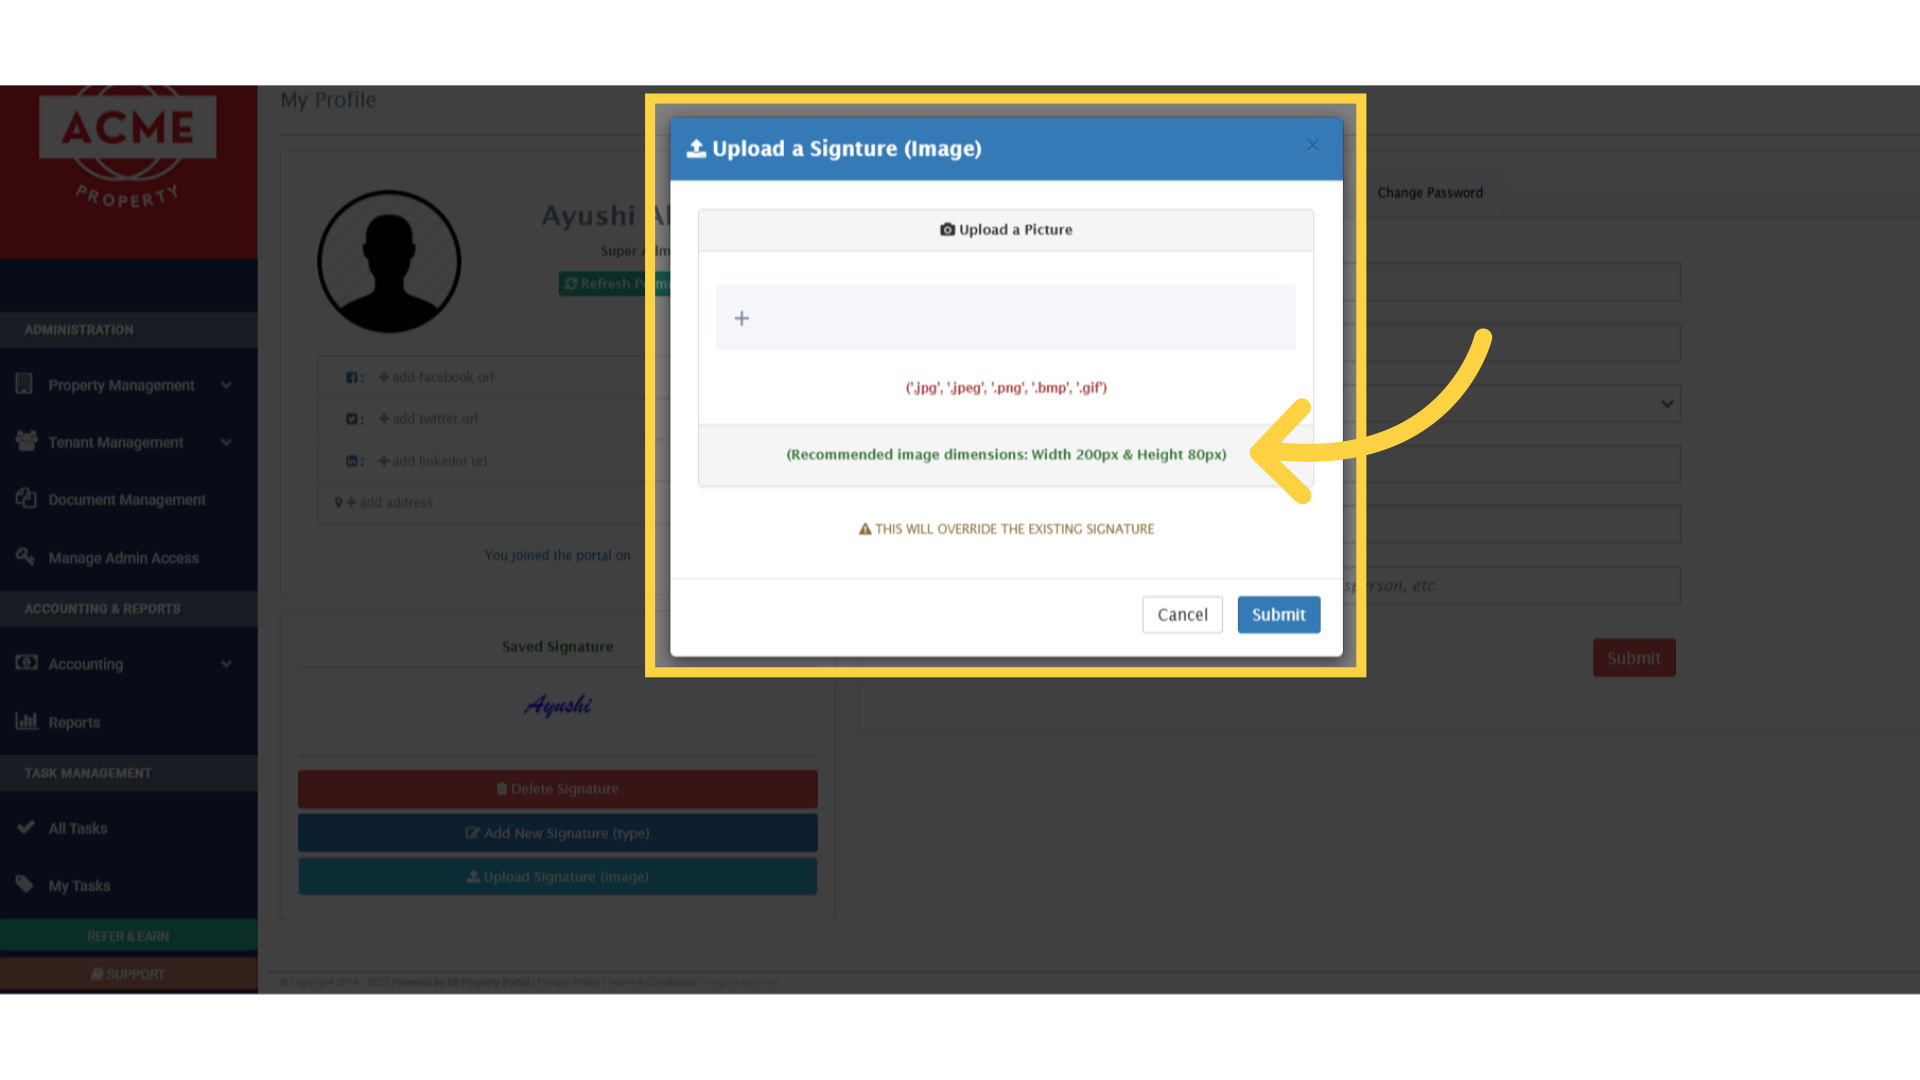
11. So, remember, you can upload your signature in image format. The recommended image dimensions are, 200 pixels in width and, 80 pixels in height for the best display.
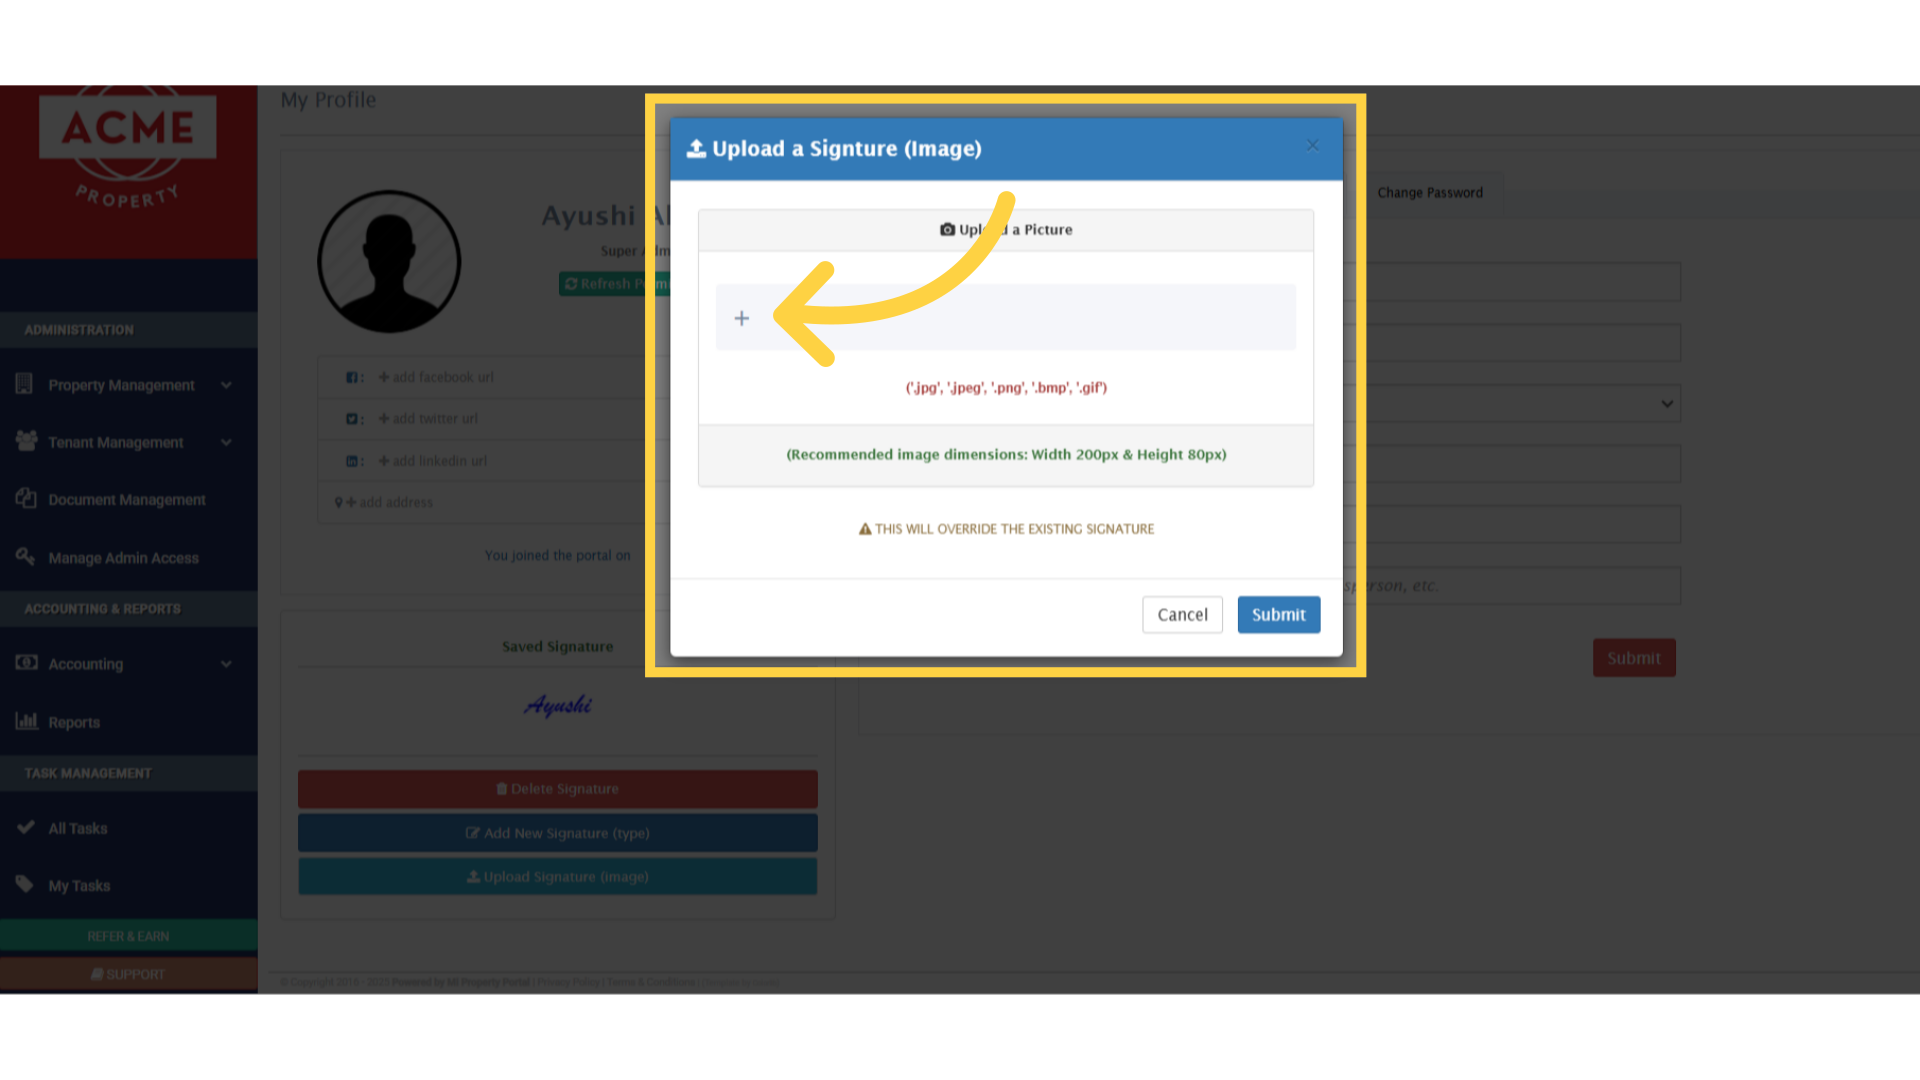
12. Simply, click on this + icon, right here, to upload your signature image, from your local system
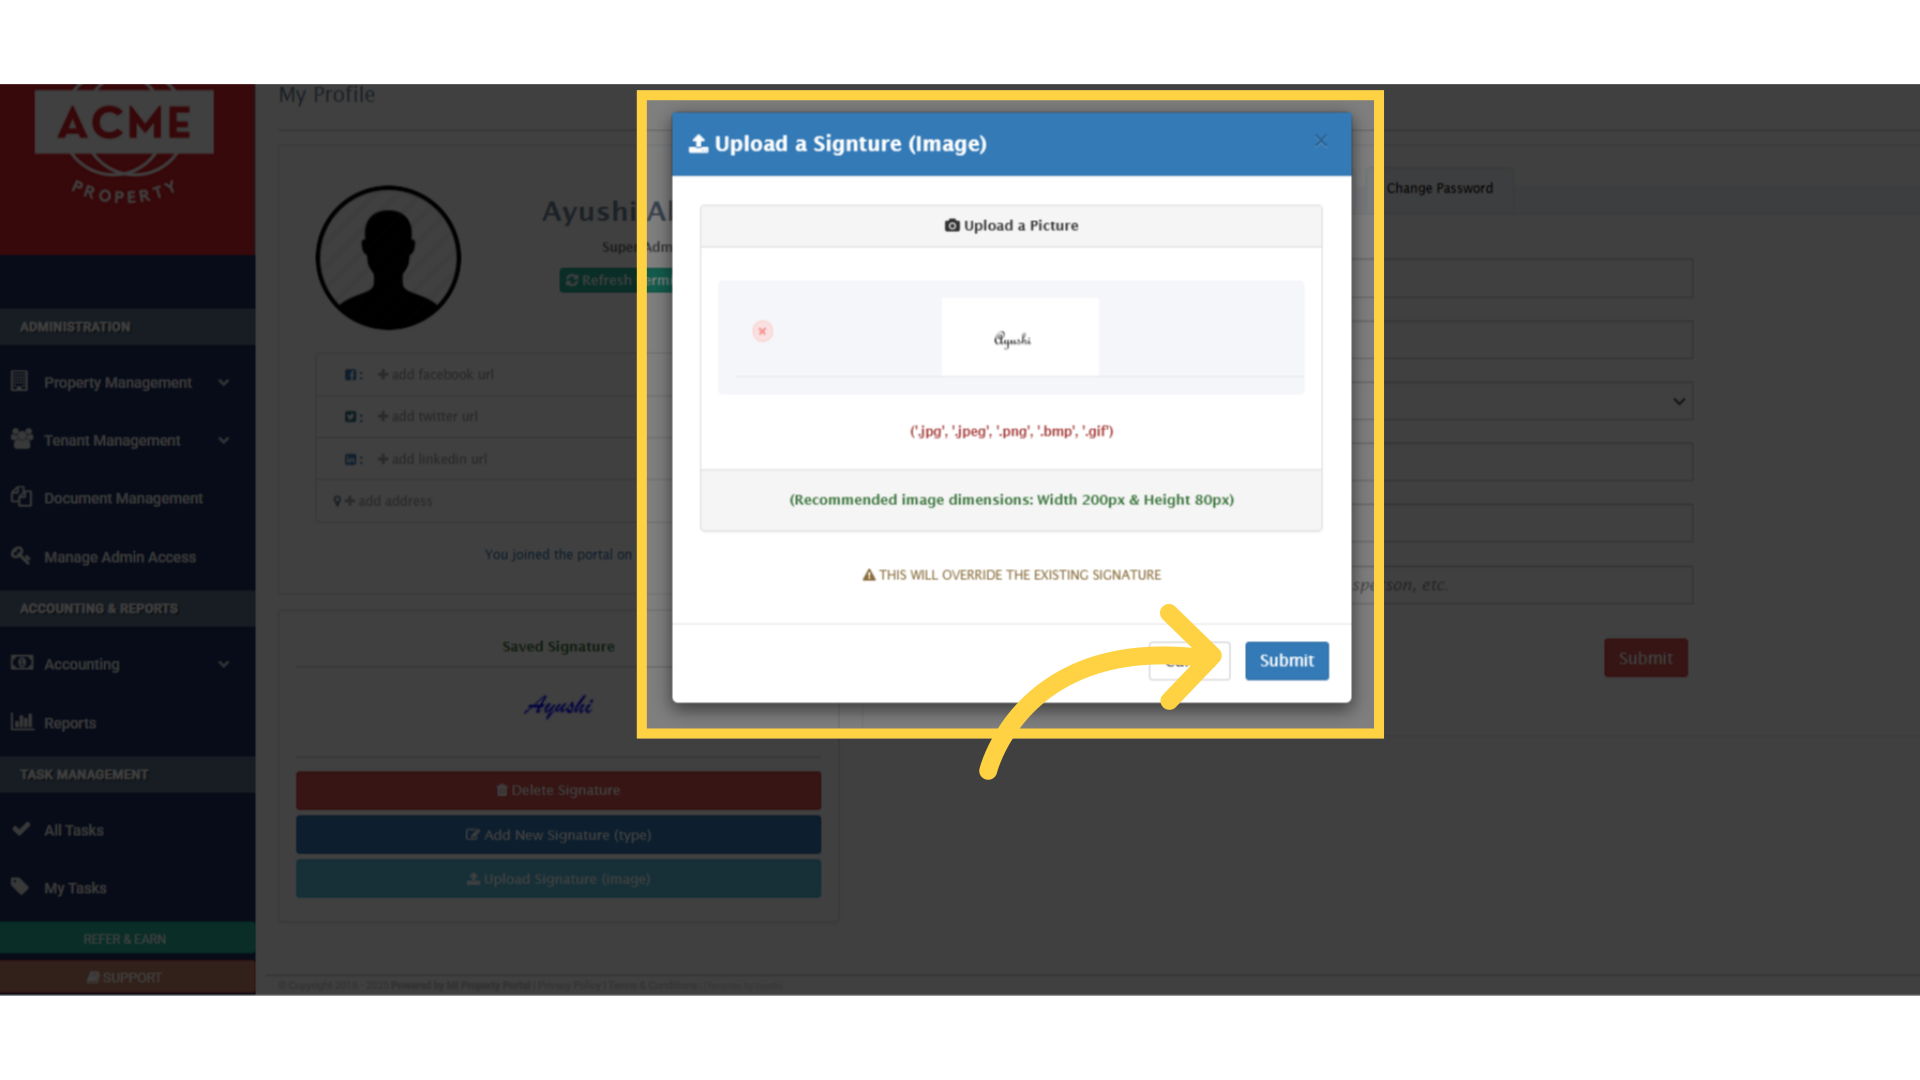
13. Once you’re done uploading your signature image, click on the Submit button to save it
14. See? The uploaded signature now appears right here, under the Saved Signature section.

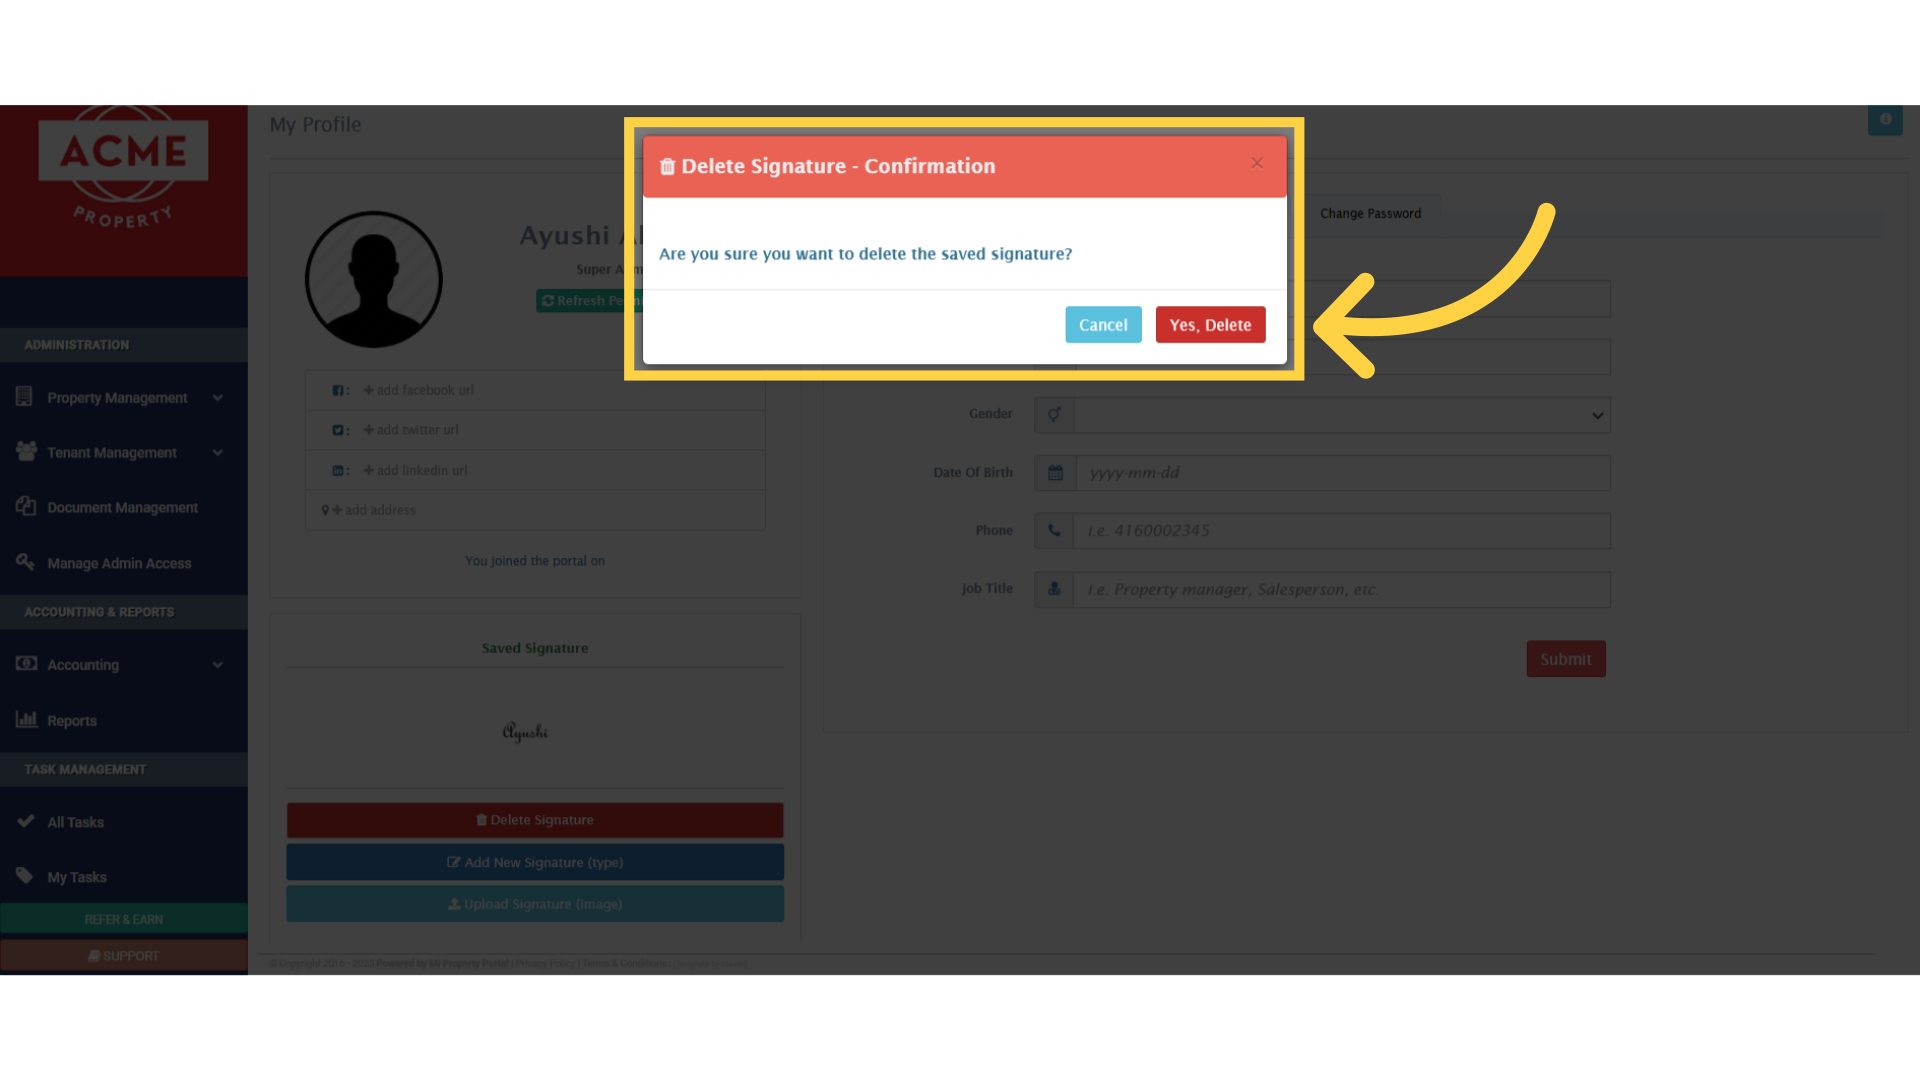
15. Did you notice? The Delete Signature option wasn’t visible before we added a signature to the system.
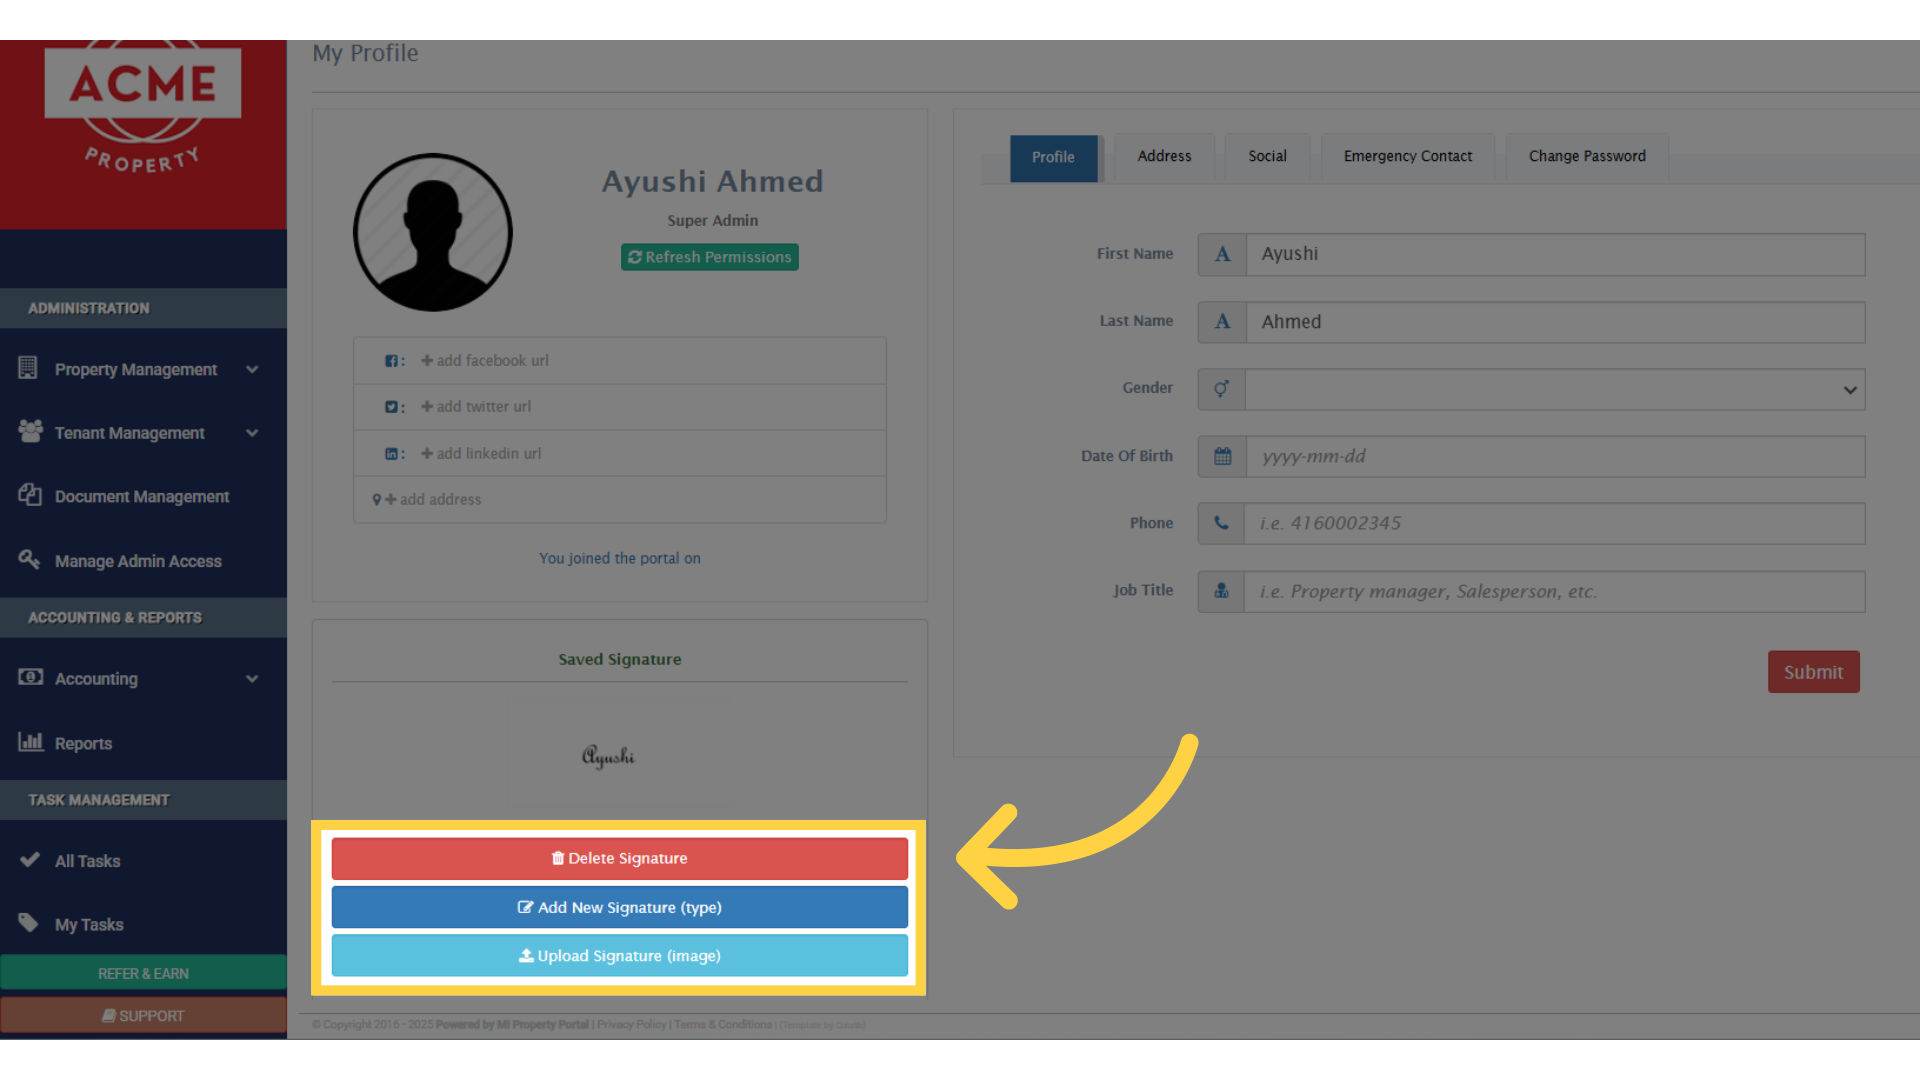
16. So, to remove a signature from the system, simply click on this button
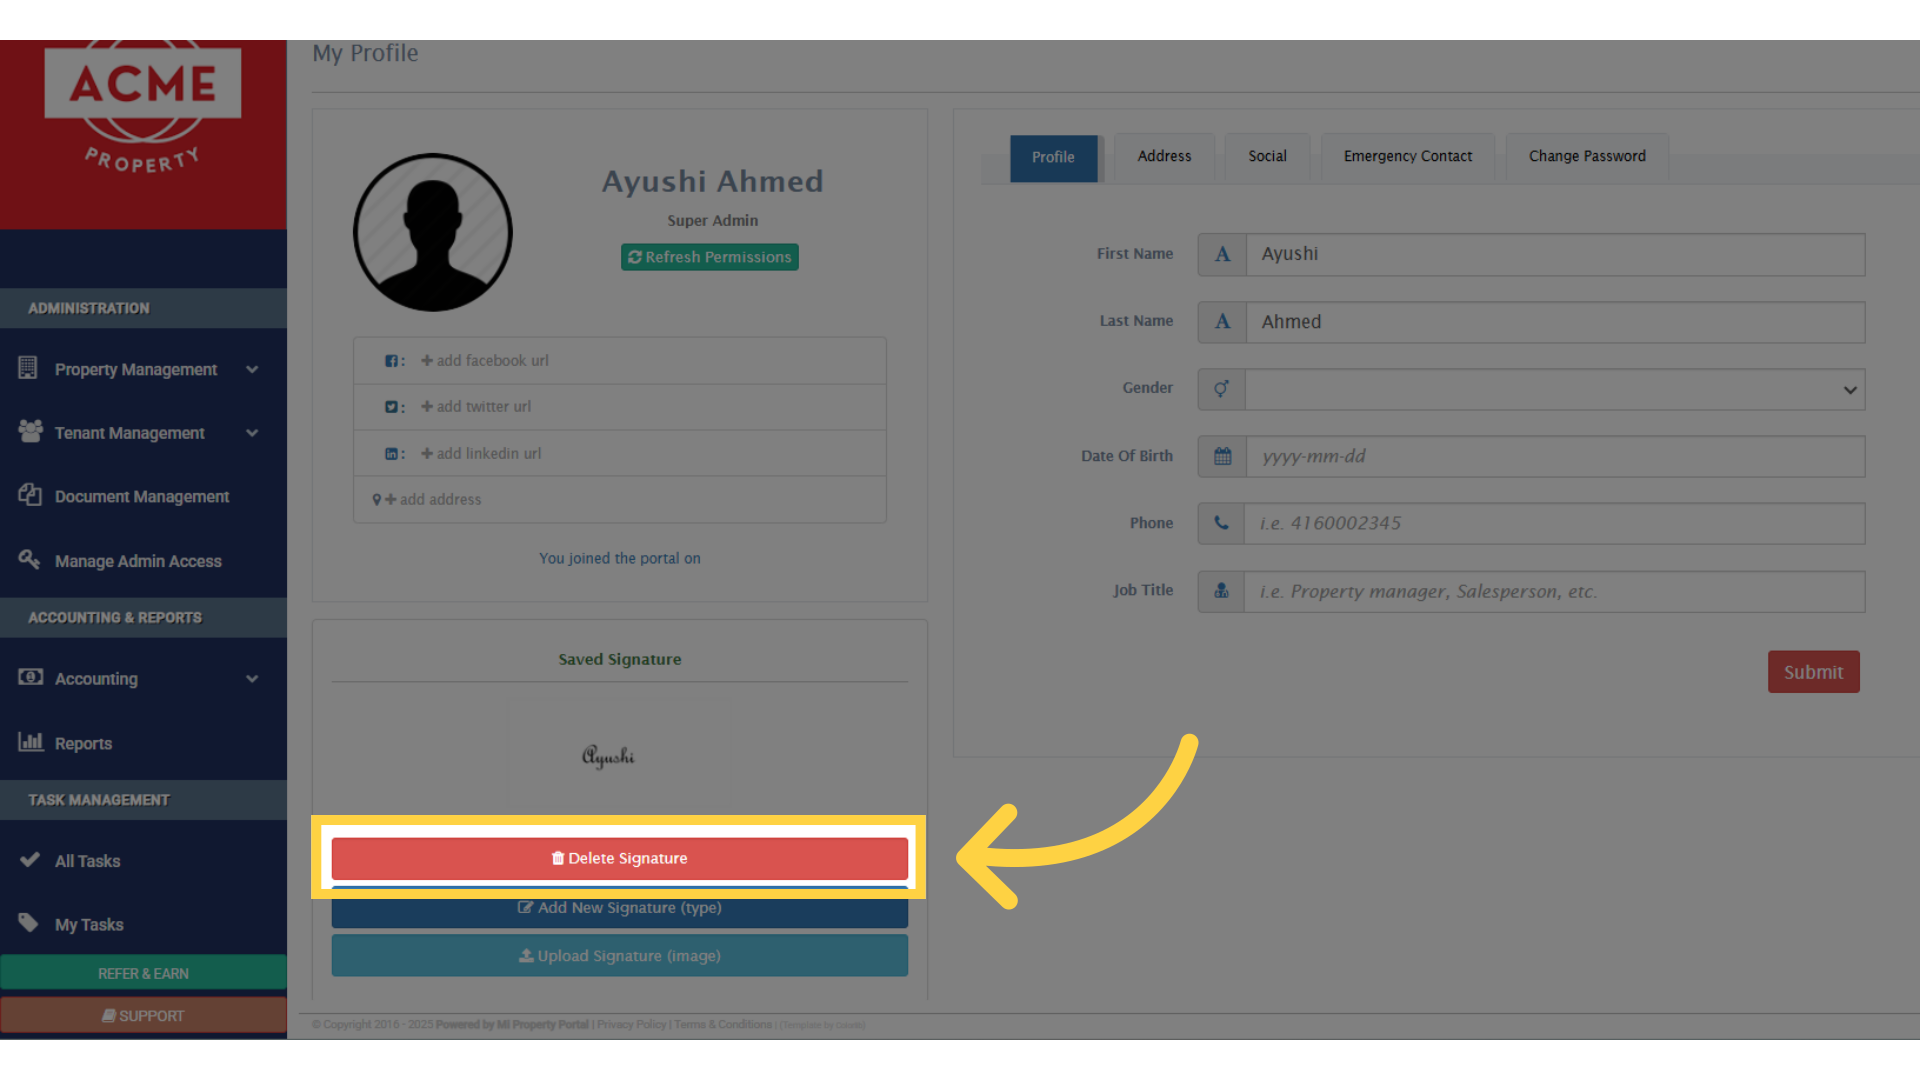
17. In the delete confirmation pop-up, click on Yes, Delete button, to confirm your actions, and your signature will be removed from the system.