This guide will walk you through the process of creating a move-in or move-out inspection using Mipropertyportal
1. Under the Property Management dropdown, select Inspections
2. Click on plus New Inspection button on the left under Inspection/List header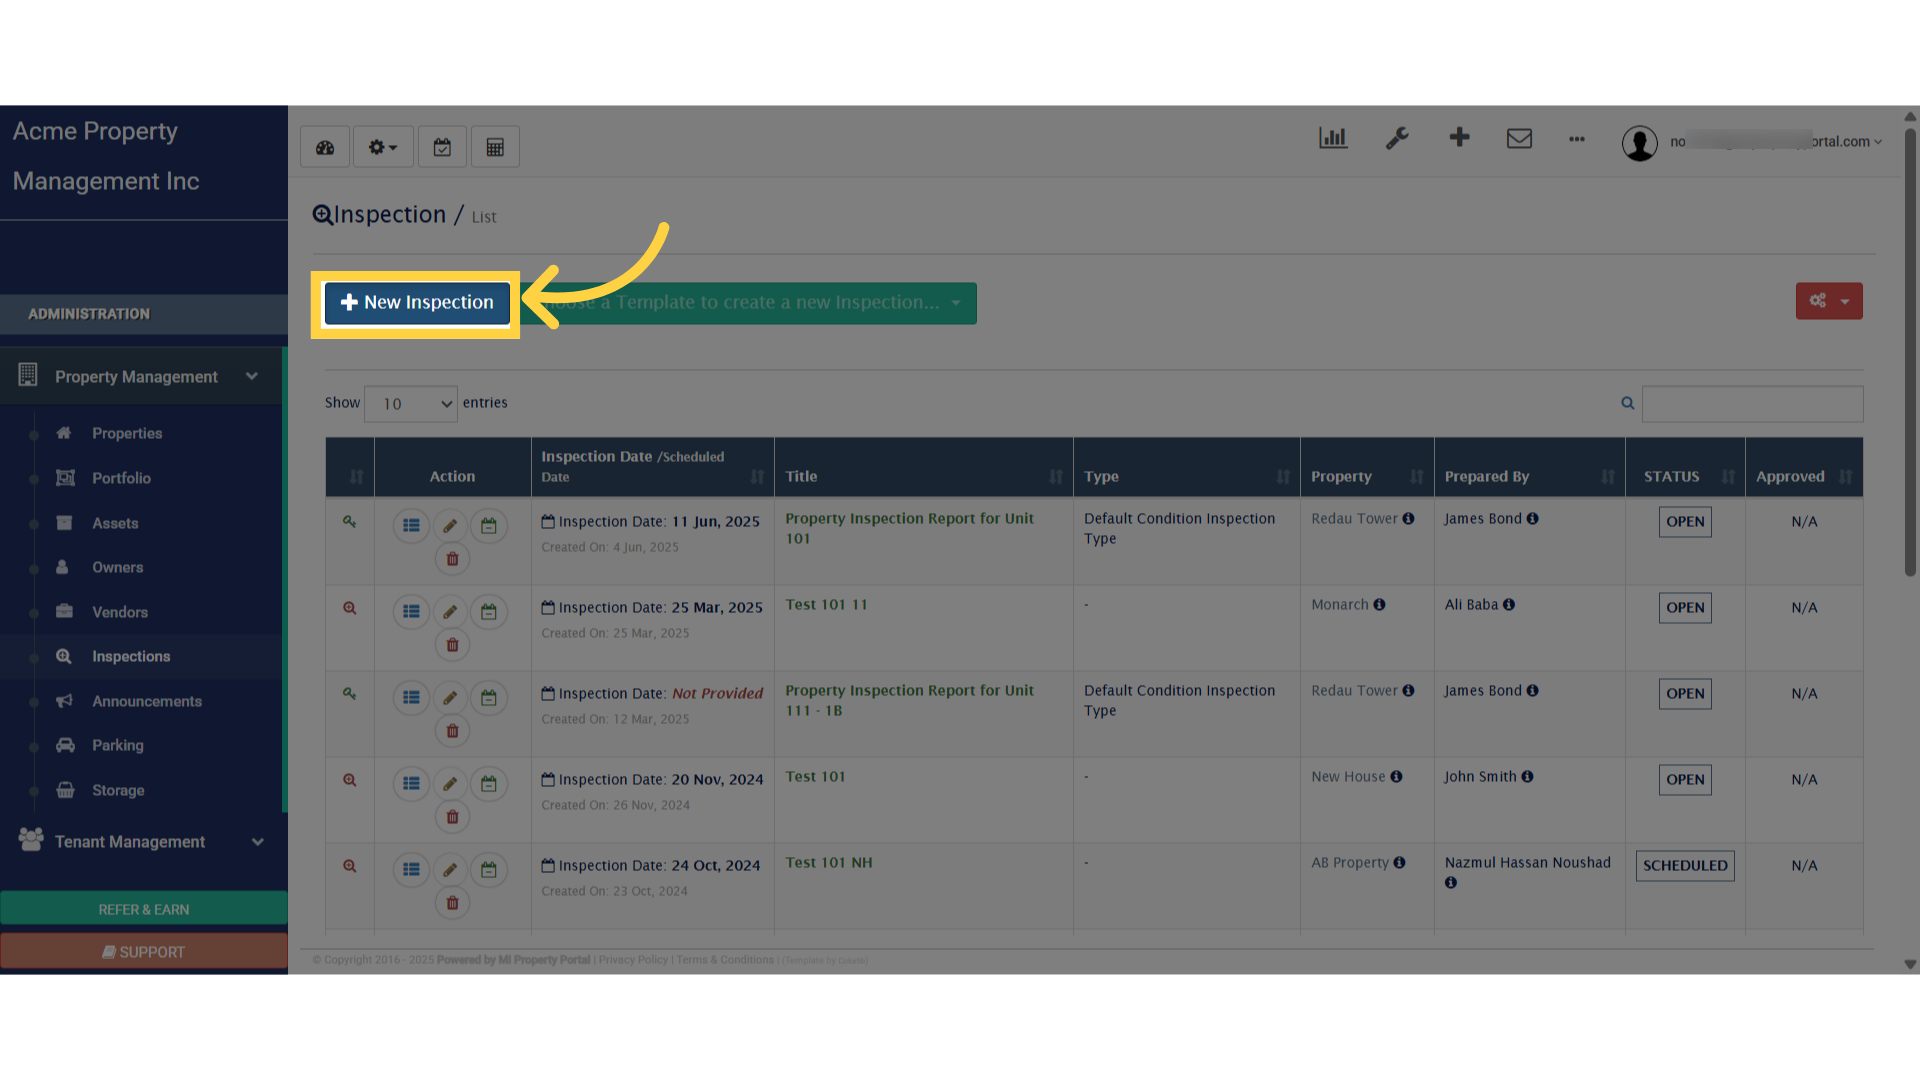
3. Click on Move-In/Move-Out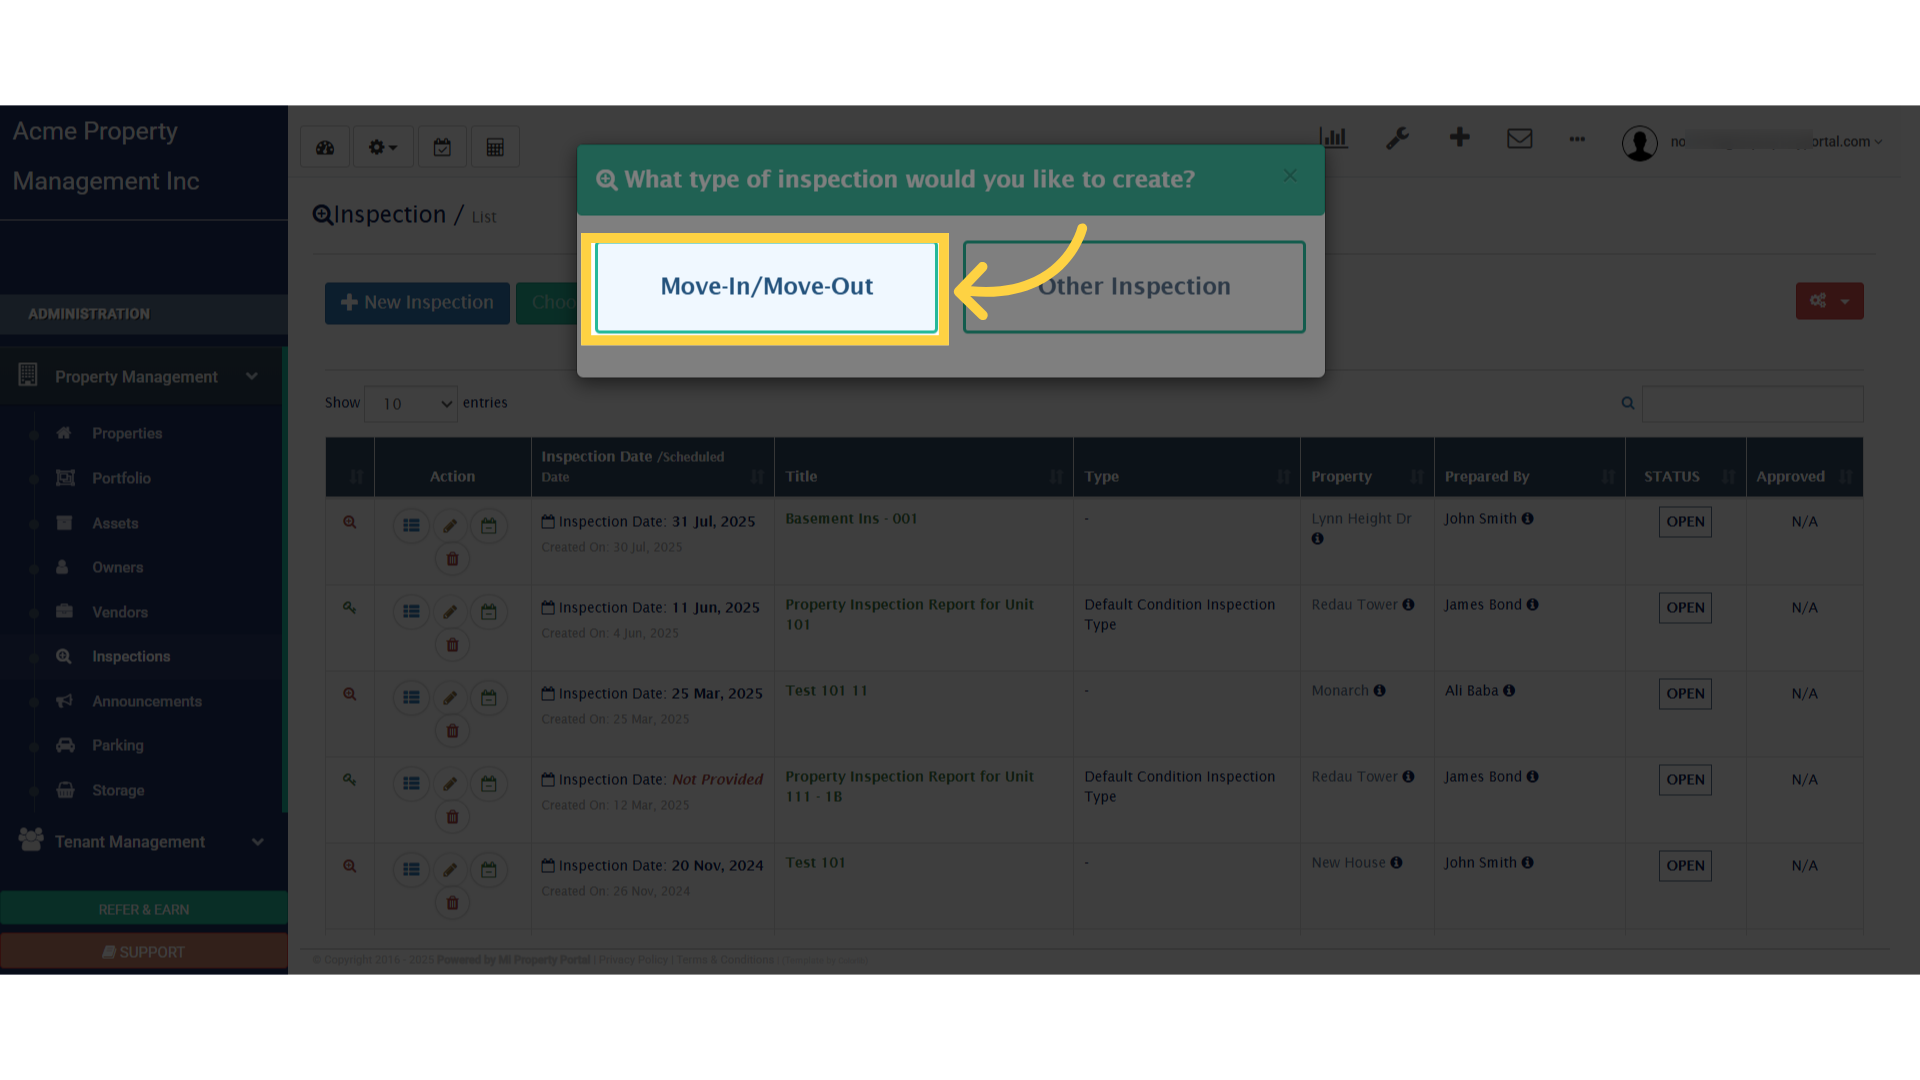
4. Complete all fields under Confirm Property, Unit, and Tenant to proceed
5. Click “Next”
6. Now that you’re in Step 2, go ahead and fill out the sections for Tenant Details and Owner/Landlord Details to move forward
7. Click “Next”
8. In Step 3, enter the details under Inspection Number and Title. Then, scroll down to continue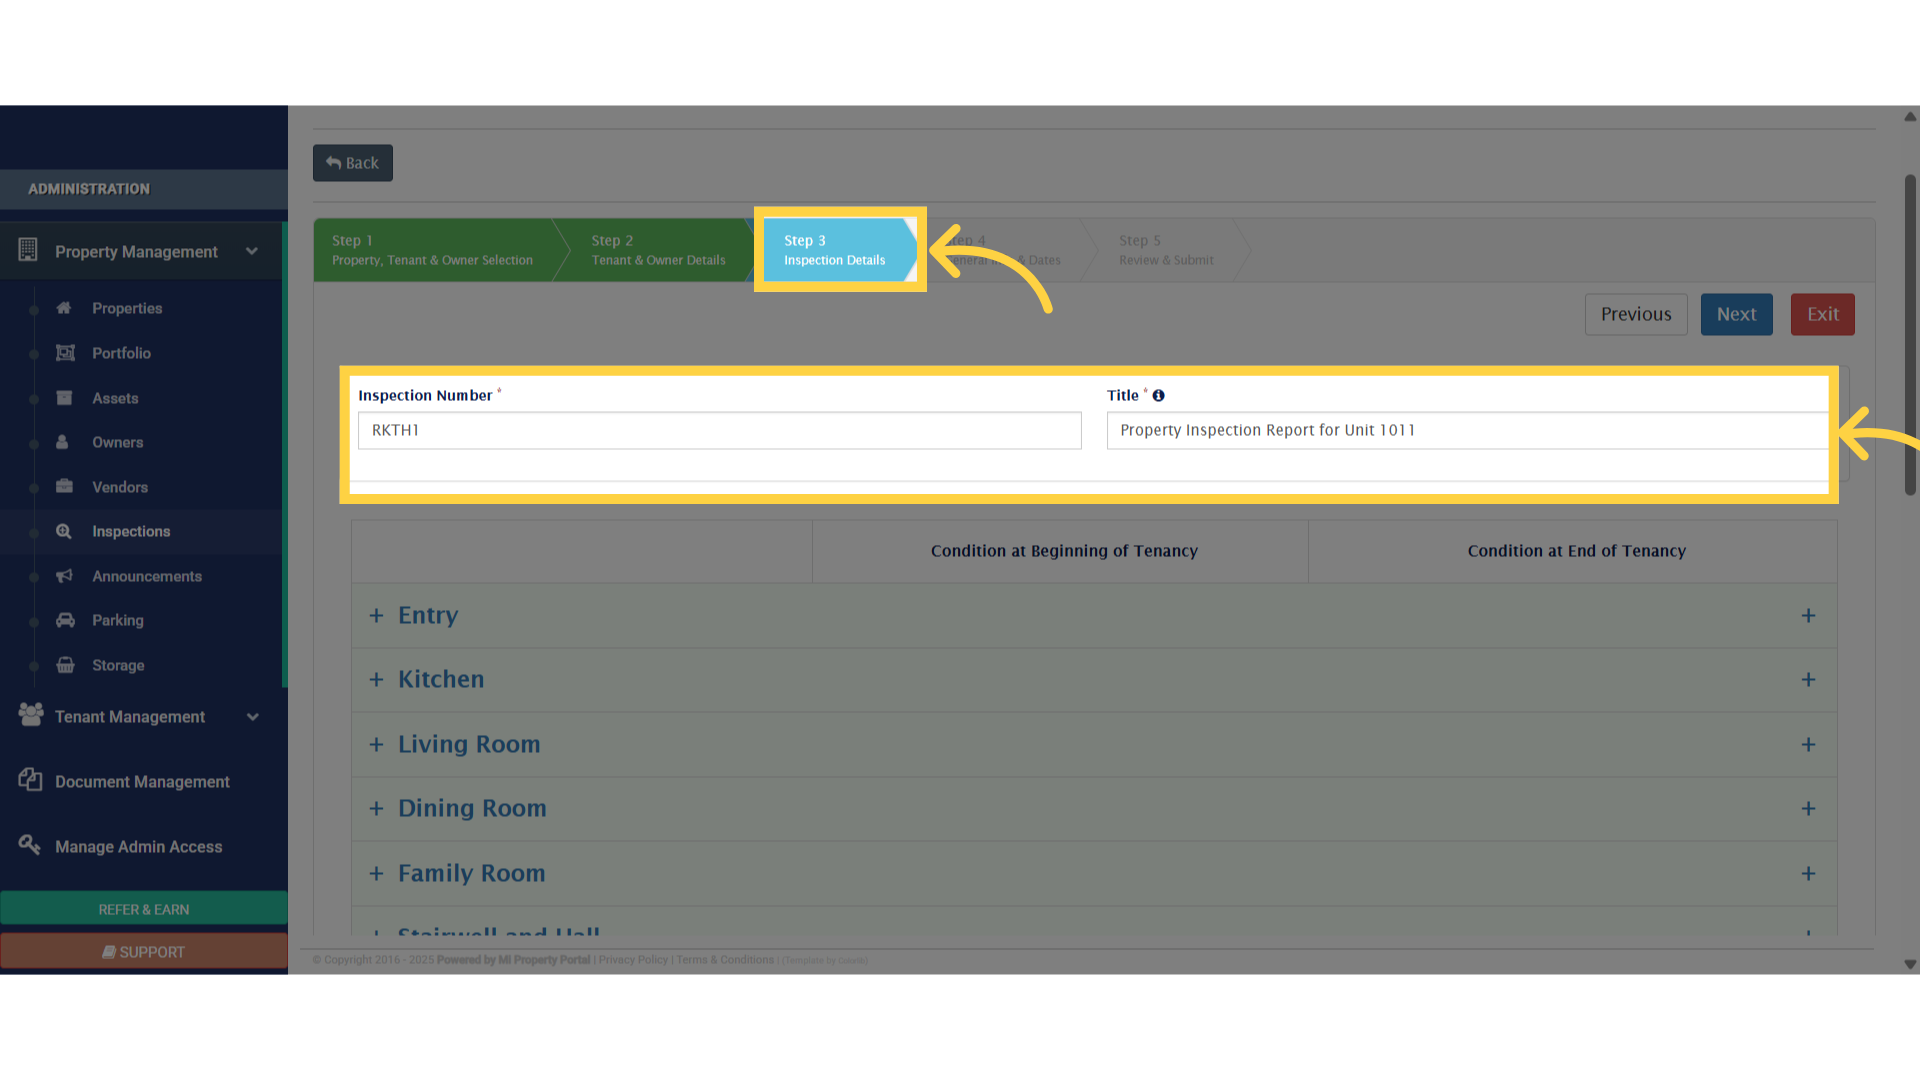
9. Click the plus icon next to the available options to expand and view more details
10. Click on the dropdown and select the appropriate condition. Also add comments by clicking on the Comment box
11. Select and complete the fields for Condition at Beginning of Tenancy and Condition at End of Tenancy to accurately document the property’s status
12. Click “Next”
13. “Now in Step 4, go ahead and fill out the ‘Move-In’ and ‘Move-Out’ fields to capture the key dates for the tenancy
14. Once you’ve entered all the required details, click Save & Continue to confirm the information. Then, click Next to proceed to the final step
15. The preview will appear for the Inspection Report
16. Please note: These checkboxes will remain disabled and cannot be edited at this stage
17. Click on the plus icon to upload photos directly from your device
18. Click “Submit”
19. Once everything looks good, go ahead and click Yes, Submit to finalize submission
Thank you for watching.